

Grow Pink Radishes, and add a vibrant splash of color and zesty flavor to your garden and your plate! Have you ever dreamt of pulling up a bunch of perfectly pink radishes, ready to add a peppery kick to your salads or a crunchy bite to your crudités? Well, dream no more! This DIY guide is your ticket to radish-growing success, even if you’re a complete beginner.
Radishes have been cultivated for centuries, with roots (pun intended!) tracing back to ancient Egypt. They were a staple food for the pyramid builders, providing essential nutrients and a satisfying crunch. Today, radishes are enjoyed worldwide, but there’s something extra special about growing your own, especially when they boast that beautiful pink hue.
Why bother with this DIY trick? Because store-bought radishes often lack the freshness and flavor of homegrown ones. Plus, growing your own is incredibly rewarding and surprisingly easy! I’m going to show you simple, effective techniques to grow pink radishes that are crisp, flavorful, and bursting with color. Imagine the satisfaction of serving a salad featuring radishes you nurtured from seed to table. Let’s get our hands dirty and transform your garden into a radish paradise!
Growing Gorgeous Pink Radishes: A DIY Guide for the Home Gardener
Okay, let’s get our hands dirty and grow some vibrant pink radishes! I’m going to walk you through everything you need to know, from prepping the soil to harvesting those crunchy, colorful beauties. Radishes are super rewarding because they grow so quickly – you can literally see results in just a few weeks. Plus, the pink varieties are just so darn pretty!
Choosing Your Pink Radish Variety
First things first, let’s talk about which pink radish to plant. There are a few options, and they all have slightly different characteristics. Here are a couple of my favorites:
* **Pink Beauty:** This is a classic choice. They’re round, bright pink, and have a mild, slightly sweet flavor. They mature quickly, usually in about 22-25 days.
* **French Breakfast:** These are elongated radishes, typically red with a white tip, but some varieties lean towards a lovely pink hue. They have a slightly peppery flavor and mature in about 20-30 days.
* **Easter Egg Blend:** While not exclusively pink, this blend often includes pink radishes alongside red, purple, and white ones. It’s a fun way to add variety to your garden and your plate!
Preparing Your Radish Bed
Radishes are pretty easygoing, but they do have a few preferences when it comes to their growing environment. Here’s how to create the perfect radish paradise:
* **Sunlight:** Radishes need at least 6 hours of sunlight per day. Choose a spot in your garden that gets plenty of sunshine.
* **Soil:** Well-drained soil is crucial. Radishes don’t like to sit in soggy soil, as this can lead to rot. Amend your soil with compost or other organic matter to improve drainage and fertility. Aim for a loose, crumbly texture.
* **pH:** Radishes prefer a soil pH between 6.0 and 7.0. You can test your soil pH with a home testing kit or send a sample to your local agricultural extension office.
* **Clear the Area:** Remove any rocks, weeds, or debris from the planting area. This will give your radishes plenty of room to grow.
Planting Your Pink Radish Seeds
Now for the fun part – planting! Here’s a step-by-step guide to getting those seeds in the ground:
1. **Timing is Key:** Radishes are a cool-season crop, meaning they thrive in cooler temperatures. The best time to plant them is in early spring or late summer/early fall. Avoid planting them during the hottest part of the summer, as they tend to bolt (go to seed) in the heat. I usually start planting mine about 4-6 weeks before the last expected frost in spring, and again about 6-8 weeks before the first expected frost in fall.
2. **Create Shallow Furrows:** Use a hoe or your finger to create shallow furrows in the soil, about ½ inch deep and 1 inch apart.
3. **Sow the Seeds:** Sprinkle the radish seeds evenly along the furrows. Don’t overcrowd them – aim for about ½ inch spacing between seeds.
4. **Cover the Seeds:** Gently cover the seeds with soil.
5. **Water Thoroughly:** Water the planting area gently but thoroughly. You want to moisten the soil without washing away the seeds.
6. **Mark Your Rows:** It’s a good idea to label your rows so you know exactly what you’ve planted.
Caring for Your Growing Radishes
Radishes are relatively low-maintenance, but there are a few things you can do to ensure a bountiful harvest:
* **Watering:** Keep the soil consistently moist, but not soggy. Water deeply whenever the top inch of soil feels dry.
* **Thinning:** Once the seedlings emerge (usually in about 4-7 days), thin them to about 1-2 inches apart. This will give them enough room to develop properly. Don’t just pull them out! Gently snip the unwanted seedlings at the soil line with scissors to avoid disturbing the roots of the remaining plants.
* **Weeding:** Keep the area around your radishes free of weeds. Weeds compete with radishes for nutrients and water.
* **Fertilizing (Optional):** Radishes don’t typically need a lot of fertilizer, but if your soil is particularly poor, you can give them a light feeding of a balanced fertilizer a few weeks after planting. I prefer to use a liquid seaweed fertilizer, diluted according to the package directions.
* **Pest Control:** Radishes are generally pest-resistant, but they can sometimes be bothered by flea beetles or root maggots. If you notice signs of pest damage, you can try using insecticidal soap or diatomaceous earth. I always try to use organic pest control methods whenever possible.
Harvesting Your Pink Radishes
This is the moment we’ve been waiting for! Radishes are ready to harvest when they reach about 1 inch in diameter.
1. **Check for Size:** Gently brush away the soil around the base of the radish to check its size.
2. **Pull Gently:** Grasp the radish leaves near the base and gently pull the radish out of the ground. If it’s stubborn, you can loosen the soil around it with a trowel.
3. **Wash and Enjoy:** Wash the radishes thoroughly and enjoy them fresh! You can eat them raw in salads, on sandwiches, or as a crunchy snack. You can also roast them, pickle them, or add them to soups and stews.
Troubleshooting Common Radish Problems
Even with the best planning, sometimes things don’t go exactly as expected. Here are a few common radish problems and how to deal with them:
* **Radishes are too small:** This is usually caused by overcrowding or lack of sunlight. Make sure you thin your seedlings properly and that your radishes are getting enough sun.
* **Radishes are too spicy:** This can be caused by hot weather or inconsistent watering. Try planting your radishes in a shadier spot or watering them more frequently.
* **Radishes are cracked:** This is usually caused by inconsistent watering. Try to keep the soil consistently moist, especially during dry spells.
* **Radishes are bolting (going to seed):** This is usually caused by hot weather. Try planting your radishes in early spring or late summer/early fall, when the temperatures are cooler.
Extending Your Radish Harvest
Want to enjoy fresh radishes all season long? Here are a few tips for extending your harvest:
* **Succession Planting:** Plant a new batch of radishes every 2-3 weeks. This will ensure a continuous supply of fresh radishes.
* **Choose Different Varieties:** Some radish varieties are more heat-tolerant than others. Experiment with different varieties to find ones that thrive in your climate.
* **Provide Shade:** During the hottest part of the summer, you can provide shade for your radishes by using shade cloth or planting them near taller plants.
Bonus Tip: Don’t Throw Away the Greens!
Radish greens are perfectly edible and packed with nutrients. You can use them in salads, stir-fries, or soups. They have a slightly peppery flavor, similar to arugula. Just be sure to wash them thoroughly before using them.
Storing Your Harvested Radishes
To keep your radishes fresh for as long as possible, follow these storage tips:
* **Remove the Greens:** Cut off the radish greens, leaving about ½ inch of stem attached. This will prevent the greens from drawing moisture away from the radishes.
* **Wash and Dry:** Wash the radishes thoroughly and dry them completely.
* **Store in the Refrigerator:** Place the radishes in a plastic bag or container lined with a damp paper towel. Store them in the refrigerator crisper drawer. They should last for about 1-2 weeks.
Enjoying Your Homegrown Pink Radishes
Now that you’ve successfully grown your own pink radishes, it’s time to enjoy the fruits (or rather, roots!) of your labor. Here are a few ideas for using your homegrown radishes:
* **Salads:** Slice or dice radishes and add them to your favorite salads for a crunchy, peppery kick.
* **Sandwiches:** Add thin slices of radish to sandwiches for extra flavor and texture.
* **Snacks:** Enjoy radishes raw with a sprinkle of salt or a dollop of hummus.
* **Roasted Radishes:** Toss radishes with olive oil, salt, and pepper and roast them in the oven until tender.
* **Pickled Radishes:** Pickle radishes for a tangy and flavorful condiment.
* **Radish Butter:** Blend radishes with softened butter and herbs for a delicious spread.
Growing your own pink radishes is a fun and rewarding experience. With a little bit of planning and effort, you can enjoy fresh, colorful radishes all season long. Happy gardening!

Conclusion
So, there you have it! Growing pink radishes at home is not only surprisingly simple, but it’s also incredibly rewarding. Forget those bland, store-bought radishes that lack that vibrant color and peppery punch. With this easy DIY trick, you can cultivate a garden brimming with beautiful, crisp, and flavorful pink radishes that will elevate your salads, snacks, and side dishes to a whole new level.
Why is this a must-try? Because you’re taking control of your food source, ensuring freshness and quality that you simply can’t replicate with commercially grown produce. Plus, the satisfaction of harvesting something you’ve nurtured from seed to table is an experience that’s hard to beat. Imagine the delight of serving a radish salad featuring radishes you grew yourself – the vibrant pink hue will be a conversation starter, and the taste will be unforgettable.
But the fun doesn’t stop there! Feel free to experiment with different radish varieties. While this guide focuses on achieving that desirable pink color, you can explore other types like French Breakfast radishes, which offer a milder flavor, or even black radishes for a more intense, earthy taste. You can also play around with the soil composition. Adding compost or other organic matter can significantly improve the flavor and texture of your radishes.
Consider companion planting as well. Radishes are known to deter certain pests, making them excellent companions for carrots, lettuce, and other garden vegetables. Planting them together can create a mutually beneficial ecosystem in your garden.
Don’t be afraid to get creative with your radish recipes! Beyond salads, try pickling them for a tangy condiment, roasting them for a sweeter flavor, or even using the radish greens in soups and stir-fries. The possibilities are endless!
We’re confident that once you try this DIY trick for growing pink radishes, you’ll be hooked. It’s a simple, cost-effective, and incredibly satisfying way to add a touch of beauty and flavor to your home-cooked meals.
So, grab your seeds, prepare your soil, and get ready to embark on a radish-growing adventure. We encourage you to try this method and share your experiences with us! Let us know what worked best for you, any variations you tried, and how your pink radishes turned out. Share your photos and recipes on social media using #HomeGrownRadishes and inspire others to join the fun. Happy gardening!
Frequently Asked Questions (FAQ)
What exactly makes radishes turn pink? Is it a specific type of seed?
The pink color in radishes is primarily determined by the variety of radish you choose. Certain varieties, like the ‘Pink Beauty’ radish, are specifically bred to produce that vibrant pink hue. However, environmental factors can also play a role. For instance, consistent watering and adequate sunlight can enhance the color development. While the specific DIY trick outlined in this article doesn’t magically turn any radish pink, it focuses on optimizing growing conditions to ensure that pink varieties reach their full color potential. Using high-quality seeds from a reputable source is crucial for achieving the desired results.
How long does it take to grow pink radishes from seed to harvest?
One of the best things about radishes is their quick growth cycle! Generally, you can expect to harvest your pink radishes within 22 to 30 days from planting the seeds. This makes them a perfect crop for impatient gardeners or those looking for a quick win. However, the exact time can vary depending on the specific variety, soil conditions, and weather. Warmer temperatures tend to accelerate growth, while cooler temperatures may slow it down slightly. Regularly check the soil moisture and ensure adequate sunlight to optimize growth and achieve the fastest possible harvest.
What kind of soil is best for growing pink radishes?
Radishes thrive in well-drained, loose soil that is rich in organic matter. Heavy clay soil can hinder root development and result in misshapen or stunted radishes. Before planting, amend your soil with compost or well-rotted manure to improve drainage and fertility. A slightly acidic to neutral soil pH (around 6.0 to 7.0) is ideal. You can test your soil pH using a home testing kit or by sending a sample to your local agricultural extension office. If your soil is too acidic, you can add lime to raise the pH.
How much sunlight do pink radishes need?
Radishes need at least 6 hours of direct sunlight per day to grow properly. While they can tolerate some partial shade, insufficient sunlight can lead to leggy growth and smaller radishes. Choose a planting location that receives ample sunlight throughout the day. If you’re growing radishes indoors, use grow lights to supplement natural sunlight and ensure adequate light exposure.
How often should I water my pink radishes?
Consistent watering is crucial for growing plump, juicy radishes. Keep the soil consistently moist, but not waterlogged. Water deeply whenever the top inch of soil feels dry to the touch. Avoid letting the soil dry out completely, as this can cause the radishes to become tough and bitter. Overwatering, on the other hand, can lead to root rot. Use a watering can or a hose with a gentle spray nozzle to avoid disturbing the delicate seedlings.
What are some common pests and diseases that affect radishes, and how can I prevent them?
Radishes are generally relatively pest-resistant, but they can be susceptible to certain pests and diseases, including flea beetles, root maggots, and fungal diseases. Flea beetles can chew small holes in the leaves, while root maggots can damage the roots. To prevent flea beetles, cover your radish plants with row covers. To prevent root maggots, practice crop rotation and avoid planting radishes in the same location year after year. Fungal diseases can be prevented by ensuring good air circulation and avoiding overwatering. If you notice any signs of pests or diseases, treat them promptly with appropriate organic pest control methods.
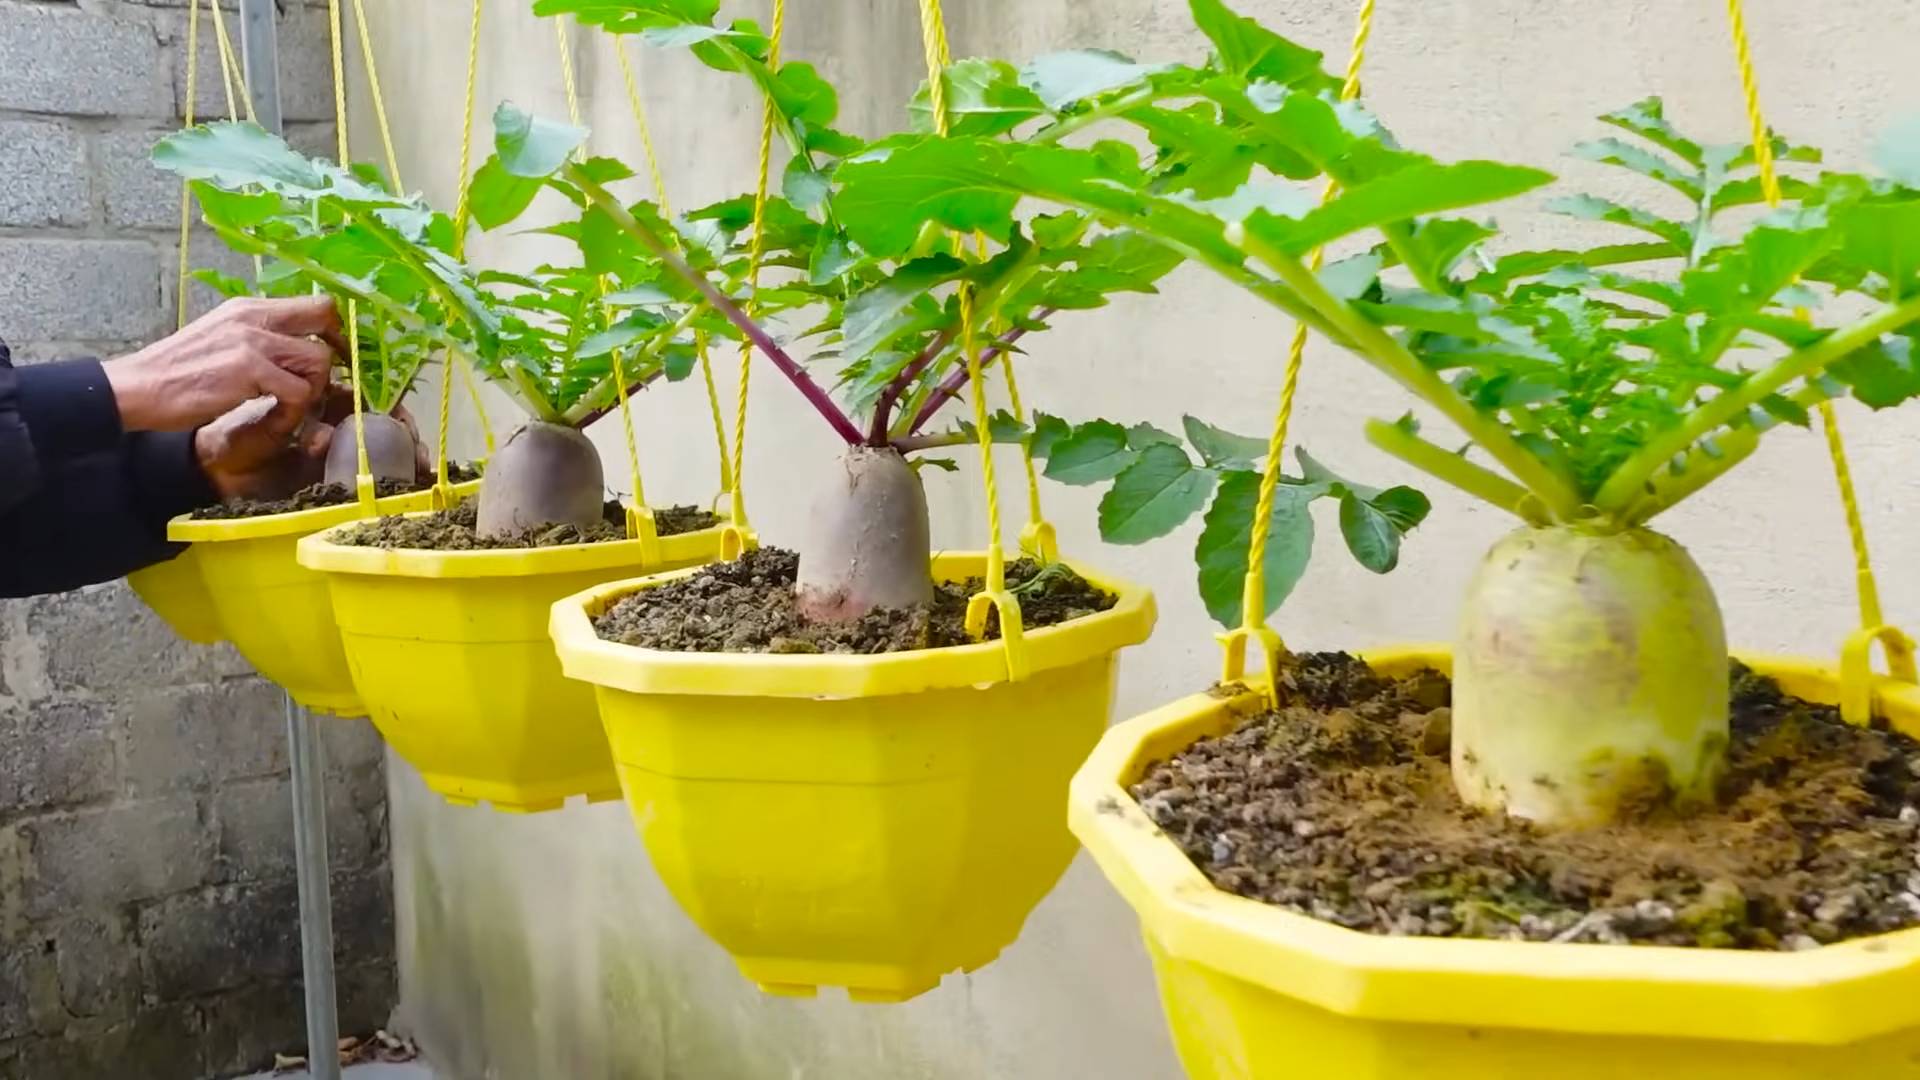
Can I grow pink radishes in containers?
Yes, absolutely! Radishes are well-suited for container gardening. Choose a container that is at least 6 inches deep and has drainage holes. Use a high-quality potting mix and follow the same planting and care instructions as you would for growing radishes in the ground. Container-grown radishes may require more frequent watering than those grown in the ground, as the soil in containers tends to dry out more quickly.
Are radish greens edible?
Yes, radish greens are perfectly edible and nutritious! They have a peppery flavor similar to the radishes themselves. You can use them in salads, soups, stir-fries, or as a garnish. Harvest the greens when they are young and tender for the best flavor. Be sure to wash them thoroughly before using.
How do I know when my pink radishes are ready to harvest?
Radishes are typically ready to harvest when they reach about 1 inch in diameter. Gently loosen the soil around the radish and pull it out of the ground. If the radish is too small, leave it in the ground for a few more days. Harvest radishes promptly once they are ready, as they can become tough and bitter if left in the ground for too long.
What are some creative ways to use pink radishes in recipes?
Beyond the classic radish salad, there are many creative ways to incorporate pink radishes into your cooking. Try pickling them for a tangy condiment, roasting them for a sweeter flavor, or grating them into coleslaw for a peppery kick. You can also use them as a garnish for soups, tacos, and other dishes. The vibrant pink color adds a beautiful touch to any plate. Don’t forget to use the radish greens as well! They can be added to salads, soups, and stir-fries for a nutritious and flavorful boost.


Leave a Comment