

Grow Radishes Tiny Spaces? Absolutely! I know what you’re thinking: “Radishes? In *my* tiny apartment garden?” But trust me, even if you’re working with a balcony smaller than a postage stamp, you can absolutely cultivate these peppery little gems. For centuries, radishes have been a staple in gardens worldwide, from ancient Egypt where they were offered to the gods, to humble kitchen gardens across Europe. Their quick growth and adaptability make them the perfect crop for beginner gardeners and seasoned pros alike.
But why bother growing radishes at all, especially in a limited space? Well, beyond their delicious crunch and vibrant color, radishes are incredibly rewarding. They sprout quickly, offering almost instant gratification, and they’re packed with nutrients. Plus, imagine the satisfaction of adding freshly harvested, homegrown radishes to your salads and snacks! This DIY guide is your key to unlocking the secrets of successfully grow radishes tiny spaces, even if you think you don’t have enough room. I’m going to share my favorite tricks and hacks to maximize your yield and make the most of every inch of your precious gardening space. Get ready to enjoy a bountiful radish harvest, no matter how small your garden may be!
Growing Radishes in Tiny Spaces: A DIY Guide
Hey there, fellow gardening enthusiasts! Ever dreamed of fresh, peppery radishes straight from your own little patch, even if you’re short on space? Well, dream no more! I’m going to walk you through a super easy DIY project that will have you harvesting radishes in no time, no matter how tiny your garden (or balcony, or even windowsill!) might be. We’re talking container gardening at its finest.
Choosing Your Container and Soil
First things first, let’s talk about where these little guys are going to live.
* Container Size: Radishes don’t need a ton of space, but they do need some depth. Aim for a container that’s at least 6 inches deep. A wider container is better than a tall, narrow one, as it will allow you to plant more radishes. I’ve had great success with old plastic tubs, repurposed buckets, and even window boxes. Just make sure whatever you choose has drainage holes!
* Drainage is Key: Seriously, don’t skip this step. Radishes hate soggy feet. If your container doesn’t have drainage holes, drill some in the bottom.
* Soil Matters: Radishes prefer loose, well-draining soil. A good potting mix is your best bet. Avoid using garden soil directly in containers, as it can compact and become too heavy. I like to mix my own using equal parts potting soil, compost, and perlite or vermiculite. The compost adds nutrients, while the perlite or vermiculite improves drainage and aeration.
Planting Your Radish Seeds
Alright, now for the fun part – planting!
1. Prepare the Soil: Fill your container with your chosen potting mix, leaving about an inch of space at the top. Gently pat the soil down to remove any large air pockets.
2. Sowing the Seeds: Radish seeds are small, so you don’t need to bury them too deep. I usually aim for about ½ inch deep. Space the seeds about an inch apart. If you’re using a larger container, you can plant them in rows, leaving about 2 inches between rows.
3. Cover and Water: Gently cover the seeds with soil and water thoroughly. You want the soil to be moist but not waterlogged. A gentle spray from a watering can is ideal.
4. Location, Location, Location: Radishes need at least 6 hours of sunlight per day. Place your container in a sunny spot, like a balcony, patio, or windowsill. If you don’t have enough natural sunlight, you can supplement with a grow light.
Caring for Your Radishes
Now that your radishes are planted, it’s time to give them some TLC.
1. Watering: Keep the soil consistently moist, but not soggy. Water when the top inch of soil feels dry to the touch. Overwatering can lead to root rot, so be careful!
2. Thinning: Once your radish seedlings emerge (usually within a few days), you’ll need to thin them out. This means removing some of the seedlings to give the remaining ones enough space to grow. Thin to about 1-2 inches apart. Don’t just yank them out! Gently snip them off at the soil line with scissors to avoid disturbing the roots of the remaining plants.
3. Fertilizing (Optional): Radishes are fast growers and don’t require a lot of fertilizer. However, if your soil is poor, you can give them a light feeding with a balanced liquid fertilizer diluted to half strength. Do this about two weeks after the seedlings emerge. I personally prefer using compost tea as a gentle, organic fertilizer.
4. Weed Control: Keep an eye out for weeds and remove them promptly. Weeds can compete with your radishes for nutrients and water.
5. Pest Control: Radishes are generally pest-resistant, but sometimes flea beetles can be a problem. These tiny beetles can chew small holes in the leaves. If you notice flea beetles, you can try spraying your plants with insecticidal soap or covering them with row covers.
Harvesting Your Radishes
The best part! Radishes are super fast growers, so you won’t have to wait long to enjoy your harvest.
1. Timing is Everything: Radishes are typically ready to harvest in about 3-4 weeks, depending on the variety. Check the seed packet for specific harvest times.
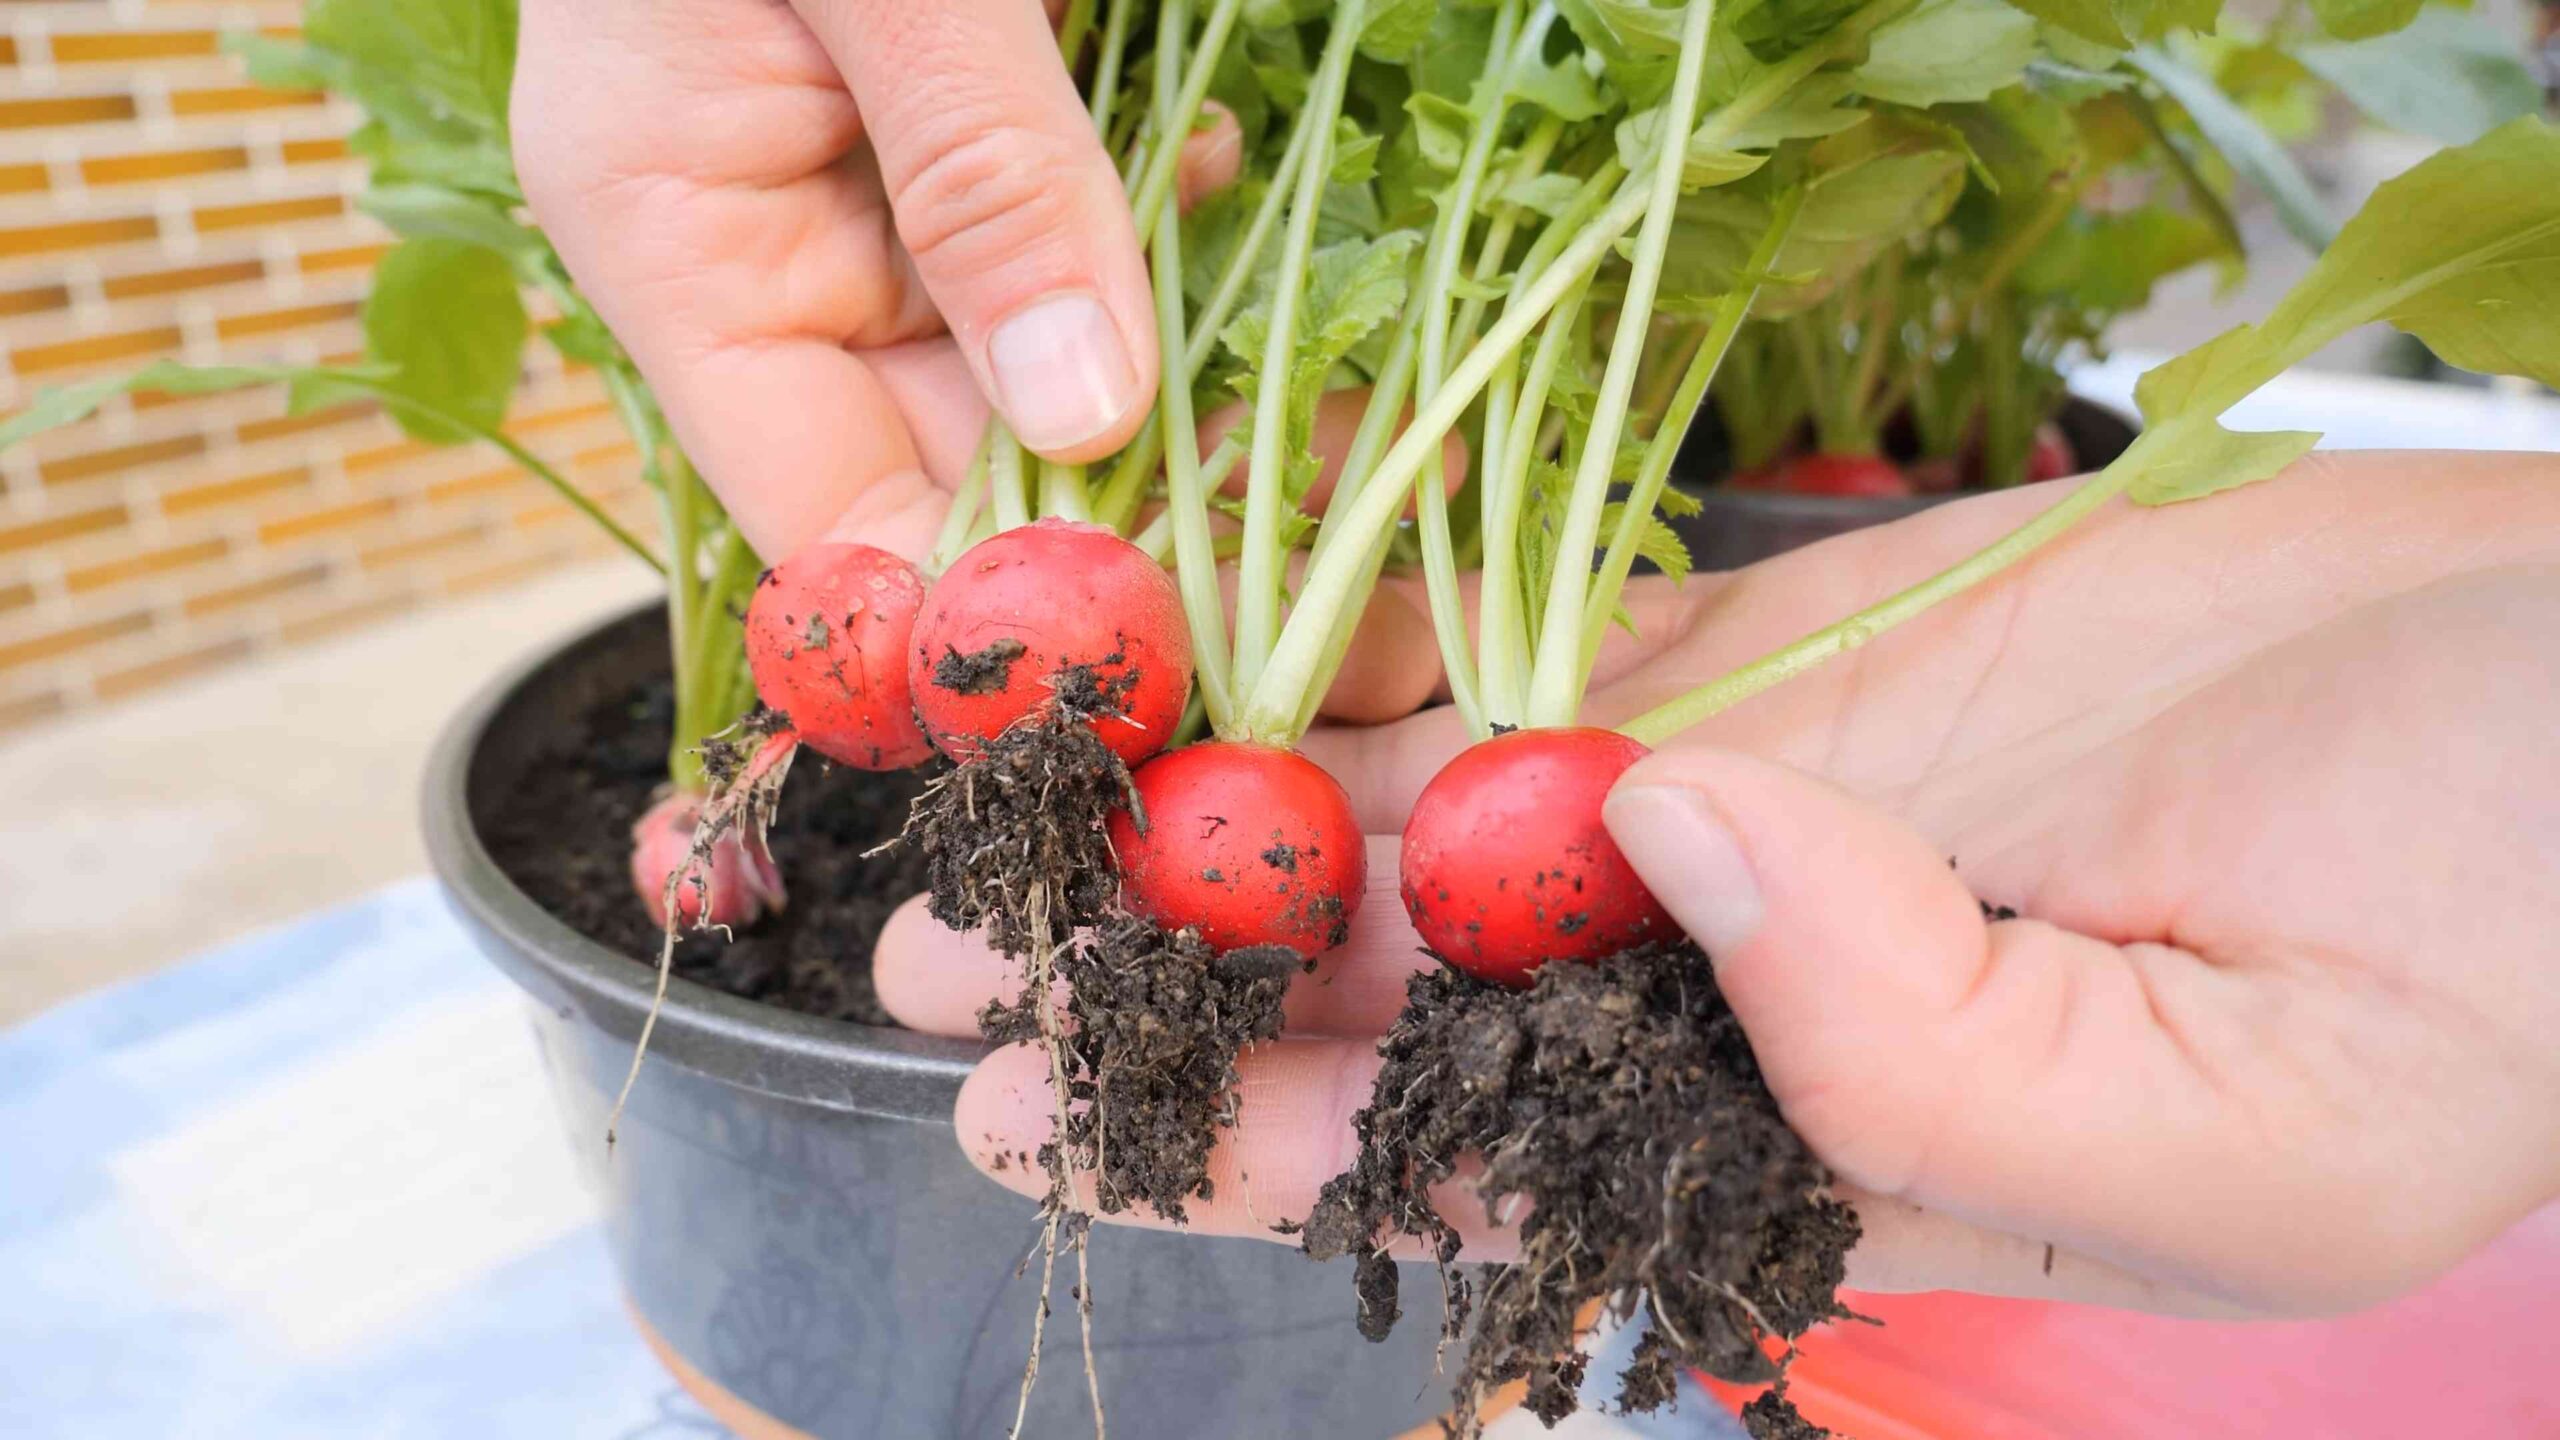
2. Signs of Readiness: The tops of the radishes will start to peek out of the soil. Gently brush away some soil to check the size of the radish. They’re usually ready when they’re about an inch in diameter.
3. Harvesting Technique: Gently pull the radishes from the soil. If they’re difficult to pull, loosen the soil around them with a trowel.
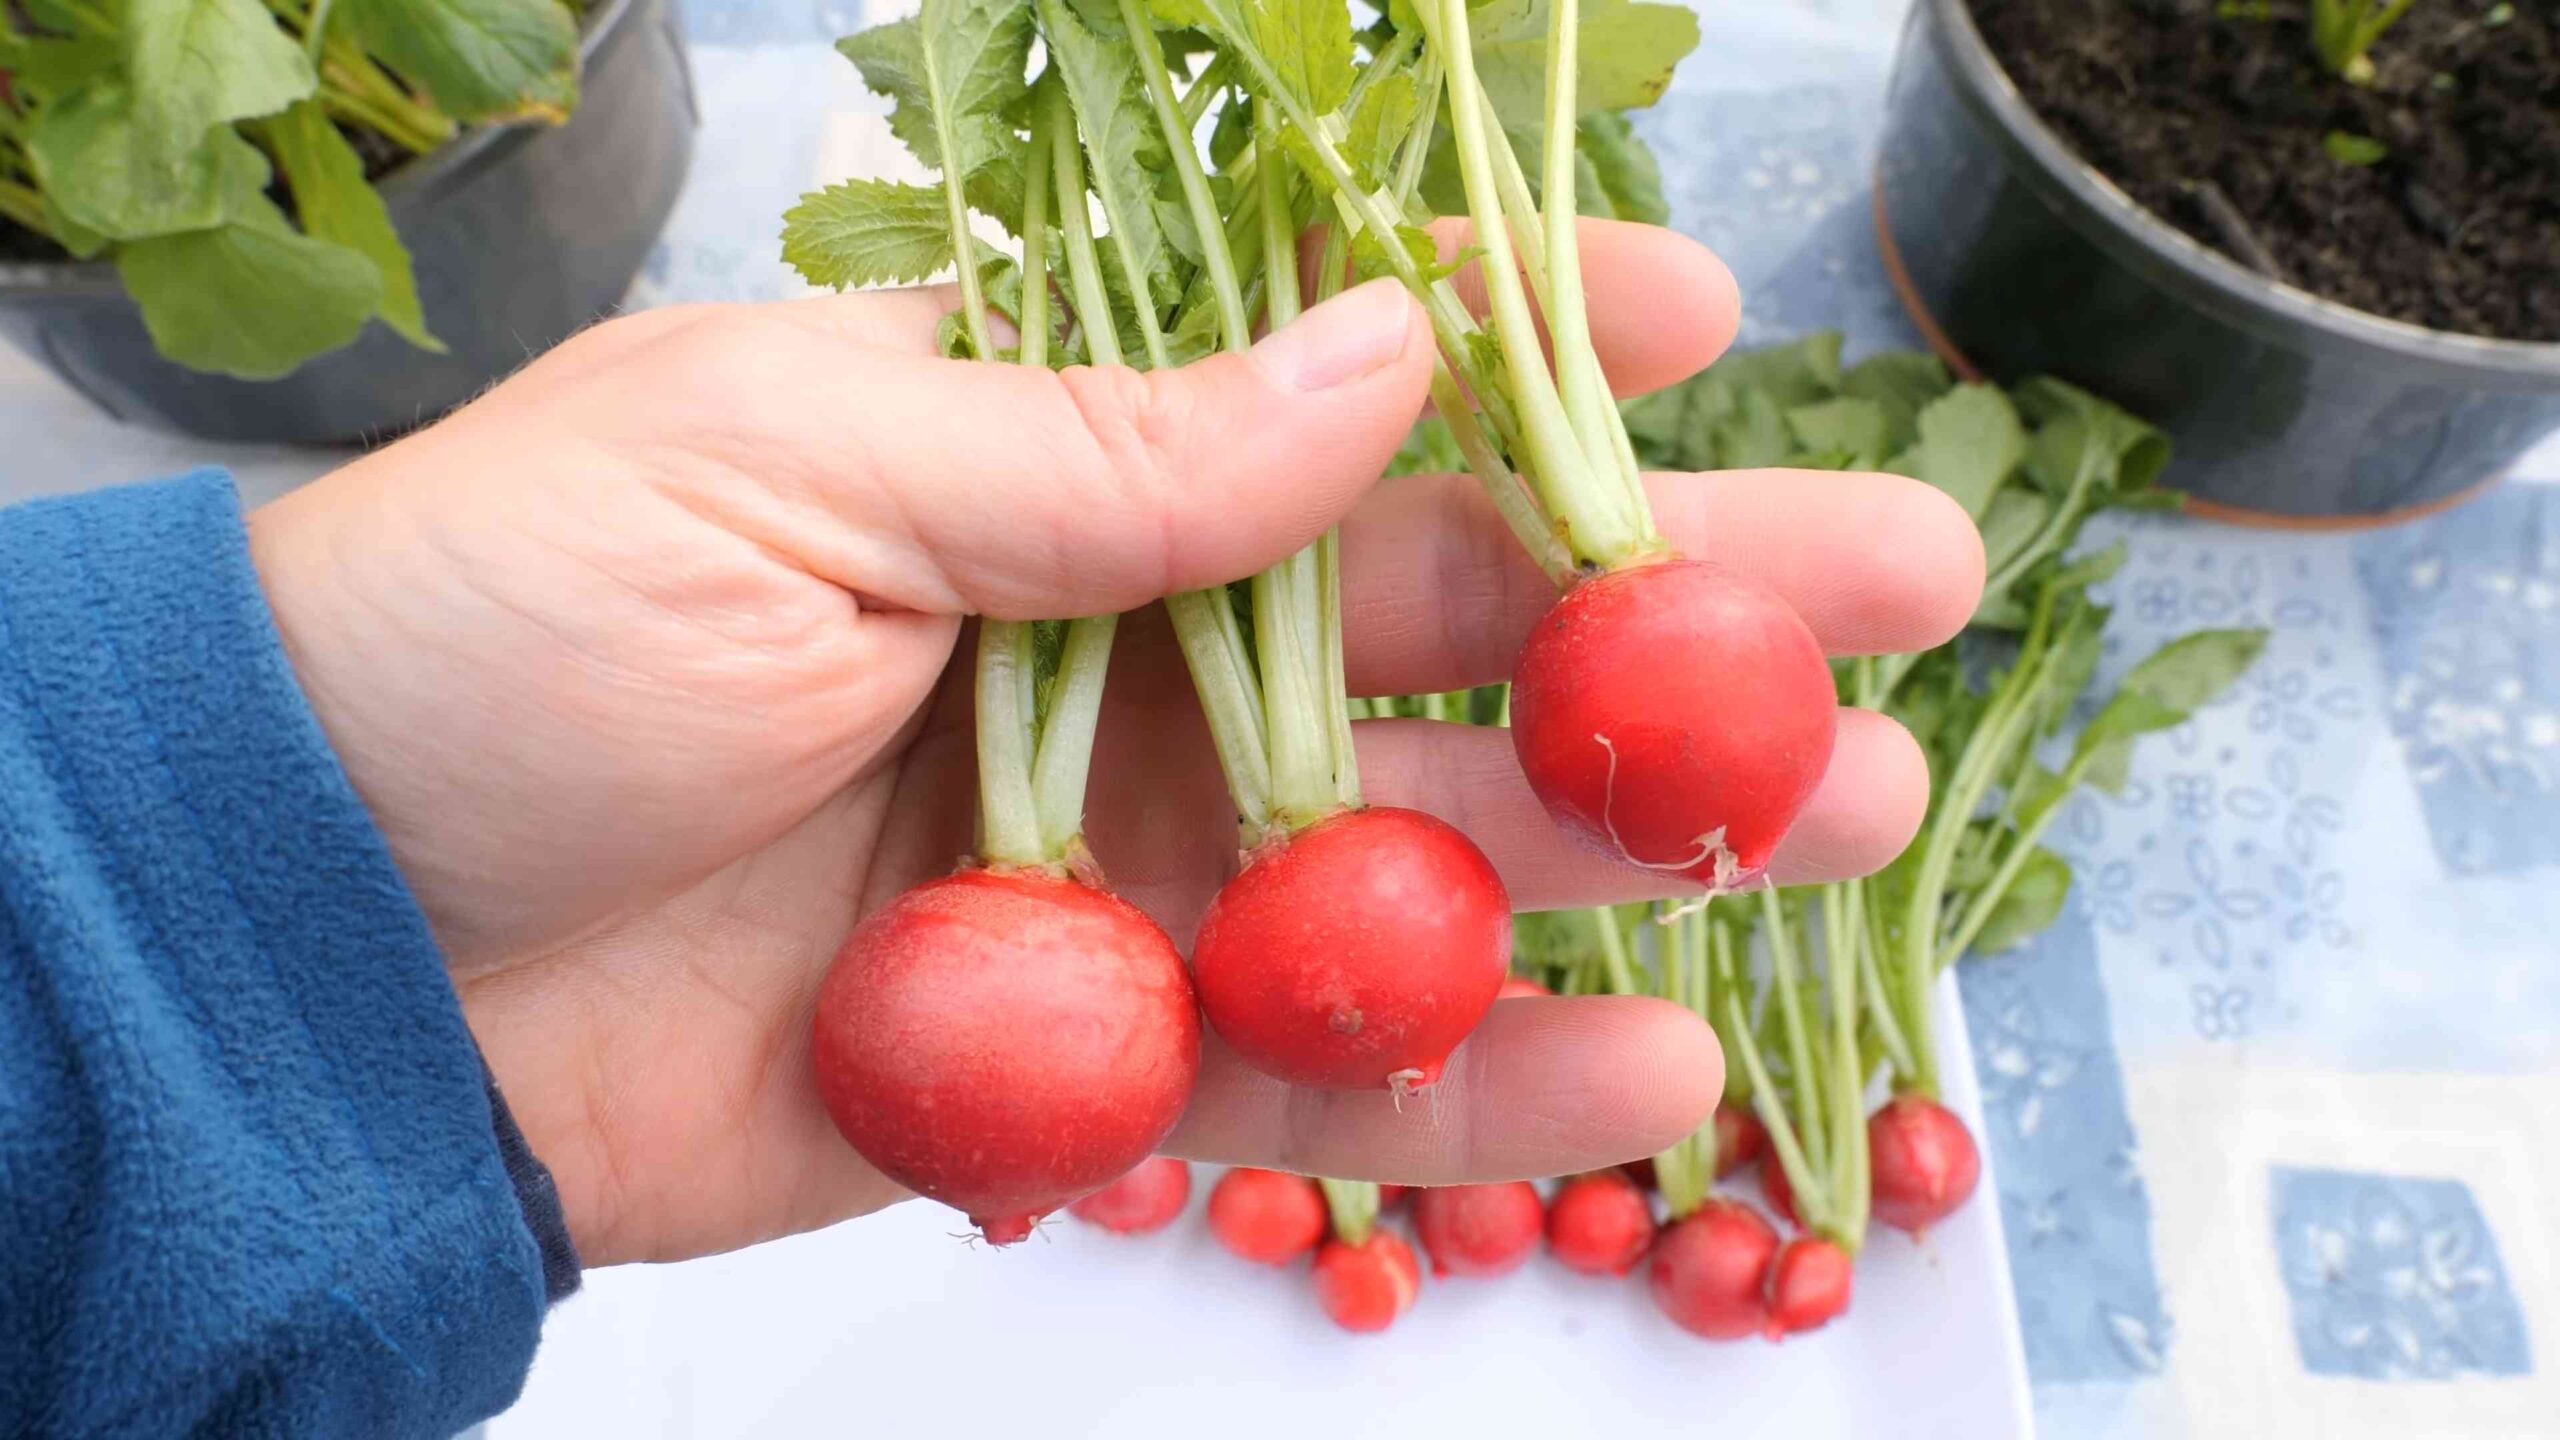
4. Enjoy Your Harvest: Wash your radishes thoroughly and enjoy them fresh! They’re delicious in salads, sandwiches, or as a crunchy snack. You can also roast them or pickle them.
Choosing the Right Radish Variety
There are tons of different radish varieties to choose from, so pick one that suits your taste and growing conditions.
* Cherry Belle: A classic, round, red radish that’s easy to grow and has a mild flavor.
* French Breakfast: An elongated, red and white radish with a slightly peppery flavor.
* Easter Egg: A mix of different colored radishes, including red, pink, purple, and white.
* Black Spanish: A large, black radish with a strong, pungent flavor.
* White Icicle: A long, white radish with a mild, sweet flavor.
Troubleshooting
Even with the best planning, sometimes things don’t go exactly as expected. Here are a few common problems you might encounter and how to fix them:
* Radishes are too small: This could be due to overcrowding, lack of sunlight, or poor soil. Make sure you thin your seedlings properly, provide plenty of sunlight, and use a good quality potting mix.
* Radishes are cracked: This is usually caused by inconsistent watering. Try to keep the soil consistently moist, especially during hot weather.
* Radishes are too spicy: This can be caused by hot weather or letting the radishes grow too large. Harvest your radishes when they’re still relatively small.
* Radishes are all tops and no bottoms: This is often due to soil that is too rich in nitrogen. Avoid using fertilizers that are high in nitrogen.
Extending Your Radish Season
Want to enjoy fresh radishes all season long? Here are a few tips:
* Succession Planting: Plant a new batch of radish seeds every 2-3 weeks. This will ensure a continuous harvest throughout the growing season.
* Choose Different Varieties: Some radish varieties are better suited for cool weather, while others can tolerate warmer temperatures. Experiment with different varieties to find the ones that grow best in your climate.
* Provide Shade: In hot weather, provide some shade for your radishes to prevent them from bolting (going to seed). You can use shade cloth or plant them in a location that receives afternoon shade.
Bonus Tip: Eating Radish Greens!
Don’t throw away those radish greens! They’re perfectly edible and packed with nutrients. You can add them to salads, stir-fries, or soups. They have a slightly peppery flavor, similar to the radishes themselves. Just make sure to wash them thoroughly before eating.
So there you have it! Growing radishes in tiny spaces is a fun, easy, and rewarding project. With a little bit of care and attention, you’ll be enjoying fresh, homegrown radishes in no time. Happy gardening!
Conclusion
So, there you have it! Growing radishes in tiny spaces is not only achievable, it’s downright rewarding. We’ve explored a simple, effective method that transforms even the smallest balcony, patio, or windowsill into a miniature radish farm. Forget the sprawling garden plots; with a little ingenuity and the right approach, you can enjoy a steady supply of crisp, peppery radishes grown right at home.
Why is this DIY trick a must-try? Because it democratizes gardening. It breaks down the barriers of space and experience, allowing anyone, regardless of their living situation or gardening prowess, to connect with the earth and enjoy the fruits (or rather, roots!) of their labor. Imagine the satisfaction of adding freshly harvested radishes to your salad, knowing you nurtured them from seed to table. It’s a small act, but it’s a powerful one, fostering a sense of self-sufficiency and connection to the natural world.
But the benefits extend beyond mere convenience. Homegrown radishes boast a flavor that far surpasses their store-bought counterparts. They’re crisper, more vibrant, and packed with a peppery punch that will awaken your taste buds. Plus, you have complete control over the growing process, ensuring your radishes are free from harmful pesticides and chemicals.
Looking to experiment? Consider these variations:
* Succession Planting: Plant a new batch of seeds every week or two to ensure a continuous harvest throughout the growing season.
* Container Choices: While we focused on smaller containers, feel free to scale up to larger pots or even window boxes for a more substantial yield. Just remember to adjust watering and fertilization accordingly.
* Radish Varieties: Don’t limit yourself to the standard red radish. Explore different varieties like French Breakfast, Easter Egg, or Watermelon radishes for a diverse range of colors, shapes, and flavors.
* Companion Planting: Radishes are excellent companion plants for carrots, lettuce, and spinach. Consider interplanting them in your tiny space garden to maximize space and deter pests.
* Sprouts and Greens: Don’t discard the radish greens! They’re edible and delicious, adding a peppery kick to salads, stir-fries, and soups. You can also sprout radish seeds for a nutritious and flavorful addition to sandwiches and salads.
We’re confident that you’ll find this DIY trick for growing radishes in tiny spaces to be both easy and enjoyable. It’s a fantastic way to add fresh, healthy produce to your diet, connect with nature, and discover the joys of gardening, even without a traditional garden.
So, what are you waiting for? Grab some seeds, a container, and some soil, and get started today! We encourage you to try this DIY trick and share your experiences with us. Post photos of your radish gardens on social media using #TinySpaceRadishes and let us know what varieties you’re growing and any tips or tricks you’ve discovered along the way. We can’t wait to see your radish-growing success!
Frequently Asked Questions (FAQ)
What kind of soil is best for growing radishes in containers?
Radishes thrive in well-draining, loose soil that is rich in organic matter. A good potting mix specifically formulated for vegetables is ideal. Avoid heavy clay soils, as they can hinder root development and lead to misshapen radishes. You can also amend your potting mix with compost or aged manure to improve drainage and fertility.
How much sunlight do radishes need?
Radishes need at least 6 hours of direct sunlight per day to grow properly. If you’re growing them indoors, place them near a sunny window or supplement with grow lights. Insufficient sunlight can result in leggy plants and small, underdeveloped radishes.
How often should I water my radishes?
Radishes need consistent moisture to prevent them from becoming tough or bitter. Water deeply whenever the top inch of soil feels dry to the touch. Avoid overwatering, as this can lead to root rot. Check the drainage of your container to ensure excess water can escape.
How long does it take for radishes to mature?
One of the great things about radishes is their quick growth rate. Most varieties mature in just 20-30 days. Check the seed packet for specific maturity times for the variety you’re growing.
How do I know when my radishes are ready to harvest?
Radishes are ready to harvest when their roots reach the size specified on the seed packet. Gently brush away some soil around the base of the plant to check the size of the radish. If they’re the right size, gently pull them from the soil. Don’t let them get too large, as they can become woody and bitter.
Why are my radishes all leaves and no root?
Several factors can contribute to this problem. Insufficient sunlight, overcrowding, and overly rich soil can all promote leafy growth at the expense of root development. Make sure your radishes are getting enough sunlight, thin them out if they’re too crowded, and avoid over-fertilizing.
Can I grow radishes in the winter?
Yes, you can grow radishes indoors during the winter months. Provide them with plenty of sunlight or grow lights, and maintain a consistent watering schedule. Choose a fast-maturing variety for best results.
What are some common pests and diseases that affect radishes?
Common pests that affect radishes include flea beetles, root maggots, and aphids. Diseases include damping-off and white rust. Use organic pest control methods, such as insecticidal soap or neem oil, to control pests. Ensure good air circulation and avoid overwatering to prevent diseases.
Can I eat the radish greens?
Absolutely! Radish greens are edible and nutritious. They have a peppery flavor similar to the roots. Use them in salads, stir-fries, soups, or as a garnish.
How do I store harvested radishes?
Remove the greens and store the radishes in a plastic bag in the refrigerator. They will keep for about a week. You can also store them in a container of water in the refrigerator to keep them crisp.
What if my radishes are too spicy?
The spiciness of radishes can vary depending on the variety and growing conditions. If your radishes are too spicy for your taste, try soaking them in cold water for a few hours before eating. This can help to mellow out the flavor.
Can I grow radishes from store-bought radishes?
While it’s possible to regrow radish greens from store-bought radishes, it’s unlikely that you’ll get a substantial root crop. Store-bought radishes are often hybrids and may not produce true-to-type seeds. It’s best to start with fresh seeds for reliable results.
How do I prevent my radishes from cracking?
Inconsistent watering is the most common cause of radish cracking. Ensure consistent moisture levels by watering regularly, especially during hot, dry weather. Mulching around the plants can also help to retain moisture in the soil.
Are radishes good for you?
Yes! Radishes are a low-calorie, nutrient-rich vegetable. They are a good source of vitamin C, potassium, and fiber. They also contain antioxidants and other beneficial compounds.

Leave a Comment