

Grow Your Own Pechay, and unlock a world of fresh, flavorful greens right outside your door! Have you ever dreamed of snipping vibrant, crisp leaves for your dinner salad just moments before you eat? Or perhaps you’re tired of the wilted, overpriced options at the grocery store? Well, you’re in the right place! This DIY guide will empower you to cultivate your very own thriving pechay patch, regardless of your gardening experience.
Pechay, also known as Bok Choy, isn’t just a delicious vegetable; it’s a staple in Asian cuisine with a rich history. For centuries, it’s been cultivated and enjoyed across various cultures, prized for its nutritional value and versatility. From stir-fries to soups, pechay adds a delightful crunch and subtle sweetness to countless dishes. But beyond its culinary appeal, growing your own pechay offers a sense of accomplishment and connection to nature.
In today’s world, where we’re increasingly conscious of where our food comes from, knowing you can grow your own pechay organically and sustainably is incredibly rewarding. Plus, let’s be honest, who doesn’t love a good DIY project? This guide will break down the process into simple, manageable steps, ensuring you have a bountiful harvest in no time. So, grab your gardening gloves, and let’s get started on this exciting journey to fresh, homegrown goodness!
Grow Your Own Pechay: A Beginner’s Guide
Hey there, fellow gardening enthusiasts! I’m so excited to share my experience growing pechay (also known as bok choy) right in my backyard. It’s surprisingly easy, even if you’re a complete newbie like I was not too long ago. Pechay is a delicious and nutritious leafy green that’s perfect for stir-fries, soups, and salads. Plus, growing your own means you get fresh, organic produce without having to rely on the grocery store. Let’s dive in!
What You’ll Need
Before we get started, let’s gather all the necessary materials. This will make the whole process smoother and more enjoyable.
* **Pechay Seeds:** You can find these at most garden centers or online. Look for varieties that are suited to your climate.
* **Seed Starting Trays or Small Pots:** These are perfect for starting your seeds indoors.
* **Seed Starting Mix:** This is a light and airy soil mix that’s ideal for delicate seedlings.
* **Gardening Gloves:** To keep your hands clean and protected.
* **Watering Can or Spray Bottle:** For gentle watering.
* **Garden Soil:** Rich, well-draining soil for transplanting your seedlings.
* **Compost or Organic Fertilizer:** To nourish your pechay plants.
* **Gardening Tools:** A trowel, hand rake, and garden fork will come in handy.
* **Sunlight:** Pechay needs at least 4-6 hours of sunlight per day.
* **Optional: Row Covers or Netting:** To protect your plants from pests.
Starting Your Seeds Indoors (Optional but Recommended)
Starting your seeds indoors gives them a head start, especially if you live in an area with a shorter growing season. I highly recommend this method for best results.
1. **Prepare Your Seed Starting Trays:** Fill your seed starting trays or small pots with seed starting mix. Gently press down the soil to create a firm surface.
2. **Sow the Seeds:** Sow 2-3 pechay seeds per cell or pot, about ¼ inch deep.
3. **Water Gently:** Water the soil gently using a watering can or spray bottle. Make sure the soil is moist but not waterlogged.
4. **Provide Warmth and Light:** Place the trays in a warm location with plenty of sunlight. A sunny windowsill or a grow light works well.
5. **Keep the Soil Moist:** Check the soil daily and water as needed to keep it moist.
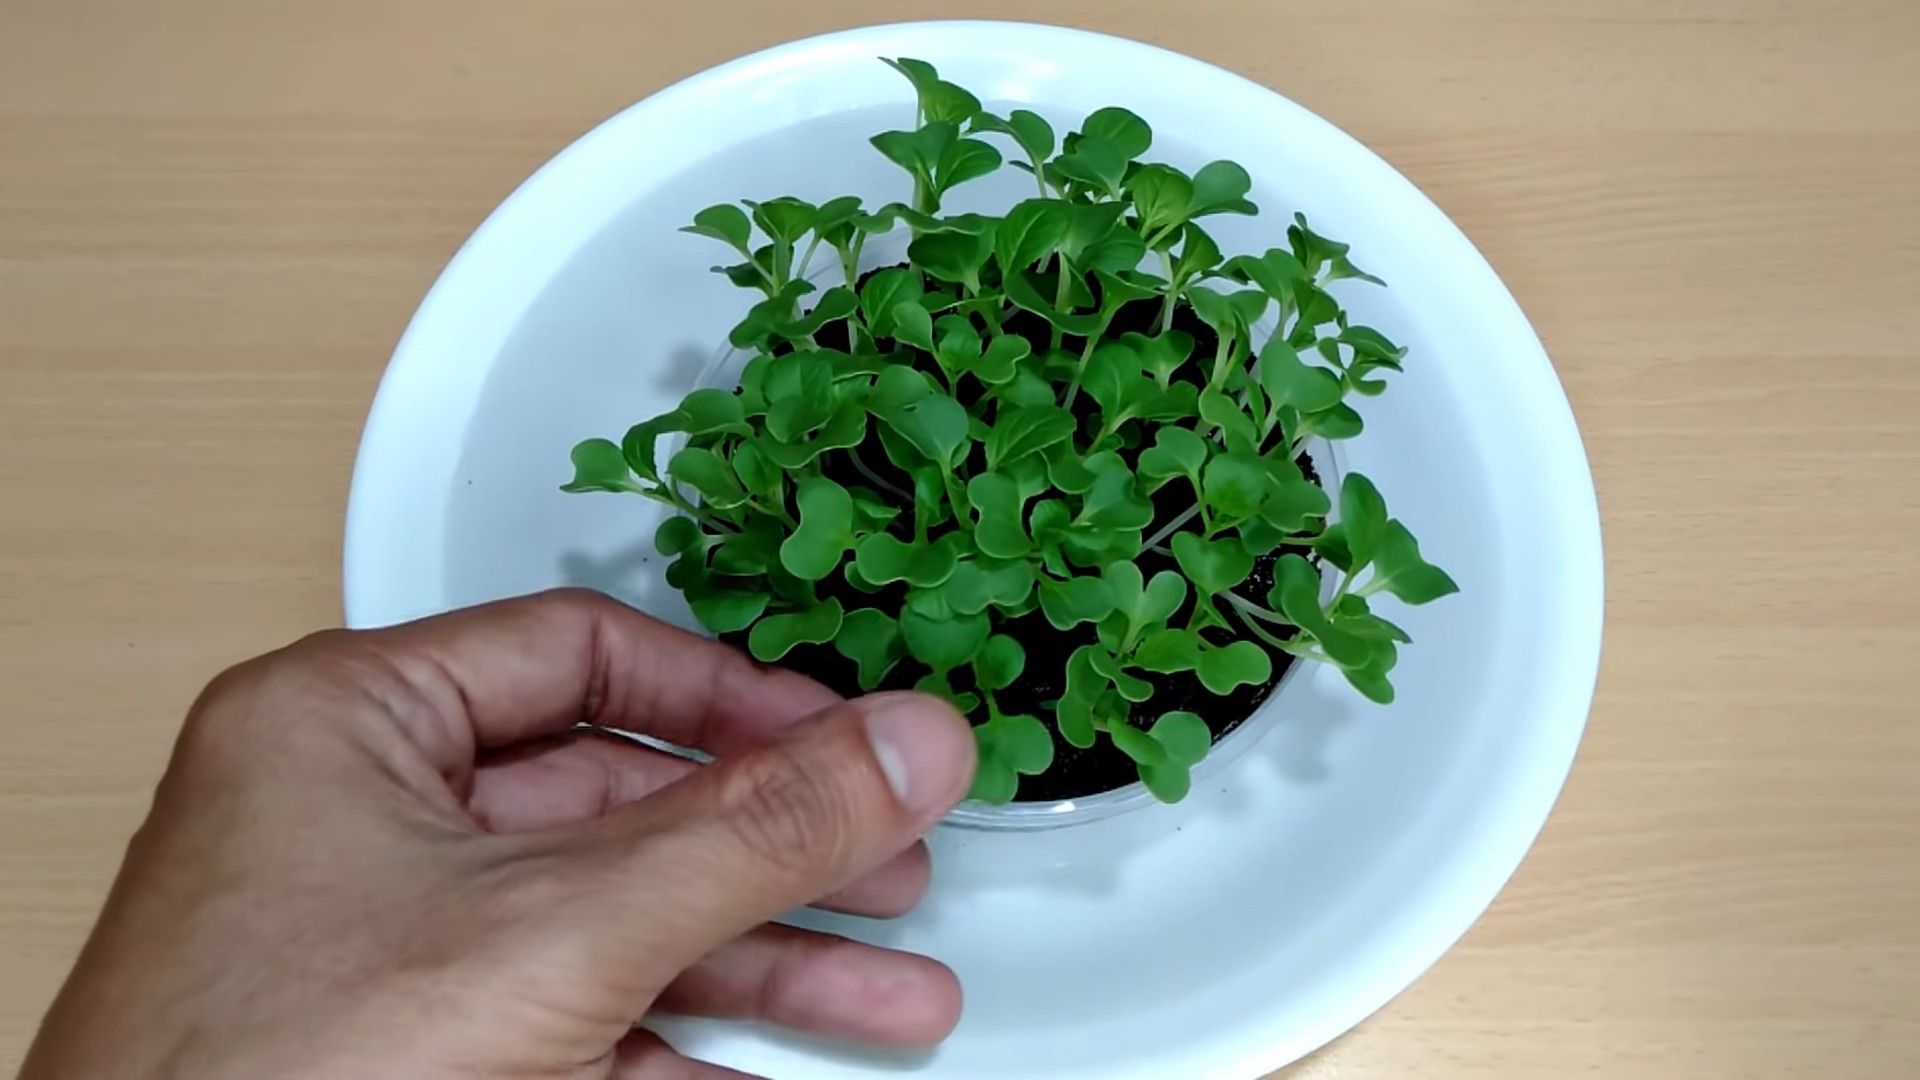
6. **Thin the Seedlings:** Once the seedlings have emerged and have a few true leaves (usually after a week or two), thin them out, leaving only the strongest seedling in each cell or pot. To thin, simply snip off the weaker seedlings at the soil line with scissors.
Preparing Your Garden Bed
While your seeds are germinating indoors, it’s time to prepare your garden bed. Pechay thrives in well-drained, fertile soil.
1. **Choose a Sunny Location:** Select a spot in your garden that receives at least 4-6 hours of sunlight per day.
2. **Clear the Area:** Remove any weeds, rocks, or debris from the area.
3. **Loosen the Soil:** Use a garden fork or tiller to loosen the soil to a depth of at least 12 inches. This will improve drainage and allow the roots to grow easily.
4. **Amend the Soil:** Incorporate compost or organic fertilizer into the soil to add nutrients and improve its structure. I usually add a generous amount of compost – about 2-3 inches – and mix it in thoroughly.
5. **Level the Soil:** Use a rake to level the soil surface and create a smooth planting bed.
Transplanting Your Seedlings
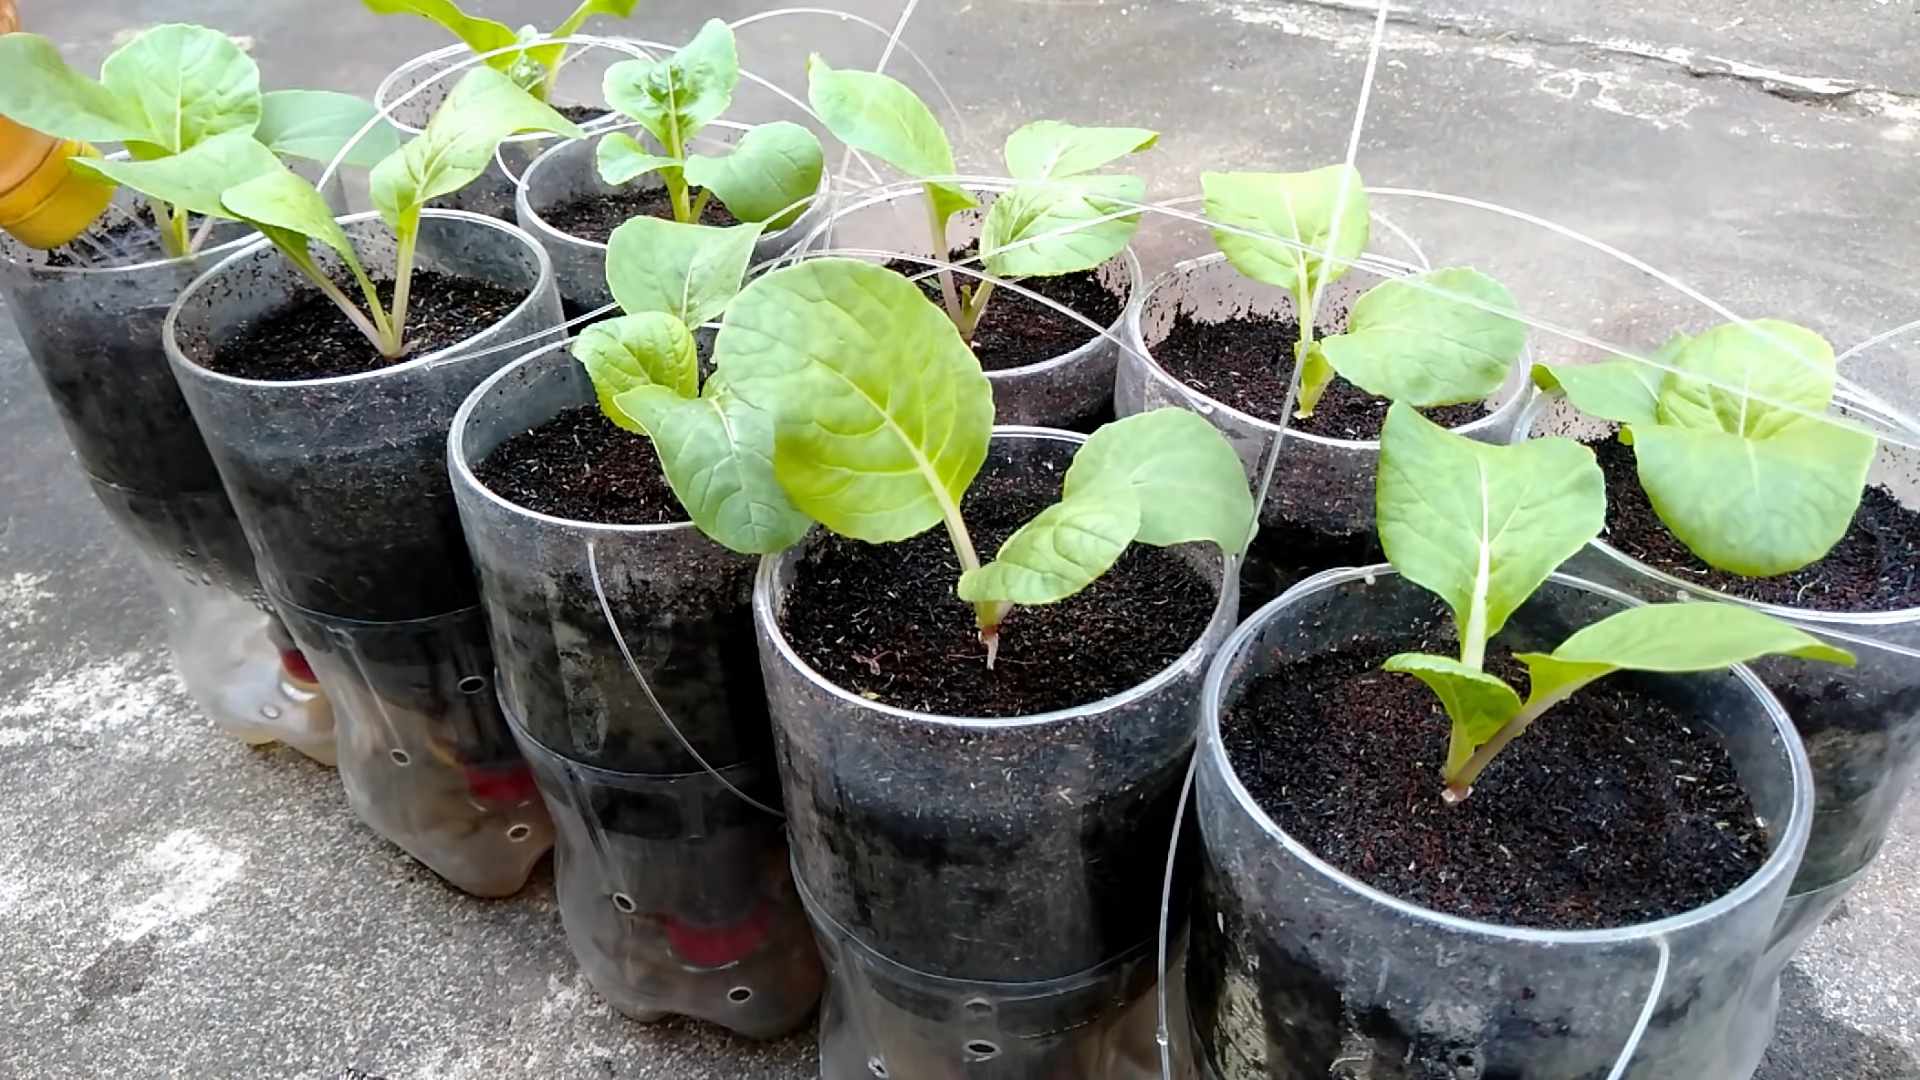
Once your seedlings have developed several true leaves and are about 3-4 inches tall, they’re ready to be transplanted into your garden bed.
1. **Harden Off the Seedlings:** Before transplanting, you need to harden off the seedlings. This means gradually exposing them to outdoor conditions to help them adjust. Start by placing the trays outdoors in a sheltered location for a few hours each day, gradually increasing the amount of time they spend outside over the course of a week.
2. **Prepare the Planting Holes:** Dig holes in your prepared garden bed, spacing them about 6-8 inches apart. The holes should be deep enough to accommodate the root balls of the seedlings.
3. **Carefully Remove the Seedlings:** Gently remove the seedlings from their trays or pots, being careful not to damage the roots. If the roots are tightly bound, gently loosen them with your fingers.
4. **Plant the Seedlings:** Place the seedlings in the holes and backfill with soil. Gently firm the soil around the base of the plants.
5. **Water Thoroughly:** Water the newly transplanted seedlings thoroughly to help them settle in.
Direct Sowing (Alternative Method)
If you prefer, you can also direct sow pechay seeds directly into your garden bed. This method is best suited for areas with a longer growing season.
1. **Prepare the Soil:** Follow the same steps as outlined in the “Preparing Your Garden Bed” section.
2. **Sow the Seeds:** Sow the seeds directly into the soil, about ¼ inch deep and 6-8 inches apart.
3. **Water Gently:** Water the soil gently using a watering can or spray bottle.
4. **Keep the Soil Moist:** Keep the soil consistently moist until the seeds germinate.
5. **Thin the Seedlings:** Once the seedlings have emerged and have a few true leaves, thin them out, leaving only the strongest seedlings spaced 6-8 inches apart.
Caring for Your Pechay Plants
Once your pechay plants are established, it’s important to provide them with the care they need to thrive.
1. **Water Regularly:** Pechay needs consistent moisture, especially during hot weather. Water deeply whenever the top inch of soil feels dry. Avoid overwatering, as this can lead to root rot.
2. **Fertilize Regularly:** Feed your pechay plants with compost tea or organic fertilizer every 2-3 weeks to provide them with the nutrients they need.
3. **Weed Regularly:** Keep the garden bed free of weeds, as they can compete with your pechay plants for nutrients and water.
4. **Protect from Pests:** Pechay can be susceptible to pests such as aphids, cabbage worms, and flea beetles. Inspect your plants regularly and take action if you notice any signs of infestation. You can use organic pest control methods such as insecticidal soap or neem oil. Row covers or netting can also help protect your plants from pests.
5. **Monitor for Diseases:** Keep an eye out for any signs of disease, such as yellowing leaves or spots. If you notice any problems, take action immediately to prevent the disease from spreading.
Harvesting Your Pechay
Pechay is a fast-growing vegetable, and you can usually start harvesting it about 45-50 days after planting.
1. **Harvest When Ready:** You can harvest pechay at any stage of growth, depending on your preference. For baby greens, harvest when the leaves are about 4-6 inches long. For mature heads, harvest when the leaves are about 8-12 inches long.
2. **Harvesting Method:** To harvest, simply cut the entire head of pechay at the base with a sharp knife. You can also harvest individual leaves as needed.
3. **Succession Planting:** To ensure a continuous harvest, consider succession planting. This means planting new seeds every 2-3 weeks.
Troubleshooting
Even with the best care, you might encounter some challenges along the way. Here are a few common problems and how to address them:
* **Pests:** As mentioned earlier, aphids, cabbage worms, and flea beetles can be a nuisance. Regularly inspect your plants and use organic pest control methods.
* **Bolting:** Bolting occurs when the plant prematurely flowers, usually due to heat stress. To prevent bolting, plant pechay in the spring or fall when temperatures are cooler. Provide shade during hot weather.
* **Yellowing Leaves:** Yellowing leaves can be a sign of nutrient deficiency or overwatering. Make sure your plants are getting enough nutrients and that the soil is well-drained.
* **Root Rot:** Root rot is caused by overwatering. Make sure the soil is well-drained and avoid watering too frequently.
Enjoying Your Homegrown Pechay
Now that you’ve harvested your homegrown pechay, it’s time to enjoy the fruits (or rather, vegetables) of your labor! Pechay is incredibly versatile and can be used in a variety of dishes.
* **Stir-fries:** Pechay is a classic ingredient in stir-fries. Simply chop it up and add it to your favorite stir-fry recipe.
* **Soups:** Pechay adds a delicious and nutritious boost to soups. Add it to your favorite soup recipe during the last few minutes of cooking.
Conclusion
So, there you have it! Growing your own pechay isn’t just a gardening project; it’s a gateway to fresher, more flavorful meals and a deeper connection with your food. We’ve walked you through the simple steps, from seed to harvest, and hopefully, dispelled any myths about it being a difficult undertaking. The truth is, with a little patience and the right conditions, you can enjoy a continuous supply of this nutritious leafy green right from your backyard or even your balcony.
Why is this DIY trick a must-try? Because it puts you in control. You know exactly what goes into your pechay – no harmful pesticides, no long-distance transportation, just pure, unadulterated goodness. Imagine the satisfaction of serving a stir-fry featuring pechay you nurtured from a tiny seed! Plus, it’s incredibly cost-effective. A single packet of seeds can yield multiple harvests, saving you money in the long run.
But the benefits extend beyond the practical. Gardening is therapeutic. It’s a chance to de-stress, connect with nature, and witness the miracle of growth firsthand. And when you’re growing something as versatile and delicious as pechay, the rewards are even greater.
Feeling adventurous? Try different varieties of pechay! There’s the classic green-stemmed variety, but you can also explore the white-stemmed types or even the baby pechay for a more delicate flavor. Experiment with different planting schedules to ensure a continuous harvest throughout the growing season. Consider companion planting – marigolds, for example, can help deter pests naturally. You can also try growing pechay in containers if you have limited space. A sunny windowsill or balcony can be transformed into a mini-vegetable garden.
We’ve given you the foundation, now it’s time to build your own pechay empire! Don’t be afraid to get your hands dirty, experiment, and learn from your experiences. Every garden is unique, and every gardener has their own style. The most important thing is to have fun and enjoy the process.
We are confident that you’ll find growing your own pechay a rewarding experience. The taste of freshly harvested pechay is simply unmatched. It’s crisper, sweeter, and more vibrant than anything you can buy in the store.
So, what are you waiting for? Grab some seeds, find a sunny spot, and get planting! We’re eager to hear about your experiences. Share your photos, tips, and challenges in the comments below. Let’s create a community of pechay enthusiasts and inspire others to embrace the joy of growing their own food. Let us know if you have any questions, we are here to help!
Frequently Asked Questions (FAQ)
What is the best time of year to plant pechay?
Pechay thrives in cooler weather, making spring and fall the ideal times to plant. In warmer climates, you can grow pechay during the winter months. Avoid planting during the hottest part of summer, as high temperatures can cause the plants to bolt (go to seed prematurely), resulting in a bitter taste. If you live in a region with mild winters, you can even enjoy a continuous harvest by staggering your planting schedule. Start seeds indoors 4-6 weeks before the last expected frost in spring, or direct sow seeds in the garden in late summer or early fall.
How much sunlight does pechay need?
Pechay needs at least 4-6 hours of direct sunlight per day to grow well. If you’re growing pechay indoors, place it near a sunny window or use grow lights to supplement natural light. Insufficient sunlight can lead to leggy growth and reduced yields. If you notice your pechay plants stretching towards the light, it’s a sign that they need more sun.
What kind of soil is best for growing pechay?
Pechay prefers well-drained, fertile soil that is rich in organic matter. Amend your garden soil with compost or well-rotted manure before planting to improve its fertility and drainage. A slightly acidic to neutral soil pH (around 6.0 to 7.0) is ideal. You can test your soil pH using a soil testing kit available at most garden centers. If your soil is too acidic, you can add lime to raise the pH.
How often should I water pechay?
Pechay needs consistent moisture to thrive. Water deeply and regularly, especially during dry periods. Aim to keep the soil consistently moist but not waterlogged. Overwatering can lead to root rot, so make sure your soil has good drainage. A good rule of thumb is to water when the top inch of soil feels dry to the touch. Mulching around your pechay plants can help retain moisture and suppress weeds.
What are some common pests and diseases that affect pechay?
Pechay can be susceptible to pests such as aphids, cabbage worms, and flea beetles. Regularly inspect your plants for signs of infestation and take action promptly. You can use organic pest control methods such as insecticidal soap, neem oil, or handpicking the pests off the plants. Diseases such as downy mildew and damping-off can also affect pechay. Ensure good air circulation around your plants and avoid overwatering to prevent these diseases.
How do I harvest pechay?
You can harvest pechay when the leaves are about 6-8 inches long. You can harvest the entire plant at once or harvest individual leaves as needed. To harvest the entire plant, cut it off at the base with a sharp knife. To harvest individual leaves, start with the outer leaves and work your way inwards. Harvesting regularly will encourage the plant to produce more leaves.
Can I grow pechay in containers?
Yes, pechay can be successfully grown in containers. Choose a container that is at least 8-12 inches deep and wide to allow enough room for the roots to grow. Use a well-draining potting mix and water regularly. Place the container in a sunny location that receives at least 4-6 hours of direct sunlight per day.
How can I prevent pechay from bolting?
Bolting is when a plant prematurely flowers and goes to seed, often resulting in a bitter taste. To prevent pechay from bolting, avoid planting during the hottest part of summer and provide consistent moisture. You can also choose bolt-resistant varieties of pechay. If you notice your pechay plants starting to bolt, harvest them immediately to salvage as much of the leaves as possible.
What are some ways to use pechay in cooking?
Pechay is a versatile leafy green that can be used in a variety of dishes. It can be stir-fried, steamed, boiled, or added to soups and stews. It’s also delicious in salads and sandwiches. Pechay pairs well with garlic, ginger, soy sauce, and sesame oil.
How do I store harvested pechay?
To store harvested pechay, wrap it loosely in a damp paper towel and place it in a plastic bag in the refrigerator. It will keep for up to a week. Avoid washing the pechay before storing it, as this can promote spoilage. Wash it just before you’re ready to use it.


Leave a Comment