

Growing Blueberries from Seeds might seem like a daunting task, but trust me, the satisfaction of nurturing a tiny seed into a thriving blueberry bush is absolutely worth the effort! Forget those expensive nursery plants for a moment – we’re diving into the wonderful world of DIY propagation, and you’ll be amazed at how rewarding it can be.
Blueberries have a rich history, deeply intertwined with Native American cultures who not only cherished them for their delicious flavor but also recognized their potent medicinal properties. For centuries, these vibrant berries have been a symbol of health and abundance. Now, you can bring that legacy into your own backyard!
Why bother with growing blueberries from seeds when you can just buy a plant? Well, for starters, it’s incredibly cost-effective. Plus, it allows you to cultivate unique varieties that might not be readily available at your local garden center. More importantly, it’s a fantastic learning experience that connects you to the natural world in a profound way. Imagine the pride you’ll feel when you harvest your first handful of homegrown blueberries, knowing you nurtured them from the very beginning. This DIY project is perfect for anyone looking to add a personal touch to their garden and enjoy the freshest, most flavorful blueberries imaginable. So, let’s get started and unlock the secrets to successfully growing blueberries from seeds!
Growing Blueberries from Seeds: A Comprehensive DIY Guide
Hey there, fellow gardening enthusiasts! Ever dreamt of having a blueberry patch bursting with juicy, homegrown goodness? While most folks propagate blueberries from cuttings or established plants, I’m here to tell you that growing them from seeds is totally doable – albeit a bit more challenging and time-consuming. But trust me, the satisfaction of nurturing a blueberry plant from a tiny seed is incredibly rewarding! So, grab your gardening gloves, and let’s dive into this exciting project.
Understanding the Challenge (and Why It’s Worth It!)
Before we get started, let’s be real: growing blueberries from seed isn’t a walk in the park. It requires patience, attention to detail, and a good understanding of blueberry needs. Here’s why:
* Long Germination Time: Blueberry seeds can take weeks, even months, to germinate.
* Slow Growth: Seedlings grow slowly, so you’ll need to be patient.
* Specific Soil Requirements: Blueberries are acid-loving plants, so you’ll need to provide the right soil conditions.
* Genetic Variation: Plants grown from seed may not be identical to the parent plant, meaning the fruit characteristics could vary.
But don’t let that scare you off! The benefits are equally compelling:
* Cost-Effective: Starting from seed is much cheaper than buying established plants.
* Unique Varieties: You might end up with a blueberry variety that’s uniquely yours.
* Deep Satisfaction: There’s nothing quite like the feeling of accomplishment when you harvest blueberries from a plant you grew from seed.
Gathering Your Supplies
Okay, let’s get practical. Here’s what you’ll need to embark on this blueberry-growing adventure:
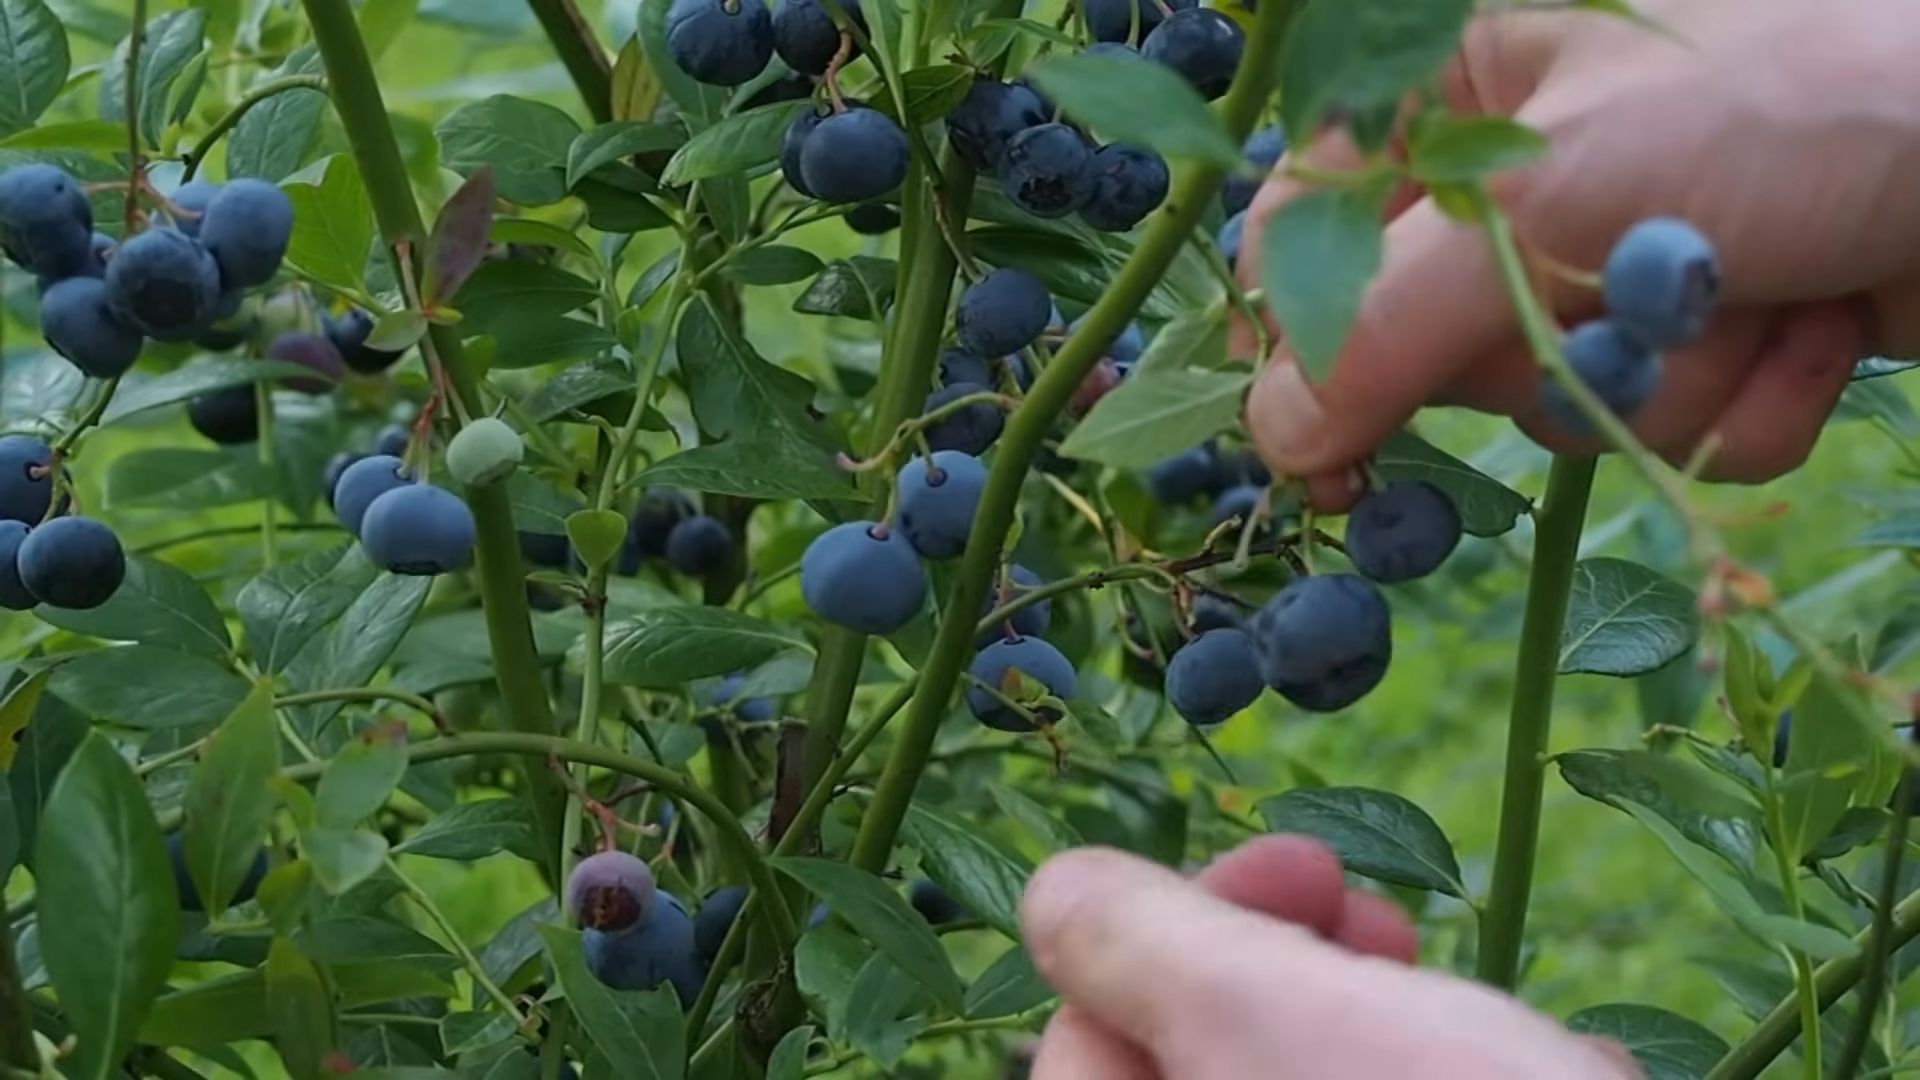
* Ripe Blueberries: Choose organic blueberries if possible, to avoid any unwanted chemicals. You can use fresh or frozen berries.
* Distilled Water: Tap water can contain minerals that might hinder germination.
* Small Bowls or Containers: For soaking and separating the seeds.
* Fine-Mesh Sieve or Cheesecloth: To help separate the seeds from the pulp.
* Paper Towels: For drying the seeds.
* Seed Starting Trays or Small Pots: With drainage holes, of course!
* Peat Moss: A key ingredient for acidic soil.
* Perlite or Vermiculite: To improve drainage and aeration.
* Sphagnum Moss: To help retain moisture and acidity.
* Spray Bottle: For gentle watering.
* Clear Plastic Wrap or a Humidity Dome: To create a humid environment for germination.
* Grow Lights (Optional): If you don’t have a sunny windowsill.
* pH Meter or Soil Testing Kit: To monitor soil acidity.
* Sulfur (Optional): To lower soil pH if needed.
* Slow-Release Acid-Loving Fertilizer: Once the seedlings are established.
Extracting and Preparing the Blueberry Seeds
This is where the fun begins! We’re going to carefully extract those tiny seeds from the blueberries.
1. Soak the Blueberries: Gently crush the blueberries in a bowl and cover them with distilled water. Let them soak for about 24 hours. This will help soften the pulp and make it easier to separate the seeds.
2. Separate the Seeds: After soaking, mash the blueberries further with your fingers. Then, add more distilled water and stir vigorously. The seeds should sink to the bottom, while the pulp will float. Carefully pour off the pulp and water, leaving the seeds behind. Repeat this process several times until you have mostly clean seeds.
3. Clean the Seeds: Transfer the seeds to a fine-mesh sieve or wrap them in cheesecloth. Rinse them thoroughly under running distilled water to remove any remaining pulp.
4. Dry the Seeds: Spread the cleaned seeds on a paper towel in a single layer. Let them air dry completely for several days. Make sure they’re in a well-ventilated area and out of direct sunlight. This is crucial to prevent mold growth.
5. Stratification (Cold Treatment): Blueberry seeds need a period of cold stratification to break their dormancy. Place the dried seeds in a small plastic bag or container filled with slightly moistened sphagnum moss or vermiculite. Seal the bag and store it in the refrigerator (not the freezer!) for 60-90 days. This mimics the natural winter conditions that the seeds would experience in the wild.
Preparing the Seed Starting Mix
Blueberries thrive in acidic soil, so we need to create a seed starting mix that caters to their needs.
1. Combine the Ingredients: In a large bowl, mix equal parts of peat moss, perlite (or vermiculite), and sphagnum moss.
2. Moisten the Mix: Add distilled water gradually, mixing until the medium is evenly moist but not soggy. It should feel like a wrung-out sponge.
3. Check the pH: Ideally, the pH of your seed starting mix should be between 4.5 and 5.5. Use a pH meter or soil testing kit to check the pH. If it’s too high, you can add a small amount of sulfur to lower it. Follow the instructions on the sulfur product carefully.
Sowing the Blueberry Seeds
Now for the exciting part – planting those tiny seeds!
1. Fill the Seed Starting Trays or Pots: Fill your seed starting trays or small pots with the prepared seed starting mix. Gently press down on the mix to firm it slightly.
2. Sow the Seeds: Sprinkle the stratified blueberry seeds evenly over the surface of the soil. Don’t bury them too deep; they need light to germinate. A light dusting of sphagnum moss over the seeds is fine.
3. Water Gently: Use a spray bottle to mist the soil surface gently. Avoid overwatering, as this can lead to fungal diseases.
4. Create a Humid Environment: Cover the seed starting trays or pots with clear plastic wrap or a humidity dome to create a humid environment. This will help keep the soil moist and promote germination.
5. Provide Light and Warmth: Place the seed starting trays or pots in a warm location with bright, indirect light. If you don’t have a sunny windowsill, you can use grow lights. Maintain a temperature of around 70-75°F (21-24°C).
Caring for the Seedlings
This is where patience comes in! Germination can take several weeks, even months.
1. Monitor Moisture Levels: Check the soil moisture regularly. The soil should be consistently moist but not soggy. Mist the soil with a spray bottle as needed.
2. Ventilation: Remove the plastic wrap or humidity dome for a few hours each day to provide ventilation and prevent fungal diseases.
3. Light: Ensure the seedlings receive adequate light. If using grow lights, keep them on for 14-16 hours per day.
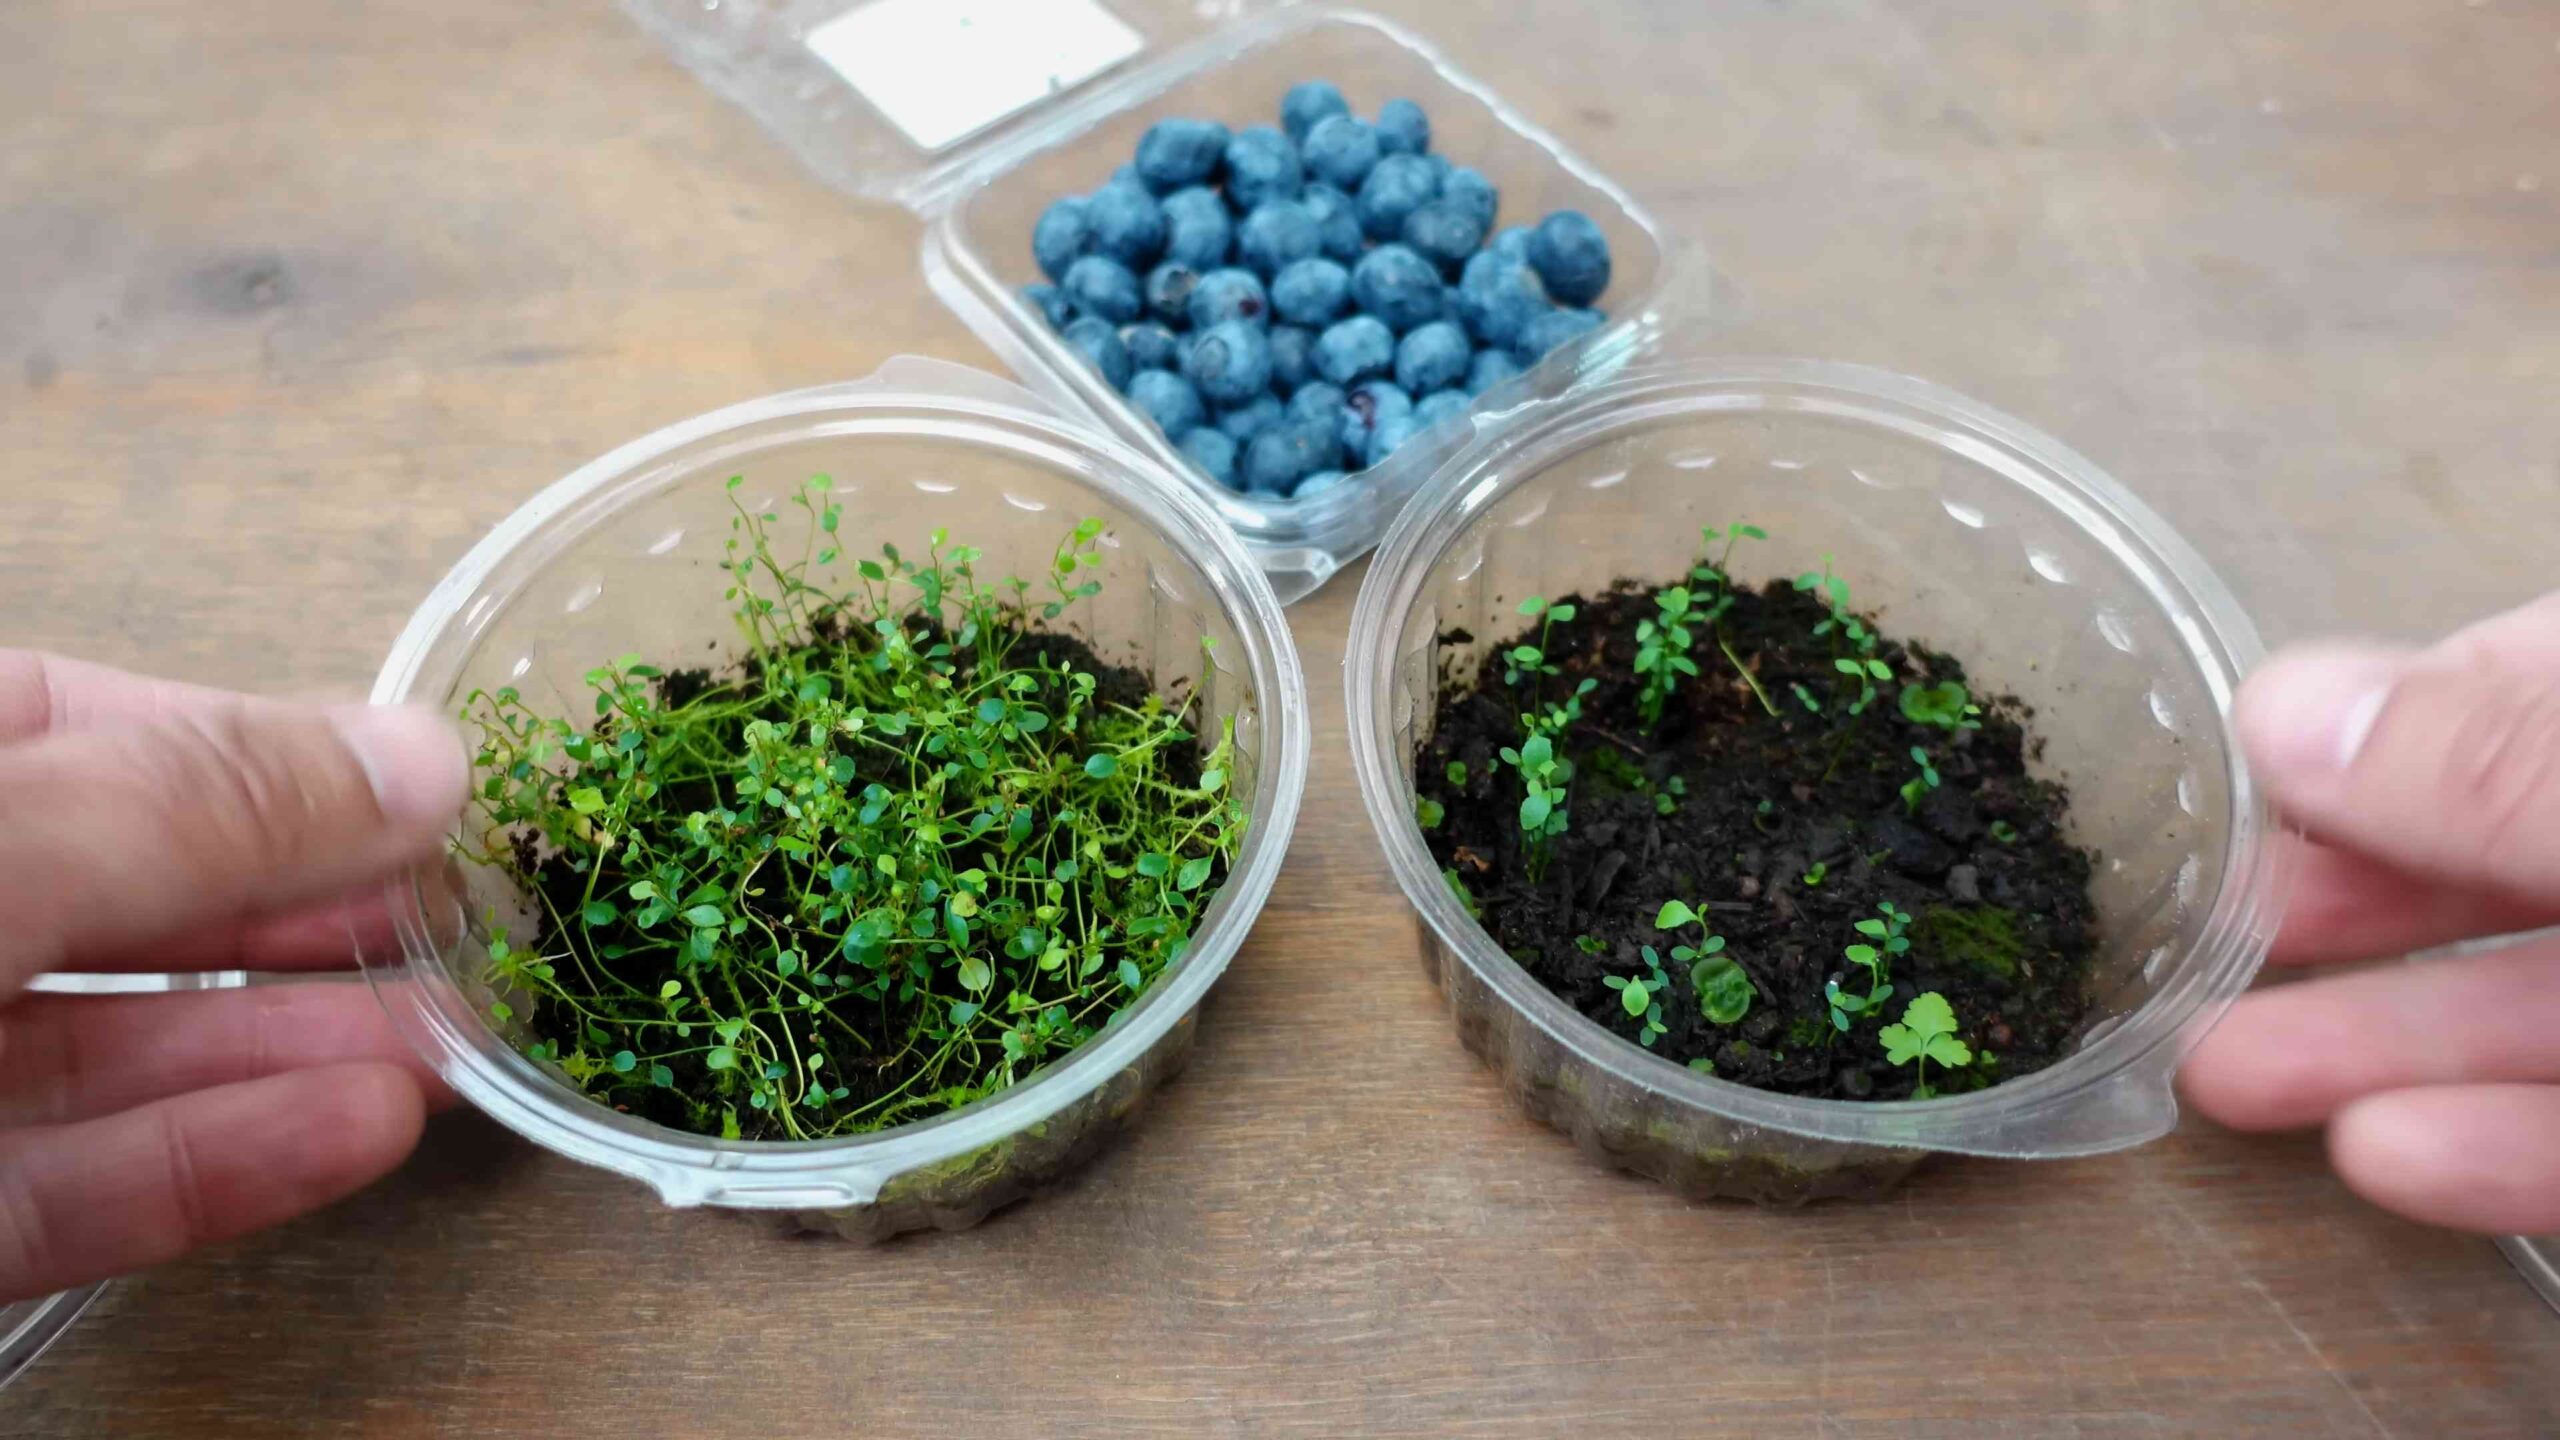
4. Thinning (If Necessary): Once the seedlings have developed a few true leaves, you may need to thin them out if they’re too crowded. Choose the strongest seedlings and carefully remove the weaker ones.
5. Fertilizing: Once the seedlings have developed several sets of true leaves, you can start fertilizing them with a diluted solution of slow-release acid-loving fertilizer. Follow the instructions on the fertilizer product carefully.
Transplanting the Seedlings
Once the seedlings are large enough to handle, it’s time to transplant them into larger pots.
1. Prepare Larger Pots: Fill larger pots (4-6 inches in diameter) with the same acidic soil mix you used for seed starting.
2. Carefully Remove the Seedlings: Gently loosen the soil around the seedlings and carefully lift them out of the seed starting trays or pots. Be careful not to damage the roots.
3. Transplant the Seedlings: Plant each seedling in a larger pot, making sure the top of the root ball is level with the soil surface.
4. Water Thoroughly: Water the transplanted seedlings thoroughly.
5. Acclimatize to Outdoor Conditions: Gradually acclimatize the seedlings to outdoor conditions by placing them in a sheltered location for a few hours each day, gradually increasing the amount of time they spend outdoors.
Long-Term Care
Blueberries are relatively low-maintenance plants, but they do require some specific care to thrive.
1. Watering: Water regularly, especially during dry periods. Blueberries prefer consistently moist soil, but avoid overwatering.
2. Fertilizing: Fertilize in the spring with a slow-release acid-loving fertilizer.
3. Pruning: Prune annually in late winter or early spring to remove dead, damaged, or crossing branches. This will help improve air circulation and promote fruit production.
4. Mulching: Apply a layer of organic mulch,
Conclusion
Embarking on the journey of growing blueberries from seeds might seem daunting, but the rewards are immeasurable. From witnessing the first tiny sprout emerge to harvesting your own plump, juicy berries, the entire process is a testament to the magic of nature and your own green thumb. This DIY trick isn’t just about saving money; it’s about connecting with the earth, understanding the life cycle of a plant, and experiencing the unparalleled satisfaction of nurturing something from its very beginning.
Think of the possibilities! Imagine rows of blueberry bushes, each one a unique individual grown from seed, offering a diverse range of flavors and characteristics. You could even experiment with different blueberry varieties, creating your own custom blend of sweetness and tartness. This method allows you to tailor your blueberry patch to your specific taste preferences and growing conditions.
Beyond the practical benefits, growing blueberries from seeds offers a therapeutic and educational experience. It’s a chance to slow down, observe the subtle changes in your seedlings, and learn about the intricate processes that sustain life. It’s also a fantastic project to share with children, fostering a love of nature and a sense of responsibility.
Don’t be afraid to experiment! Once you’ve mastered the basic technique, you can explore different soil mixes, fertilization methods, and even try grafting your seedling onto more established rootstock for faster fruit production. Consider using rainwater for irrigation, as blueberries prefer slightly acidic conditions. You can also try different methods of stratification, such as using a refrigerator or burying the seeds outdoors over the winter.
We encourage you to take the plunge and try this DIY trick for growing blueberries from seeds. It’s an investment of time and effort, but the payoff – in terms of fresh, delicious berries and a deeper connection to nature – is well worth it. Remember to be patient, persistent, and observant. Blueberries can be slow growers, but with proper care and attention, you’ll be rewarded with a bountiful harvest for years to come.
And most importantly, we want to hear about your experience! Share your successes, your challenges, and your tips with us in the comments below. Let’s create a community of blueberry enthusiasts who are passionate about growing their own food and sharing their knowledge with others. Your insights could inspire someone else to embark on this rewarding journey. So, grab your seeds, prepare your soil, and get ready to experience the joy of growing your own blueberries from scratch. This DIY trick will change the way you think about blueberries forever.
Frequently Asked Questions (FAQ)
1. Is it really possible to grow blueberries from seeds? I thought they were usually propagated from cuttings.
Yes, it is absolutely possible to grow blueberries from seeds, although it’s true that commercial growers often use cuttings for faster and more predictable results. Growing from seed takes longer and requires more patience, but it’s a rewarding experience that allows you to cultivate unique blueberry plants with potentially different characteristics than their parent plants. The key is to understand the specific needs of blueberry seeds, particularly the need for stratification (a period of cold, moist storage) to break dormancy.
2. How long does it take to grow blueberries from seeds to the point where they produce fruit?
Growing blueberries from seeds is a long-term commitment. It typically takes 3 to 5 years for a blueberry plant grown from seed to produce a significant amount of fruit. The first year or two will primarily be focused on vegetative growth, establishing a strong root system and developing healthy foliage. Be patient and provide consistent care, and you’ll eventually be rewarded with a bountiful harvest.
3. What kind of soil is best for growing blueberries from seeds?
Blueberries thrive in acidic soil with a pH between 4.5 and 5.5. You can test your soil’s pH using a soil testing kit available at most garden centers. If your soil is not acidic enough, you can amend it with peat moss, sulfur, or other acidifying agents. A well-draining soil is also crucial to prevent root rot. A good mix for starting blueberry seeds is a combination of peat moss, perlite, and vermiculite. As the seedlings grow, you can gradually transition them to a more acidic soil mix specifically formulated for blueberries.
4. How do I stratify blueberry seeds?
Stratification is essential for breaking the dormancy of blueberry seeds and encouraging germination. There are several methods you can use:
* **Refrigerator Stratification:** Place the seeds in a damp paper towel or coffee filter, then seal them in a plastic bag or container. Store the bag in the refrigerator (not the freezer) for 60-90 days. Make sure the paper towel stays moist but not soggy.
* **Outdoor Stratification:** Sow the seeds in a seed tray or pot in the fall and leave them outdoors over the winter. The natural cold temperatures will provide the necessary stratification. Protect the seeds from rodents and birds.
5. What are the best blueberry varieties to grow from seed?
While you can technically grow any blueberry variety from seed, some varieties are known to be more vigorous and adaptable than others. Consider starting with common varieties like ‘Highbush’ or ‘Rabbiteye’ blueberries, as they are generally more forgiving and easier to grow. Keep in mind that growing from seed means you won’t necessarily get the exact same characteristics as the parent plant, so be prepared for some variation.
6. How often should I water my blueberry seedlings?
Blueberry seedlings need consistent moisture, but they don’t like to be waterlogged. Water them regularly, especially during dry periods, but allow the soil to dry out slightly between waterings. Check the soil moisture by sticking your finger into the soil – if it feels dry to the touch, it’s time to water. Use rainwater or distilled water if possible, as tap water can sometimes be too alkaline.
7. What kind of fertilizer should I use for blueberry seedlings?
Use a fertilizer specifically formulated for acid-loving plants, such as azaleas or rhododendrons. Apply the fertilizer according to the package instructions, being careful not to over-fertilize, as this can damage the seedlings. A slow-release fertilizer is a good option for providing a steady supply of nutrients. You can also amend the soil with organic matter, such as compost or well-rotted manure, to improve its fertility and drainage.
8. How do I protect my blueberry seedlings from pests and diseases?
Blueberry seedlings are susceptible to various pests and diseases, so it’s important to take preventative measures. Monitor your seedlings regularly for signs of infestation or disease, such as leaf spots, wilting, or stunted growth. Use organic pest control methods, such as insecticidal soap or neem oil, to control pests. Ensure good air circulation around the plants to prevent fungal diseases. Remove any diseased leaves or branches promptly to prevent the spread of infection.
9. When should I transplant my blueberry seedlings into larger pots or into the ground?
Once your blueberry seedlings have developed several sets of true leaves and have a strong root system, you can transplant them into larger pots or into the ground. Choose a sunny location with well-draining, acidic soil. Dig a hole that is twice as wide as the root ball and just as deep. Gently remove the seedling from its pot and loosen the roots. Place the seedling in the hole and backfill with soil, tamping it down gently. Water thoroughly after transplanting.
10. Can I grow blueberries in containers?
Yes, blueberries can be successfully grown in containers, which is a great option if you have limited space or if your soil is not suitable for growing blueberries. Choose a large container (at least 15-20 gallons) with drainage holes. Use a potting mix specifically formulated for acid-loving plants. Water and fertilize regularly, and protect the plants from extreme temperatures. Container-grown blueberries may need to be repotted every few years as they outgrow their containers.


Leave a Comment