

Growing Java Plum at Home might seem like a tropical dream, especially if you’re not living in a traditionally tropical climate. But guess what? It’s totally achievable, and I’m here to show you how! Forget those expensive trips to the specialty fruit store; imagine plucking your own juicy, sweet Java Plums right from your backyard.
The Java Plum, also known as Jambolan or Duhat, has a rich history, deeply rooted in Southeast Asian cultures where it’s been enjoyed for centuries, not just for its delicious fruit but also for its medicinal properties. Traditionally, different parts of the tree have been used in Ayurvedic medicine. Now, you can bring a piece of that heritage to your own garden!
Why should you bother with this DIY project? Well, for starters, fresh, homegrown fruit always tastes better! Plus, growing Java Plum at home is a fantastic way to connect with nature, learn about plant care, and impress your friends and family with your gardening prowess. More importantly, you’ll have access to a healthy and delicious fruit that’s packed with antioxidants and vitamins. This guide will provide you with simple, step-by-step instructions and insider tips to ensure your Java Plum tree thrives, even if you’re a beginner gardener. Let’s get started!
Growing Java Plum (Jamun) at Home: A Comprehensive DIY Guide
Hey there, fellow plant enthusiasts! Ever dreamt of having your own Java Plum (Jamun) tree, laden with those delicious, slightly tart, and incredibly healthy fruits? Well, dream no more! Growing your own Jamun tree at home is totally achievable, and I’m here to guide you through every step of the process. It might seem daunting at first, but trust me, with a little patience and the right know-how, you’ll be enjoying homegrown Jamun in no time.
Choosing the Right Variety and Propagation Method
Before we dive into the nitty-gritty, let’s talk about choosing the right variety and how you want to start your Jamun journey.
* **Variety Selection:** While most Jamun trees produce similar-looking fruit, there are subtle differences in taste, size, and yield. Look for varieties known for their sweetness and larger fruit size. Local nurseries are your best bet for finding varieties that thrive in your specific climate. Ask them about the best options for your region.
* **Propagation Methods:** You have a few options here:
* **Seed Propagation:** This is the most common and easiest method. However, keep in mind that trees grown from seed can take longer to bear fruit (around 7-10 years) and might not be true to the parent plant.
* **Grafting:** Grafting involves joining a branch (scion) from a known, high-yielding variety onto the rootstock of another Jamun tree. This method ensures that you get the desired fruit quality and reduces the time to fruiting (around 4-5 years). It’s a bit more technical, but definitely worth considering if you want faster results.
* **Air Layering (Gootee):** This is another vegetative propagation method where you encourage root growth on a branch while it’s still attached to the parent tree. Once the roots develop, you can cut the branch and plant it. It’s a good option if you want to clone a specific tree.
For this guide, I’ll focus primarily on seed propagation, as it’s the most accessible for beginners. But I’ll also touch upon grafting briefly.
Section 1: Seed Propagation – From Seed to Sapling
Okay, let’s get our hands dirty! Here’s how to grow Jamun from seed:
1. **Collect and Prepare the Seeds:**
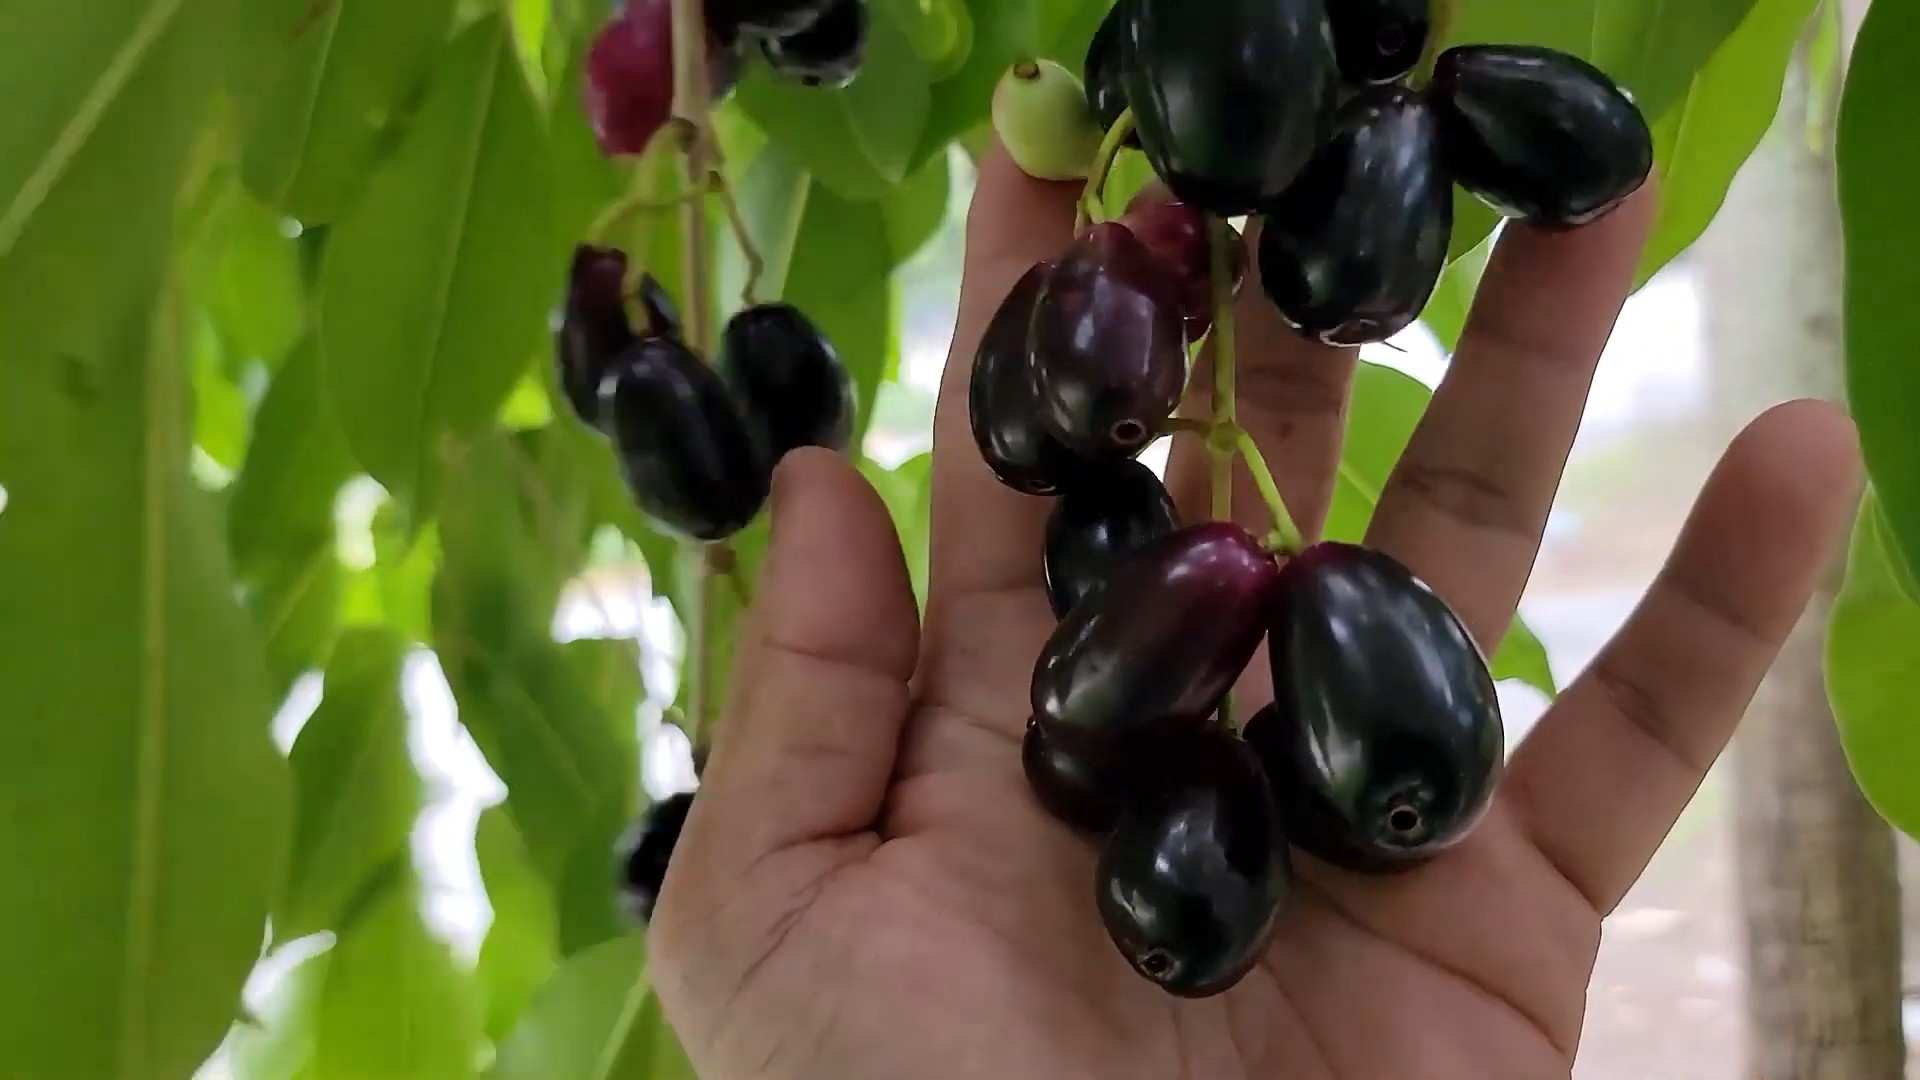
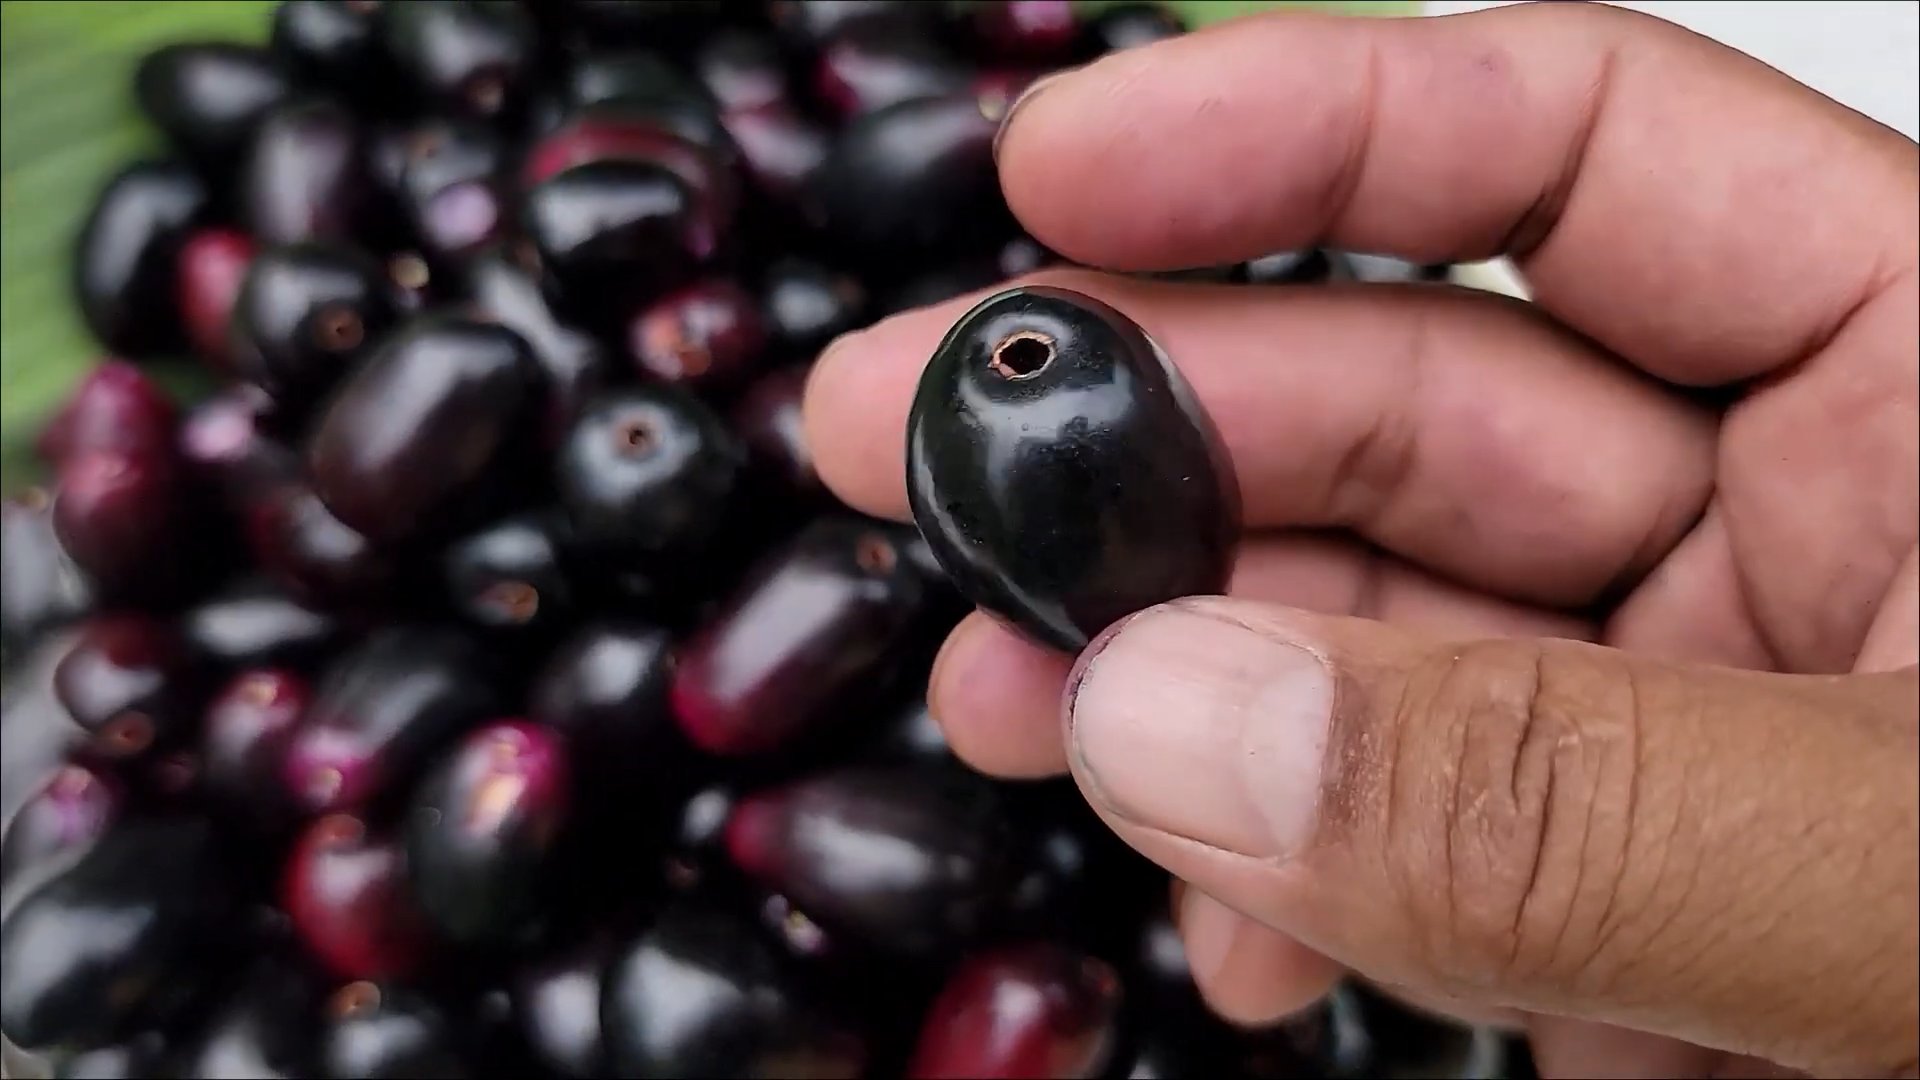
* **Source Ripe Fruits:** The first step is to get your hands on some ripe Jamun fruits. The best time to collect them is during the fruiting season (usually summer). Choose fruits that are plump, dark purple, and free from blemishes.
* **Extract the Seeds:** Once you have your fruits, gently remove the pulp to extract the seeds. You’ll find one or two seeds inside each fruit.
* **Clean the Seeds:** Thoroughly wash the seeds to remove any remaining pulp. This is important to prevent fungal growth.
* **Dry the Seeds (Slightly):** Allow the seeds to air dry for a day or two in a shaded area. Don’t let them dry out completely, as this can reduce their viability.
2. **Sowing the Seeds:**
* **Choose a Container:** Select a container with drainage holes. A seedling tray or small pots (around 4-6 inches in diameter) are ideal.
* **Prepare the Soil Mix:** Use a well-draining soil mix. A combination of garden soil, compost, and sand (in equal proportions) works well. This ensures good aeration and drainage, which are crucial for seed germination.
* **Sow the Seeds:** Sow the seeds about 1-2 inches deep in the soil. Place one or two seeds per container.
* **Water Gently:** Water the soil gently after sowing. Avoid overwatering, as this can lead to seed rot.
3. **Providing the Right Conditions:**
* **Warmth and Humidity:** Jamun seeds germinate best in warm and humid conditions. Maintain a temperature of around 70-85°F (21-29°C). You can cover the container with a plastic wrap or a clear plastic bag to create a mini-greenhouse effect. Remember to poke a few holes in the plastic for ventilation.
* **Indirect Sunlight:** Place the container in a location that receives indirect sunlight. Direct sunlight can scorch the seeds and young seedlings.
* **Water Regularly:** Keep the soil consistently moist, but not waterlogged. Check the soil moisture daily and water when the top inch feels dry.
4. **Germination and Early Care:**
* **Patience is Key:** Germination can take anywhere from 2-4 weeks, so be patient.
* **Remove the Cover:** Once the seedlings emerge, remove the plastic cover gradually to acclimate them to the ambient environment.
* **Thinning:** If you sowed multiple seeds per container and more than one seedling emerges, thin them out by removing the weaker ones. This will give the stronger seedling more space and resources to grow.
* **Fertilizing (Optional):** Once the seedlings have developed a few sets of true leaves, you can start fertilizing them with a diluted liquid fertilizer (follow the instructions on the fertilizer package).
Section 2: Transplanting and Growing Your Sapling
Now that you have a healthy Jamun sapling, it’s time to transplant it to a larger pot or directly into the ground.
1. **Choosing the Right Location:**
* **Sunlight:** Jamun trees need plenty of sunlight to thrive. Choose a location that receives at least 6-8 hours of direct sunlight per day.
* **Soil:** Jamun trees prefer well-draining soil that is rich in organic matter. Avoid planting in areas with heavy clay soil or standing water.
* **Space:** Jamun trees can grow quite large, so make sure you have enough space for them to spread out. Consider the mature size of the tree (typically 30-50 feet tall and wide) when choosing a location.
* **Wind Protection:** While Jamun trees are relatively hardy, they can be susceptible to wind damage, especially when young. Choose a location that is sheltered from strong winds.
2. **Preparing the Planting Hole:**
* **Dig a Hole:** Dig a hole that is twice as wide and as deep as the root ball of your sapling.
* **Amend the Soil:** Mix the soil you removed from the hole with compost or other organic matter. This will improve drainage and provide essential nutrients to the tree.
3. **Transplanting the Sapling:**
* **Gently Remove the Sapling:** Carefully remove the sapling from its container, being careful not to damage the roots.
* **Loosen the Roots:** Gently loosen the roots of the sapling before planting. This will encourage them to spread out and establish themselves in the new soil.
* **Place the Sapling in the Hole:** Place the sapling in the hole, making sure that the top of the root ball is level with the surrounding soil.
* **Fill the Hole:** Fill the hole with the amended soil, gently firming it around the roots.
* **Water Thoroughly:** Water the sapling thoroughly after planting.
4. **Ongoing Care:**
* **Watering:** Water the tree regularly, especially during dry periods. Young trees need more frequent watering than established trees.
* **Fertilizing:** Fertilize the tree in the spring and fall with a balanced fertilizer. Follow the instructions on the fertilizer package.
* **Mulching:** Apply a layer of mulch around the base of the tree to help retain moisture, suppress weeds, and regulate soil temperature.
* **Pruning:** Prune the tree regularly to remove dead, damaged, or crossing branches. This will help to improve air circulation and sunlight penetration.
* **Pest and Disease Control:** Monitor the tree regularly for pests and diseases. Treat any problems promptly with appropriate pesticides or fungicides.
Section 3: Grafting (A Brief Overview)
As I mentioned earlier, grafting is a faster way to get fruit from a known variety. Here’s a simplified overview:
1. **Obtain a Scion:** A scion is a piece of branch from a desired Jamun variety. It should be healthy and have several buds.
2. **Prepare the Rootstock:** The rootstock is the base of another Jamun tree (often grown from seed). Make a clean cut on the rootstock.
3. **Join the Scion and Rootstock:** There are various grafting techniques, but the most common is the cleft graft. Make a matching cut on the scion and insert it into the cut on the rootstock.
4. **Secure the Graft:** Wrap the graft union tightly with grafting tape to hold the scion and rootstock together.
5. **Provide Care:** Keep the grafted tree in a humid environment and protect it from direct sunlight.
Grafting requires practice and skill. I highly recommend watching videos and reading detailed guides before attempting it.
Section 4: Common Problems and Solutions
Even
Conclusion
So, there you have it! Growing Java Plum at home, while it might seem daunting at first, is an incredibly rewarding experience that brings a touch of the exotic right to your backyard. We’ve walked through the essential steps, from selecting the perfect seedling or cutting to nurturing your young tree into a fruit-bearing marvel. The beauty of this DIY project lies not only in the delicious, tangy-sweet Java Plums you’ll eventually harvest, but also in the connection you forge with nature and the satisfaction of cultivating something beautiful and fruitful with your own hands.
Why is this a must-try? Because store-bought Java Plums, if you can even find them, simply can’t compare to the flavor and freshness of homegrown fruit. Plus, you have complete control over the growing process, ensuring your plums are free from unwanted chemicals and pesticides. Imagine the joy of sharing your homegrown bounty with friends and family, or using them to create unique jams, jellies, and desserts.
But the benefits extend beyond just the fruit. Java Plum trees are also incredibly attractive, providing shade and adding a touch of tropical elegance to your landscape. They’re relatively low-maintenance once established, making them a perfect choice for both experienced gardeners and beginners alike.
Looking for variations or ways to personalize your Java Plum growing journey? Consider these ideas:
* Espalier Training: Train your Java Plum tree against a wall or fence for a stunning visual display and to maximize space in smaller gardens.
* Container Gardening: If you live in a colder climate, grow your Java Plum in a large container that can be moved indoors during the winter months.
* Grafting: Experiment with grafting different varieties of Java Plum onto a single tree to enjoy a wider range of flavors and fruit characteristics.
* Companion Planting: Research companion plants that can benefit your Java Plum tree, such as herbs that deter pests or flowers that attract pollinators.
Ultimately, the success of your Java Plum growing endeavor hinges on your dedication and willingness to learn. Don’t be afraid to experiment, adapt, and troubleshoot along the way. Every gardener faces challenges, but the rewards of harvesting your own delicious Java Plums are well worth the effort.
We wholeheartedly encourage you to embark on this exciting DIY adventure. Start small, be patient, and most importantly, have fun! We’re confident that you’ll be amazed by the results.
Now, we want to hear from you! Have you ever tried growing Java Plum at home? What challenges did you face, and what tips would you share with other aspiring growers? Share your experiences, photos, and questions in the comments below. Let’s create a community of Java Plum enthusiasts and learn from each other. Your insights could be invaluable to someone just starting out. Let’s get growing!
Frequently Asked Questions (FAQ)
What is the best time of year to plant a Java Plum tree?
The ideal time to plant a Java Plum tree is during the late spring or early summer, after the last frost has passed. This gives the tree ample time to establish its roots before the onset of winter. However, in warmer climates with mild winters, you can plant Java Plum trees at almost any time of year, as long as you provide adequate watering and protection from extreme temperatures. Avoid planting during the hottest months of summer, as the young tree may struggle to cope with the heat stress.
How much sunlight does a Java Plum tree need?
Java Plum trees thrive in full sunlight, requiring at least 6-8 hours of direct sunlight per day. Adequate sunlight is crucial for optimal growth, fruit production, and overall health of the tree. If you live in a particularly hot climate, some afternoon shade may be beneficial to prevent leaf scorch. However, insufficient sunlight can lead to stunted growth, reduced fruit yield, and increased susceptibility to diseases. Choose a planting location that receives ample sunlight throughout the day.
What type of soil is best for growing Java Plum?
Java Plum trees prefer well-draining soil that is rich in organic matter. The soil pH should be slightly acidic to neutral, ideally between 6.0 and 7.0. Avoid planting in heavy clay soils that retain too much water, as this can lead to root rot. If your soil is poor or compacted, amend it with compost, well-rotted manure, or other organic materials to improve drainage and fertility. A soil test can help you determine the pH and nutrient levels of your soil and guide you in making necessary amendments.
How often should I water my Java Plum tree?
Water your Java Plum tree regularly, especially during the first few years after planting. Keep the soil consistently moist, but not waterlogged. Water deeply and less frequently, allowing the soil to dry out slightly between waterings. The frequency of watering will depend on the climate, soil type, and age of the tree. During hot, dry weather, you may need to water more frequently. Mature Java Plum trees are relatively drought-tolerant, but they still benefit from regular watering, especially during fruit development.
How do I fertilize my Java Plum tree?
Fertilize your Java Plum tree in the spring and early summer with a balanced fertilizer that is specifically formulated for fruit trees. Follow the instructions on the fertilizer package carefully, and avoid over-fertilizing, as this can damage the tree. You can also amend the soil with compost or well-rotted manure to provide a slow-release source of nutrients. A soil test can help you determine the specific nutrient needs of your tree.
When will my Java Plum tree start producing fruit?
Java Plum trees typically start producing fruit within 3-5 years after planting, depending on the variety, growing conditions, and care provided. Grafted trees may fruit sooner than seedlings. To encourage fruit production, ensure that your tree receives adequate sunlight, water, and nutrients. Pruning can also help to improve air circulation and sunlight penetration, which can promote fruit development.
How do I prune my Java Plum tree?
Prune your Java Plum tree annually during the dormant season (late winter or early spring) to remove dead, damaged, or crossing branches. Pruning helps to maintain the shape of the tree, improve air circulation, and promote fruit production. Remove any suckers that grow from the base of the tree. You can also thin out the canopy to allow more sunlight to reach the interior branches.
What are some common pests and diseases that affect Java Plum trees?
Java Plum trees are generally resistant to pests and diseases, but they can be susceptible to certain problems, such as aphids, scale insects, fruit flies, and fungal diseases like anthracnose. Monitor your tree regularly for signs of pests or diseases, and take appropriate action if necessary. You can use organic pest control methods, such as insecticidal soap or neem oil, to control pests. For fungal diseases, you can use a fungicide. Proper sanitation, such as removing fallen leaves and fruit, can also help to prevent the spread of diseases.
Can I grow Java Plum in a container?
Yes, you can grow Java Plum in a container, especially if you live in a colder climate where the tree needs to be moved indoors during the winter. Choose a large container with drainage holes, and use a well-draining potting mix. Container-grown Java Plum trees will require more frequent watering and fertilization than trees grown in the ground. Prune the tree regularly to maintain its size and shape.
Are Java Plums safe to eat?
Yes, Java Plums are safe to eat when ripe. The fruit is typically dark purple or black in color and has a sweet, tangy flavor. However, unripe Java Plums can be very astringent and unpalatable. Be sure to harvest the fruit when it is fully ripe for the best flavor. Some people may experience mild digestive upset from eating large quantities of Java Plums.


Leave a Comment