

Growing Pears at Home might seem like a challenge reserved for seasoned orchardists, but I’m here to tell you it’s absolutely achievable, even in your own backyard! Imagine biting into a juicy, sun-ripened pear, bursting with flavor, knowing you nurtured it from blossom to fruit. That’s the magic we’re unlocking today.
For centuries, pears have been cultivated and cherished across cultures. From ancient Rome, where they were a symbol of prosperity, to the picturesque orchards of Europe, pears have held a special place in our culinary and agricultural history. But you don’t need rolling hills and a team of gardeners to enjoy this delicious fruit.
In today’s world, where we’re increasingly conscious of where our food comes from, growing pears at home offers a fantastic way to connect with nature, enjoy fresh, organic produce, and even save money. Plus, let’s be honest, there’s a certain satisfaction that comes with nurturing something from a tiny sapling to a fruit-bearing tree. This DIY guide will provide you with simple, effective tricks and hacks to successfully cultivate your own pear tree, regardless of your gardening experience. We’ll cover everything from choosing the right variety for your climate to protecting your precious pears from pests and diseases. So, grab your gardening gloves, and let’s get started!
Growing Pears at Home: A Beginner’s Guide to Sweet Success
Okay, so you want to grow pears at home? Awesome! Pears are delicious, relatively easy to care for once established, and there’s nothing quite like biting into a pear you grew yourself. I’m going to walk you through everything you need to know, from choosing the right variety to harvesting your bounty. Let’s get started!
Choosing the Right Pear Variety
This is probably the most important decision you’ll make. Not all pear trees are created equal, and some are much better suited to certain climates than others. Plus, some varieties need a pollinator (another pear tree nearby) to produce fruit.
* Consider your climate: Pears generally need a certain number of “chill hours” – hours below 45°F (7°C) – to properly set fruit. Check your local climate data to determine how many chill hours your area gets and choose a variety that matches. Some popular choices include:
* ‘Bartlett’: A classic, all-purpose pear. Needs about 600-800 chill hours.
* ‘D’Anjou’: Another popular choice, known for its long storage life. Needs about 800-1000 chill hours.
* ‘Bosc’: A russet-skinned pear with a spicy flavor. Needs about 600-700 chill hours.
* ‘Kieffer’: A good choice for warmer climates, needing only 200-300 chill hours.
* ‘Asian Pears (e.g., ‘Hosui’, ‘Shinseiki’): Often more disease-resistant and can tolerate warmer climates.
* Pollination: Many pear varieties are not self-pollinating, meaning they need another pear tree nearby to produce fruit. Make sure to choose two compatible varieties that bloom at the same time. Some pears are considered universal pollinators, like ‘Seckel’. Check with your local nursery for recommendations.
* Rootstock: Pear trees are often grafted onto different rootstocks, which affect the tree’s size, disease resistance, and cold hardiness. Common rootstocks include:
* Standard rootstock: Produces a full-sized tree (18-20 feet tall).
* Semi-dwarf rootstock: Produces a tree that’s about 60-70% of the size of a standard tree (12-15 feet tall).
* Dwarf rootstock: Produces a tree that’s about 40-50% of the size of a standard tree (8-10 feet tall). Dwarf trees are great for smaller yards or container gardening.
* Disease Resistance: Look for varieties that are resistant to common pear diseases like fire blight. This can save you a lot of headaches down the road.
Planting Your Pear Tree
Okay, you’ve chosen your variety (or varieties!). Now it’s time to get your pear tree in the ground.
1. Choose the Right Location: Pears need at least 6-8 hours of sunlight per day. They also need well-drained soil. Avoid planting in areas where water tends to pool.
2. Prepare the Soil: Before planting, amend the soil with compost or other organic matter. This will improve drainage and provide nutrients for your tree. I like to dig a hole that’s twice as wide as the root ball and just as deep.
3. Planting Time: The best time to plant pear trees is in the early spring or late fall, when the tree is dormant.
4. Planting Procedure:
* Carefully remove the tree from its container. Gently loosen the roots, especially if they are circling the pot.
* Place the tree in the hole, making sure the top of the root ball is level with the ground.
* Backfill the hole with soil, gently tamping it down as you go.
* Water the tree thoroughly after planting.
5. Mulch: Apply a layer of mulch around the base of the tree to help retain moisture and suppress weeds. Keep the mulch a few inches away from the trunk to prevent rot.
6. Staking (Optional): If your tree is young and the trunk is thin, you may want to stake it for the first year or two to provide support. Use soft ties to avoid damaging the bark.
Caring for Your Pear Tree
Once your pear tree is planted, it’s important to provide it with the care it needs to thrive.
1. Watering: Water your pear tree regularly, especially during dry periods. Young trees need more frequent watering than established trees. Aim for deep, infrequent watering rather than shallow, frequent watering. A good rule of thumb is to water deeply when the top inch or two of soil feels dry.
2. Fertilizing: Fertilize your pear tree in the spring with a balanced fertilizer. Follow the instructions on the fertilizer package. Avoid over-fertilizing, as this can lead to excessive growth and make the tree more susceptible to disease. I usually use a fertilizer specifically formulated for fruit trees.
3. Pruning: Pruning is essential for maintaining the shape and health of your pear tree. Prune in late winter or early spring, before the tree starts to grow.
* Remove dead, damaged, or diseased branches.
* Thin out crowded branches to improve air circulation and sunlight penetration.
* Shape the tree to encourage strong branch structure.
* For young trees, focus on developing a strong central leader (the main trunk).
* For mature trees, focus on maintaining the tree’s shape and removing any suckers (shoots that grow from the base of the tree).
4. Pest and Disease Control: Pears can be susceptible to a variety of pests and diseases, including aphids, pear psylla, codling moths, and fire blight.
* Monitor your tree regularly for signs of pests or diseases.
* Use organic pest control methods whenever possible, such as insecticidal soap or horticultural oil.
* If you suspect your tree has a disease, consult with your local nursery or extension office for advice on treatment.
* Fire blight is a serious bacterial disease that can kill pear trees. If you suspect your tree has fire blight, prune out the infected branches immediately, cutting back to healthy wood. Disinfect your pruning tools after each cut.
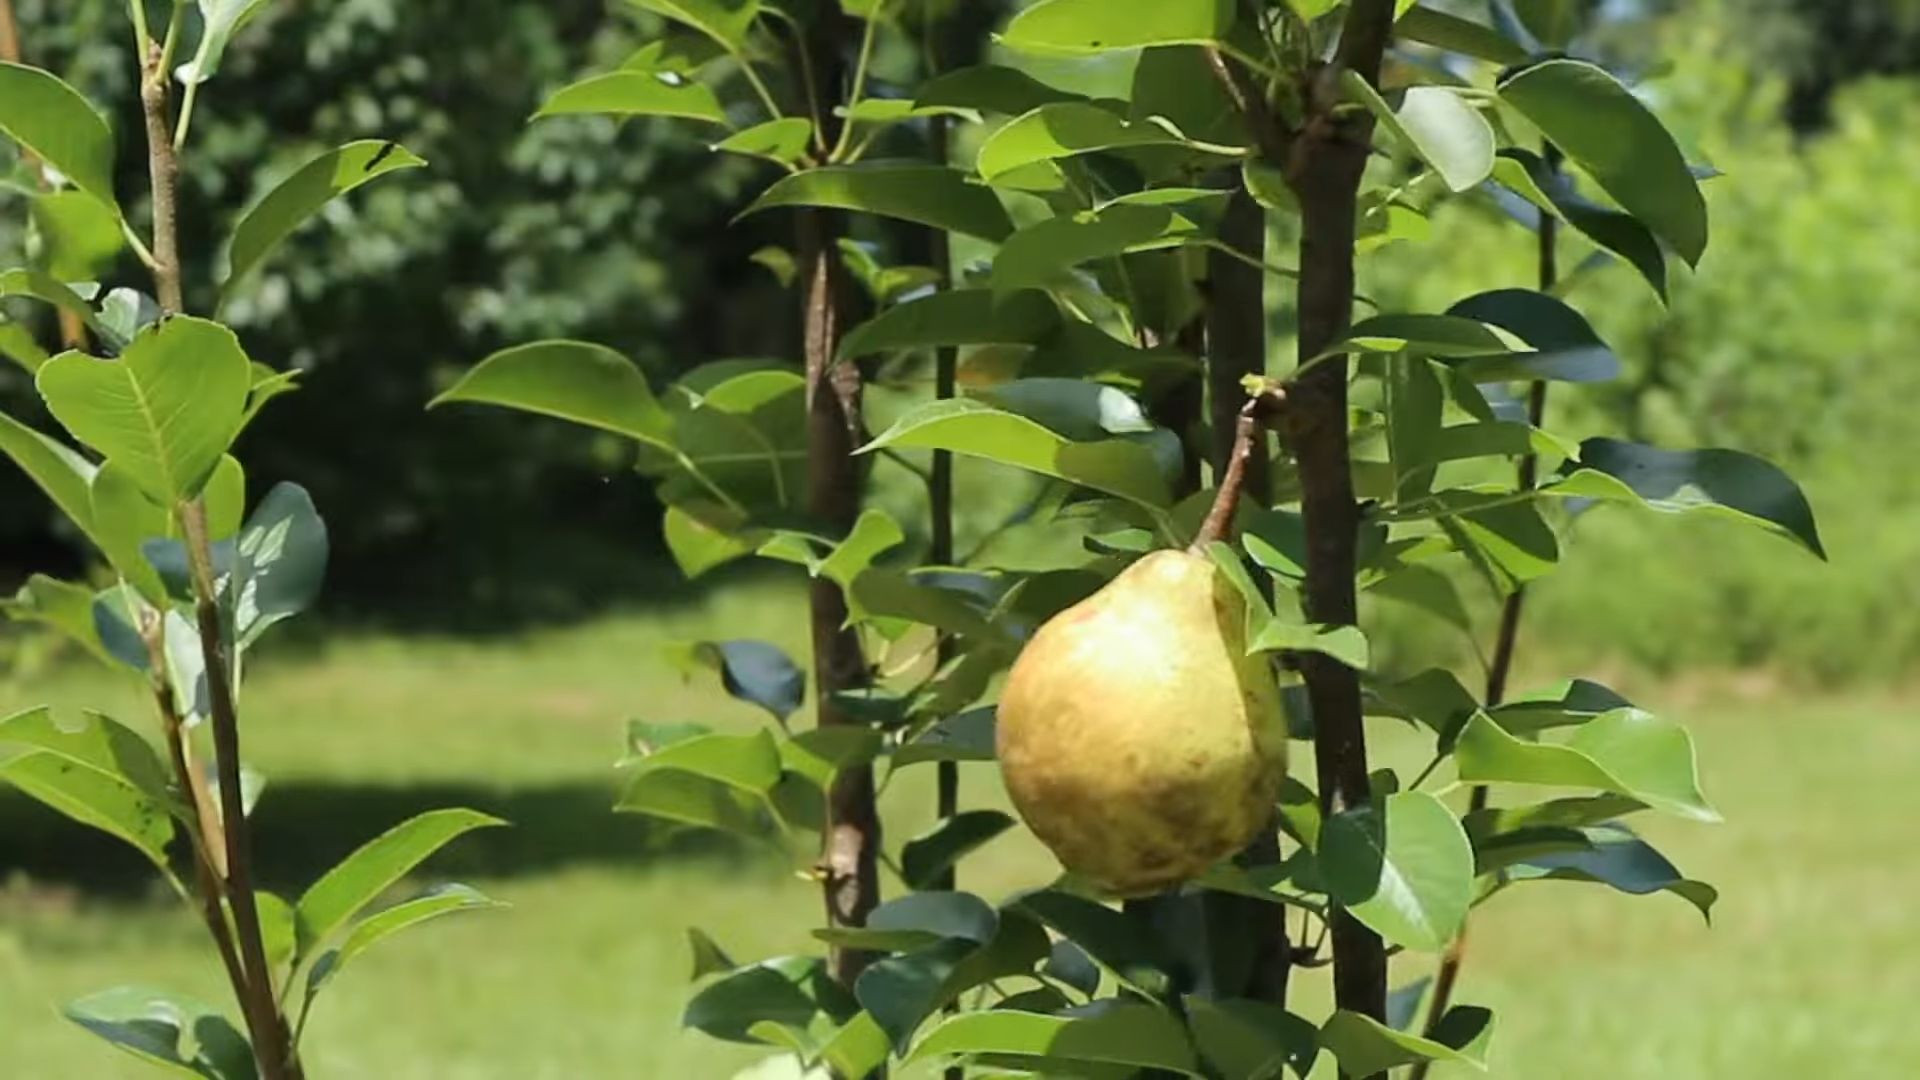
5. Thinning Fruit: This might seem counterintuitive, but thinning your pear crop can actually lead to larger, higher-quality fruit. When the pears are about the size of a dime, thin them out so that there’s only one pear per cluster and about 6-8 inches between pears. This will allow the remaining pears to get more sunlight and nutrients.
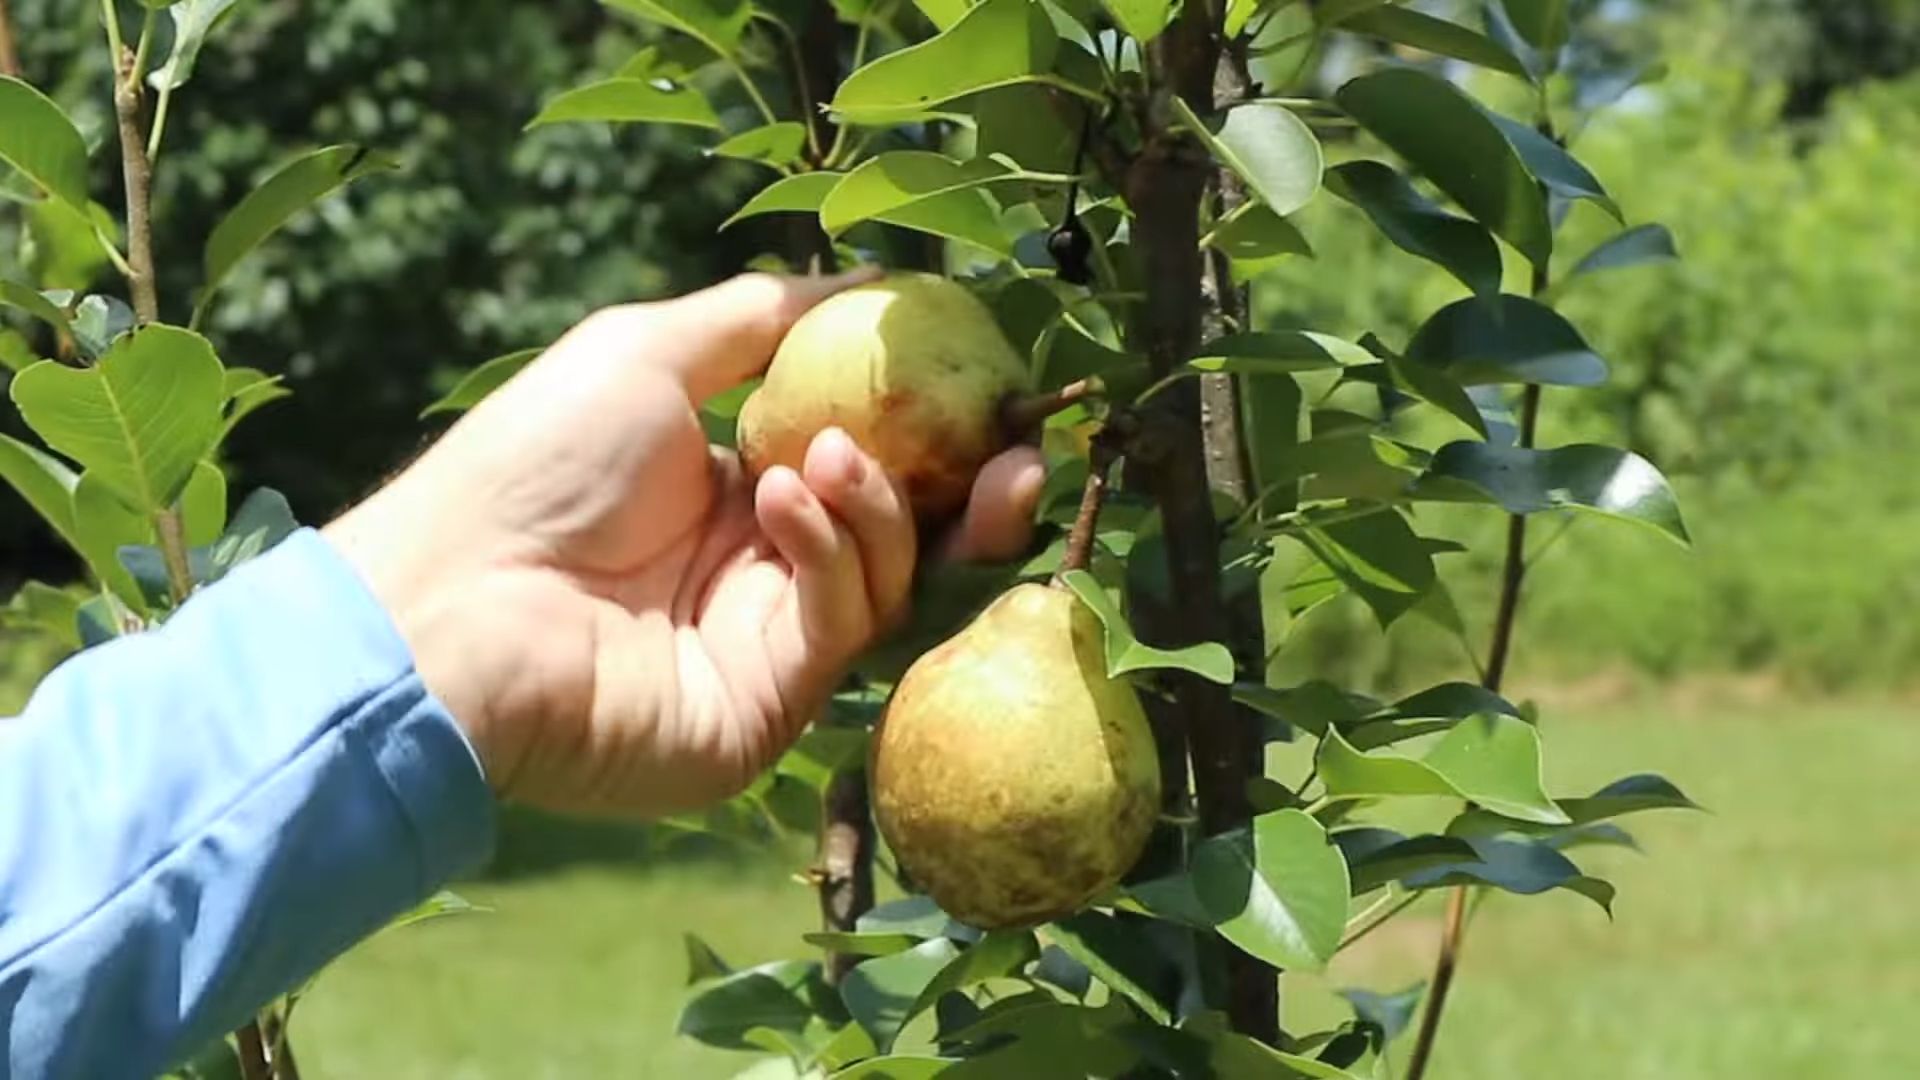
Harvesting Your Pears
The moment you’ve been waiting for! Harvesting your pears at the right time is crucial for getting the best flavor and texture.
1. Timing: Pears are best harvested when they are mature but still firm. They will ripen off the tree. The exact harvest time will depend on the variety and your climate, but generally, pears are ready to harvest in late summer or early fall.
2. Checking for Ripeness:
* Check the color: The skin color of the pear will change as it ripens. For example, ‘Bartlett’ pears will turn from green to yellow.
* Check the stem: Gently lift the pear and twist it. If it comes off the tree easily, it’s likely ripe.
* Check the flesh: You can also cut open a pear to check the flesh. It should be firm but juicy.
3. Harvesting: Gently twist the pears off the tree. Avoid bruising them.
4. Ripening: Pears ripen best at room temperature. Place them in a paper bag with a ripe banana or apple to speed up the ripening process. Check them daily for ripeness.
5. Storage: Ripe pears can be stored in the refrigerator for a few days.
Dealing with Common Pear Tree Problems
Even with the best care, you might encounter some problems along the way. Here are a few common issues and how to address them:
* Lack of Fruit:
* Pollination issues: Make sure you have a compatible pollinator nearby.
* Insufficient chill hours: Choose a variety that’s suited to your climate.
* Poor soil: Amend the soil with compost or other organic matter.
* Over-fertilizing: Too much nitrogen can lead to excessive growth and reduced fruit production.
* Improper pruning: Prune correctly to encourage fruit production.
* Pest Infestations:
* Aphids: Spray with insecticidal soap.
* Pear psylla: Use
Conclusion
So, there you have it! Growing pears at home might seem daunting at first, but with the right knowledge and a little patience, you can enjoy the unparalleled satisfaction of harvesting your own delicious, juicy pears. This DIY approach isn’t just about saving money; it’s about connecting with nature, understanding the life cycle of your food, and enjoying a fruit that tastes infinitely better than anything you can buy in a store. The difference in flavor and texture between a store-bought pear and a homegrown, perfectly ripened pear is truly remarkable.
Why is this DIY trick a must-try? Because it empowers you to control the entire process, from selecting the perfect pear variety for your climate and taste preferences to ensuring the fruit is grown organically and without harmful pesticides. You’ll be rewarded with a bounty of fresh, flavorful pears that you can enjoy in countless ways – from snacking on them fresh off the tree to using them in pies, jams, salads, and even savory dishes.
Consider these suggestions and variations to personalize your pear-growing experience:
* Espalier Training: If you have limited space, consider training your pear tree to grow flat against a wall or fence using the espalier technique. This not only saves space but also creates a beautiful and unique focal point in your garden.
* Grafting Different Varieties: Experiment with grafting different pear varieties onto a single tree. This allows you to enjoy a wider range of flavors and textures from a single plant. Just be sure to choose varieties that are compatible with each other.
* Pear Cider or Perry: If you find yourself with an abundance of pears, consider making your own pear cider, also known as perry. This refreshing beverage is a delicious way to preserve your harvest and enjoy the fruits of your labor year-round.
* Companion Planting: Research companion plants that can benefit your pear tree. Certain herbs and flowers can attract beneficial insects, deter pests, and improve soil health.
Don’t be afraid to experiment and adapt these techniques to suit your specific needs and preferences. The key is to start small, learn as you go, and enjoy the process.
We wholeheartedly encourage you to try growing pears at home. It’s a rewarding experience that will connect you with nature and provide you with a delicious and healthy source of food. Once you’ve tasted your own homegrown pears, you’ll never go back to store-bought ones.
We’d love to hear about your experiences! Share your tips, successes, and challenges in the comments below. Let’s build a community of pear-growing enthusiasts and learn from each other. Your insights could help other aspiring gardeners embark on their own pear-growing journey. So, grab your gardening gloves, choose your pear tree, and get ready to enjoy the sweet taste of success! Remember, the best time to plant a pear tree was yesterday, the next best time is today. Happy growing!
FAQ
What type of pear tree should I plant?
Choosing the right pear tree depends on your climate, space, and taste preferences. Consider factors like chill hours (the number of hours below a certain temperature required for proper fruit production), disease resistance, and fruit flavor. Some popular varieties include Bartlett, Bosc, Anjou, and Asian pears. Research which varieties thrive in your local area and select one that suits your needs. Local nurseries are an excellent resource for this information. They can provide insights into which varieties are best suited for your specific region and soil conditions. Don’t hesitate to ask them for advice!
How much space does a pear tree need?
The amount of space a pear tree needs depends on the variety and whether it’s a standard, semi-dwarf, or dwarf tree. Standard trees can grow quite large, requiring at least 20-25 feet of space between trees. Semi-dwarf trees are smaller, needing about 15-20 feet of space. Dwarf trees are the smallest, requiring only 8-10 feet of space. Consider the mature size of the tree when planting to ensure it has enough room to grow and thrive. Remember to factor in the spread of the branches as well as the root system. If space is limited, consider espalier training or growing dwarf varieties in containers.
When is the best time to plant a pear tree?
The best time to plant a pear tree is typically in the late fall or early spring, when the tree is dormant. This allows the tree to establish its roots before the growing season begins. Avoid planting during the heat of summer or when the ground is frozen. When planting, dig a hole that is twice as wide as the root ball and just as deep. Gently loosen the roots before placing the tree in the hole. Backfill with soil and water thoroughly.
How often should I water my pear tree?
Newly planted pear trees need regular watering to establish their roots. Water deeply once or twice a week, depending on the weather conditions. Established pear trees are more drought-tolerant but still benefit from occasional watering during dry spells. Avoid overwatering, as this can lead to root rot. A good rule of thumb is to water when the top inch of soil feels dry to the touch. Mulching around the base of the tree can help retain moisture and suppress weeds.
Do pear trees need to be pollinated?
Most pear trees require cross-pollination to produce fruit. This means you need to plant at least two different pear varieties that bloom at the same time. Bees and other pollinators will transfer pollen between the trees, resulting in fruit production. If you only have room for one tree, consider planting a self-pollinating variety or grafting a branch from another variety onto your existing tree. Check with your local nursery to determine which varieties are compatible for cross-pollination in your area.
How do I prune a pear tree?
Pruning is essential for maintaining the health and productivity of your pear tree. Prune in late winter or early spring, before the tree begins to grow. Remove any dead, damaged, or diseased branches. Thin out crowded branches to allow for better air circulation and sunlight penetration. Shape the tree to encourage strong branch structure and fruit production. There are many resources available online and in libraries that can provide detailed instructions on how to prune pear trees.
How do I protect my pear tree from pests and diseases?
Pear trees are susceptible to various pests and diseases, such as aphids, codling moths, and fire blight. Monitor your tree regularly for signs of infestation or disease. Use organic pest control methods whenever possible, such as insecticidal soap or neem oil. Prune away any infected branches to prevent the spread of disease. Consider using tree guards to protect the trunk from rodents and other animals. Maintaining good air circulation and sunlight penetration through proper pruning can also help prevent disease.
When will my pear tree start producing fruit?
Pear trees typically start producing fruit within 3-5 years of planting, depending on the variety and growing conditions. Dwarf trees may start producing fruit sooner than standard trees. Be patient and provide your tree with proper care, and you’ll be rewarded with a bountiful harvest in due time. Remember that proper pollination is crucial for fruit production, so ensure you have at least two compatible varieties planted nearby.
How do I know when my pears are ripe?
Pears are best harvested when they are mature but not fully ripe. They will continue to ripen off the tree. To determine if a pear is ready to harvest, gently lift it and twist. If it comes off the tree easily, it’s ready to pick. The color of the pear may also change slightly, depending on the variety. Store harvested pears in a cool, dark place to allow them to ripen fully. You can also place them in a paper bag with a banana or apple to speed up the ripening process.
Can I grow pears in containers?
Yes, you can grow dwarf pear trees in containers. Choose a large container with good drainage and use a high-quality potting mix. Water regularly and fertilize as needed. Container-grown pear trees may require more frequent watering and fertilization than those grown in the ground. Be sure to protect the container from freezing temperatures during the winter months. Container gardening is a great option for those with limited space or poor soil conditions.


Leave a Comment