

Ink Stain Removal Toothpaste: Sounds like a magic trick, right? Well, in a way, it is! We’ve all been there – a rogue pen explosion, a leaky marker, or a child’s artistic masterpiece gone astray, leaving unsightly ink stains on our favorite clothes, furniture, or even our skin. Before you resign yourself to living with the mark of the pen, let me let you in on a little secret. This simple DIY trick, using something you probably already have in your bathroom, can be a lifesaver.
While the exact origins of using toothpaste for stain removal are a bit murky, the practice likely stems from the understanding that mild abrasives and cleaning agents can lift stains without harsh chemicals. Think of it as a modern twist on age-old cleaning remedies! For generations, people have sought natural and readily available solutions to everyday problems, and this hack fits perfectly into that tradition.
Why is ink stain removal toothpaste such a game-changer? Because life happens! Spills and accidents are inevitable, and professional stain removal services can be costly and time-consuming. This DIY method offers a quick, affordable, and effective way to tackle those pesky ink stains before they set in permanently. I’m going to show you how to use this simple trick to save your favorite items and your sanity. So, grab your toothpaste, and let’s get started!
DIY Ink Stain Removal with Toothpaste: A Step-by-Step Guide
Hey there, fellow DIY enthusiasts! Ever accidentally decorated your favorite shirt with a rogue pen explosion? Don’t panic! Before you resign that garment to the “painting clothes” pile, let me share a simple, yet surprisingly effective, trick I’ve learned over the years: using toothpaste to remove ink stains. Yes, you read that right! That minty fresh paste in your bathroom can be a lifesaver when it comes to battling those pesky ink marks.
This method works best on fresh stains, but I’ve had success with older ones too, it just might take a little more elbow grease. So, grab your stained item, your trusty toothpaste (not gel!), and let’s get started!
What You’ll Need:
* Non-gel toothpaste (plain white is best!)
* A clean, soft cloth or sponge
* Water
* A clean toothbrush (optional, for stubborn stains)
* A dull knife or spoon (optional, for scraping excess ink)
* Laundry detergent
Choosing the Right Toothpaste:
It’s crucial to use the right kind of toothpaste for this hack. Avoid gel toothpastes, colored toothpastes, or those with whitening agents. These can sometimes make the stain worse or even bleach the fabric. Plain white toothpaste is your best bet. The key ingredient we’re looking for is the mild abrasive quality of the toothpaste, which helps to lift the ink from the fabric.
Testing, Testing, 1, 2, 3:
Before you go slathering toothpaste all over your favorite blouse, it’s always a good idea to test it on an inconspicuous area first. This is especially important for delicate fabrics or brightly colored items. Find a hidden seam or an inside hem and follow the steps below on that small area. If you don’t see any adverse reactions (color fading, fabric damage), you’re good to go!
Step-by-Step Ink Stain Removal:
1. Assess the Stain: Take a good look at the ink stain. How big is it? How dark is it? Is it fresh or has it been sitting for a while? This will help you determine how much toothpaste you’ll need and how much effort you’ll need to put in.
2. Pre-Treat (Optional): If the stain is particularly large or stubborn, you can try pre-treating it with a bit of water. Gently blot the stain with a damp cloth to loosen the ink. Avoid rubbing, as this can spread the stain.
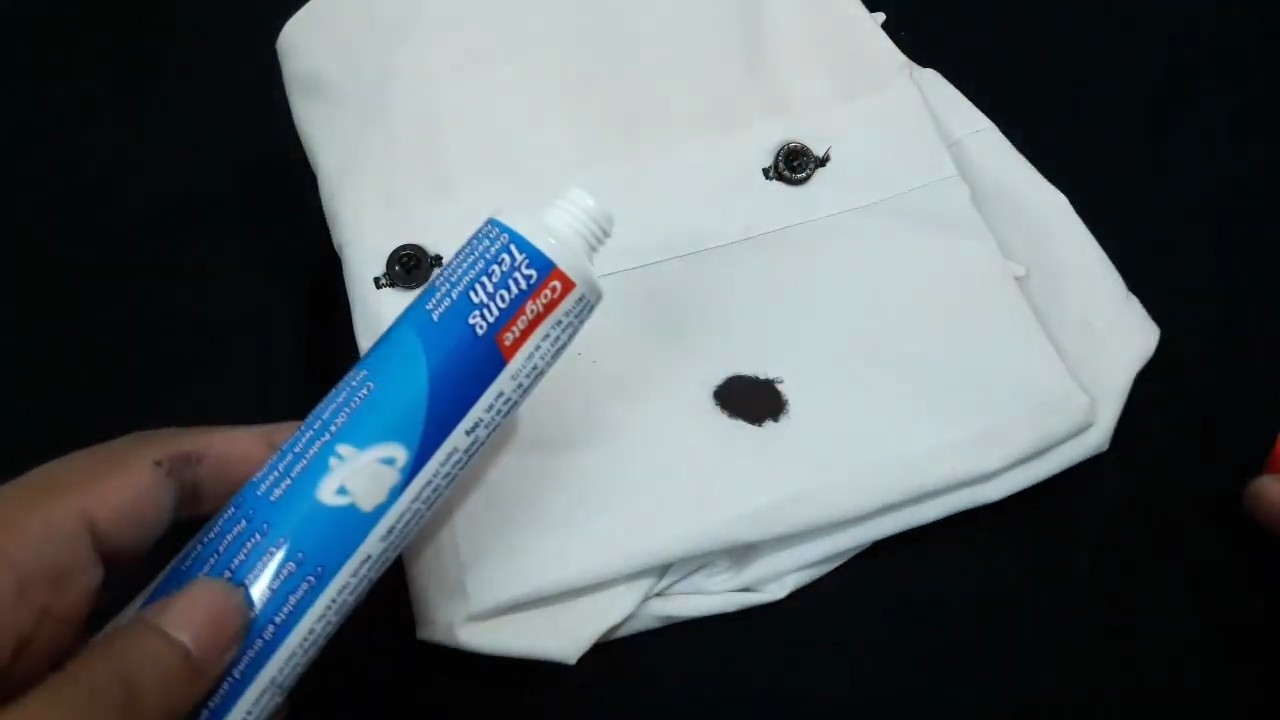
3. Apply the Toothpaste: Squeeze a generous amount of toothpaste directly onto the ink stain. Make sure the entire stain is covered with a thick layer of paste. Don’t be shy!
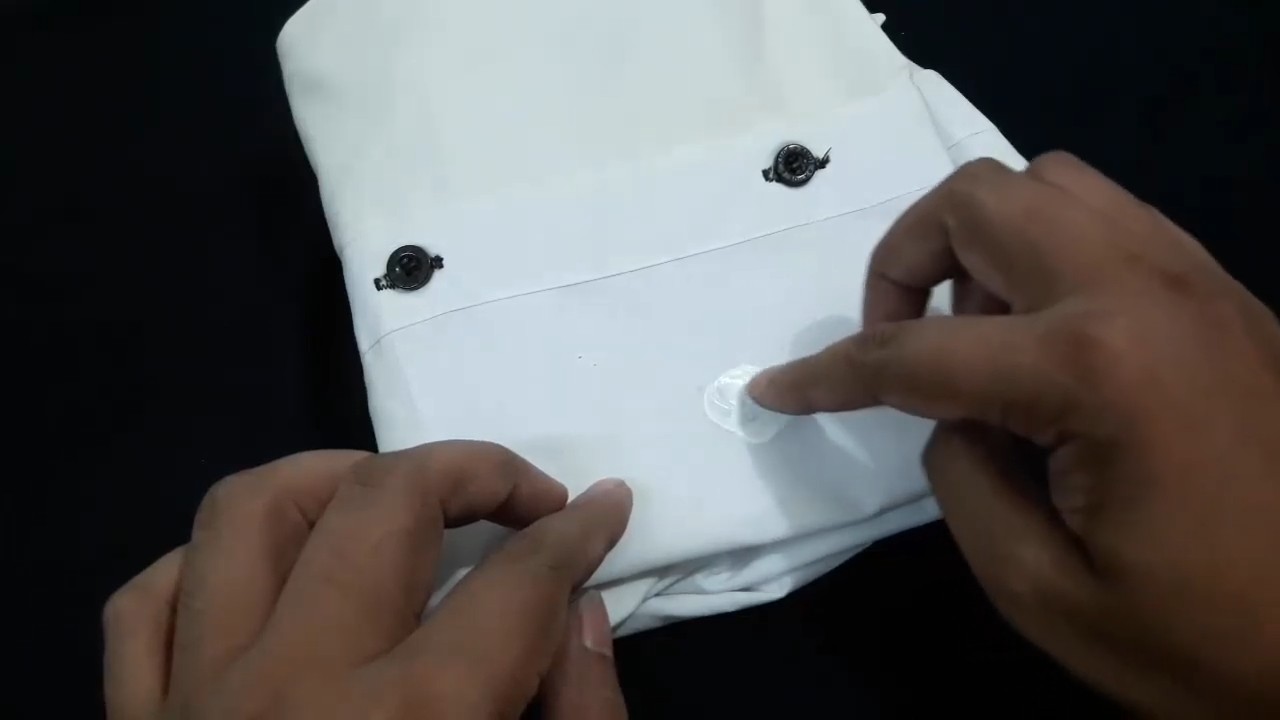
4. Gentle Scrubbing (Optional): If the stain is set in, you can use a clean, soft toothbrush to gently scrub the toothpaste into the fabric. Use small, circular motions and avoid pressing too hard. You don’t want to damage the fibers of the fabric. If you don’t have a toothbrush, you can use your finger or the soft cloth.
5. Let it Sit: This is where patience comes in. Allow the toothpaste to sit on the stain for at least 10-30 minutes. This gives the toothpaste time to work its magic and break down the ink. For older or more stubborn stains, you can even leave it on overnight. Just be sure to check the fabric periodically to make sure it’s not being damaged.
6. Rinse Thoroughly: After the toothpaste has had time to sit, rinse the area thoroughly with cold water. Make sure to remove all traces of the toothpaste. You can use your fingers to gently rub the fabric while rinsing to help dislodge any remaining ink.
7. Check for Remaining Stain: Once you’ve rinsed the area, take a close look to see if the ink stain is gone. If it’s still visible, repeat steps 3-6. You may need to repeat the process several times, especially for older or more stubborn stains.
8. Launder as Usual: Once you’re satisfied that the ink stain is gone (or significantly faded), launder the item as usual, following the care instructions on the garment’s label. This will help to remove any remaining toothpaste residue and ensure that the stain doesn’t set in permanently.
9. Air Dry: After washing, don’t put the item in the dryer until you’re absolutely sure the stain is gone. The heat from the dryer can set the stain, making it even harder to remove. Instead, air dry the item. If you still see a faint stain after air drying, repeat the toothpaste treatment before putting it in the dryer.
Dealing with Different Types of Fabrics:
The toothpaste method works best on cotton, linen, and synthetic fabrics. However, you’ll need to be more careful when dealing with delicate fabrics like silk, wool, or rayon.
* Silk: Silk is a very delicate fabric, so it’s important to be extra gentle when using the toothpaste method. Avoid scrubbing too hard and use a very small amount of toothpaste. You may also want to dilute the toothpaste with a bit of water before applying it to the stain.
* Wool: Wool is also a delicate fabric that can be easily damaged. Use a very small amount of toothpaste and avoid scrubbing. You may also want to test the toothpaste on an inconspicuous area first to make sure it doesn’t damage the fabric.
* Rayon: Rayon is a semi-synthetic fabric that can be prone to shrinking. Avoid using hot water when rinsing the toothpaste from rayon, and air dry the item to prevent shrinking.
Tackling Stubborn Stains:
Sometimes, the toothpaste method alone isn’t enough to remove a stubborn ink stain. In these cases, you can try a few other tricks:
* Rubbing Alcohol: Dab the stain with rubbing alcohol before applying the toothpaste. The alcohol can help to break down the ink and make it easier to remove. Be sure to test the rubbing alcohol on an inconspicuous area first to make sure it doesn’t damage the fabric.
* Hair Spray: Believe it or not, hair spray can also be effective at removing ink stains. Spray the stain with hair spray and let it sit for a few minutes before blotting it with a clean cloth. Then, apply the toothpaste and follow the steps above.
* Lemon Juice: Lemon juice is a natural bleaching agent that can help to lighten ink stains. Squeeze a bit of lemon juice onto the stain and let it sit for a few minutes before applying the toothpaste. Be sure to test the lemon juice on an inconspicuous area first to make sure it doesn’t bleach the fabric.
* Baking Soda Paste: Mix baking soda with a little water to form a paste. Apply the paste to the stain and let it sit for a few minutes before rinsing it off. Then, apply the toothpaste and follow the steps above. Baking soda is a mild abrasive that can help to lift the ink from the fabric.
Preventing Ink Stains in the First Place:
Of course, the best way to deal with ink stains is to prevent them from happening in the first place! Here are a few tips:
* Use pens with caps: This seems obvious, but it’s easy to forget to put the cap back on your pen. Make it a habit to always cap your pens when you’re not using them.
* Store pens properly: Store your pens in a pen holder or case to prevent them from leaking or accidentally marking your clothes or other items.
* Be careful when handling pens: Be extra careful when handling pens, especially when you’re wearing light-colored clothing. Avoid putting pens in your pockets or carrying them in your hands where they could easily leak or stain your clothes.
* Use stain-resistant fabrics: If you’re prone to spills and stains, consider wearing clothing made from stain-resistant fabrics. These fabrics are treated with a special coating that helps to repel liquids and prevent stains from setting in.
Important Considerations:
* Act Fast: The sooner you treat an ink stain, the easier it will be to remove. Fresh stains are much easier to remove than old, set-in stains.
* Avoid Heat: As mentioned earlier, avoid using heat on ink stains. Heat can set the stain and make it even harder to remove.
* Be Patient: Removing ink stains can take time and effort. Don’t get discouraged if the stain doesn’t come out immediately. Just keep repeating the steps until the stain is gone (or significantly faded).
* When to Call a Professional: If you’ve tried all of these methods and the ink stain is still visible, it may be time to call a professional cleaner. They have specialized equipment and cleaning solutions that can often remove even the most stubborn stains. This is especially important for delicate or expensive items.
So there you have it! My comprehensive guide to removing ink stains with toothpaste. I hope this helps you rescue your favorite garments from the dreaded ink monster. Remember to be patient, persistent, and always test on an inconspicuous area first. Happy stain fighting!
Conclusion
So, there you have it! This simple yet incredibly effective DIY trick using toothpaste for ink stain removal is a game-changer. Forget harsh chemicals and expensive stain removers that might damage your favorite fabrics. This method is gentle, readily accessible, and, most importantly, it works!
We’ve all been there – that dreaded moment when a pen leaks, leaving an unsightly ink stain on our clothes, furniture, or even our skin. It’s frustrating, disheartening, and often feels like a permanent mark of clumsiness. But with this toothpaste trick, you can reclaim your belongings and your peace of mind.
The beauty of this method lies in its simplicity. You likely already have toothpaste in your bathroom, making it a convenient and cost-effective solution. No need to rush to the store or wait for an online order to arrive. You can tackle that ink stain immediately, increasing your chances of complete removal.
Beyond its effectiveness, this DIY approach is also kinder to the environment. By opting for toothpaste instead of chemical-laden stain removers, you’re reducing your exposure to potentially harmful substances and minimizing your contribution to environmental pollution. It’s a win-win situation!
But don’t just take our word for it. We encourage you to try this ink stain removal hack for yourself. Experiment with different types of toothpaste – whitening toothpaste may offer a slightly stronger cleaning action, while gel toothpaste might be gentler on delicate fabrics. You can also adjust the application time and scrubbing pressure to suit the specific stain and material you’re working with. Remember to always test a small, inconspicuous area first to ensure the toothpaste doesn’t cause any discoloration or damage.
For particularly stubborn stains, you might consider pre-treating the area with a mixture of water and a mild detergent before applying the toothpaste. Alternatively, after the toothpaste treatment, you could try blotting the stain with rubbing alcohol or white vinegar for an extra boost.
And if you’re dealing with ink stains on leather, be extra cautious. Use a soft cloth and gentle pressure to avoid scratching the surface. You might also want to follow up with a leather conditioner to restore moisture and prevent cracking.
We’re confident that this toothpaste trick will become your go-to solution for ink stain removal. It’s a simple, effective, and eco-friendly way to tackle those pesky stains and keep your belongings looking their best.
So, go ahead and give it a try! We’re eager to hear about your experiences. Share your results, tips, and variations in the comments below. Let’s build a community of stain-fighting experts and help each other conquer those ink-related mishaps! Don’t forget to tell us what kind of toothpaste you used and on what type of material. Your insights could be invaluable to other readers. Happy stain removing!
Frequently Asked Questions (FAQs)
What kind of toothpaste works best for ink stain removal?
While most non-gel toothpastes will work, plain white toothpaste is generally recommended for ink stain removal. Avoid using heavily colored or gel toothpastes, as they may potentially stain the fabric further. Whitening toothpaste can sometimes be more effective due to its slightly abrasive properties, but always test it on an inconspicuous area first to ensure it doesn’t cause any discoloration. Ultimately, the best toothpaste is the one you have readily available and that you’ve tested safely on the stained material.
Will this method work on all types of ink?
This toothpaste method is most effective on water-based inks, such as those found in ballpoint pens and some felt-tip pens. It may be less effective on permanent inks, such as those used in markers or some gel pens. However, it’s still worth trying, as it can often lighten the stain and make it easier to remove with other methods. For permanent ink stains, you might need to resort to stronger solvents like rubbing alcohol or acetone, but always proceed with caution and test in an hidden area.
Can I use this method on delicate fabrics like silk or wool?
Yes, but with extreme caution. Delicate fabrics require a gentler approach. Use a soft cloth and apply the toothpaste very sparingly. Avoid rubbing vigorously, as this can damage the fibers. Instead, gently blot the stain with the toothpaste and then rinse thoroughly with cool water. It’s always best to test the toothpaste on a hidden area of the fabric first to ensure it doesn’t cause any discoloration or damage. If you’re unsure, it’s best to consult a professional dry cleaner.
How long should I leave the toothpaste on the stain?
The amount of time you leave the toothpaste on the stain will depend on the severity of the stain and the type of fabric. For light stains, 10-15 minutes may be sufficient. For more stubborn stains, you can leave it on for up to 30 minutes. However, it’s important to check the stain periodically to ensure the toothpaste isn’t causing any damage to the fabric. If you notice any discoloration or fading, rinse the toothpaste off immediately.
What if the stain doesn’t come out completely after the first try?
Don’t give up! Sometimes, it takes multiple applications to completely remove an ink stain. Repeat the process as needed, allowing the fabric to dry completely between applications. You can also try combining this method with other stain removal techniques, such as pre-treating the stain with a mixture of water and a mild detergent or blotting it with rubbing alcohol or white vinegar after the toothpaste treatment.
Will this method work on ink stains on skin?
Yes, toothpaste can be effective for removing ink stains from skin. Apply a small amount of toothpaste to the affected area and gently rub it in a circular motion. Rinse thoroughly with warm water. You may need to repeat the process a few times to completely remove the stain. If the stain is particularly stubborn, you can try using a slightly abrasive toothpaste, but be careful not to irritate the skin.
Is there anything I should avoid doing when trying to remove an ink stain with toothpaste?
Avoid using hot water, as this can set the stain and make it more difficult to remove. Also, avoid rubbing the stain vigorously, as this can damage the fabric. Instead, gently blot the stain with the toothpaste. Finally, avoid using harsh chemicals or bleach, as these can damage the fabric and potentially cause discoloration.
Can I use this method on upholstery?
Yes, you can use this method on upholstery, but be extra careful not to over-wet the fabric. Apply the toothpaste sparingly and use a damp cloth to blot the stain. Avoid rubbing vigorously, as this can spread the stain and damage the upholstery. After removing the toothpaste, use a clean, dry cloth to blot the area and remove any excess moisture. You may also want to use a vacuum cleaner to remove any remaining residue.
What other DIY stain removal tricks are there?
There are many other DIY stain removal tricks you can try. For example, you can use baking soda and vinegar to remove stains from carpets, or lemon juice and salt to remove stains from white clothing. A paste of baking soda and water can be effective for removing stains from various surfaces. The key is to research the specific stain and material you’re working with and choose a method that is appropriate and safe. Always test any DIY stain removal trick on a hidden area first to ensure it doesn’t cause any damage.
How can I prevent ink stains in the future?
Prevention is always better than cure! Store pens with the tip facing upwards to prevent leaks. Use pen caps when not in use. Avoid carrying pens in pockets or bags where they can be easily damaged. And if you do happen to get an ink stain, act quickly! The sooner you treat the stain, the easier it will be to remove.


Leave a Comment