

Natural Oven Cleaning: Is your oven looking less like a culinary haven and more like a burnt offering? Don’t despair! We’ve all been there. The good news is, you don’t need harsh chemicals or elbow grease that could rival a marathon to get your oven sparkling again. Forget those store-bought cleaners with ingredients you can’t pronounce; I’m going to show you some simple, effective, and completely natural ways to tackle that baked-on grime.
For generations, resourceful homemakers have relied on the power of natural ingredients to keep their homes clean and fresh. Think about it – before the advent of modern cleaning products, things like vinegar, baking soda, and lemon were the go-to solutions for everything from scrubbing floors to deodorizing refrigerators. These time-tested methods are not only effective but also gentler on the environment and your health. Plus, they’re often much cheaper!
Why is natural oven cleaning so important? Well, beyond the obvious aesthetic benefits of a clean oven, there are real health concerns associated with using harsh chemical cleaners. Residue from these products can linger in your oven and potentially contaminate your food the next time you cook. Nobody wants a side of toxic fumes with their dinner! This DIY guide will provide you with easy-to-follow steps and readily available ingredients to achieve a spotless oven without compromising your well-being or breaking the bank. So, let’s ditch the chemicals and embrace the power of nature to get your oven looking its best!
DIY Natural Oven Cleaning: Say Goodbye to Harsh Chemicals!
Okay, let’s face it, cleaning the oven is probably on everyone’s list of least favorite chores. The baked-on grime, the lingering smells, and the harsh chemicals in most oven cleaners? No thanks! But don’t worry, I’m going to show you how to get your oven sparkling clean using natural ingredients you probably already have in your pantry. This method is not only effective but also safer for you, your family, and the environment.
What You’ll Need
Before we dive in, let’s gather our supplies. This is a pretty simple process, so the list is short and sweet:
* Baking soda
* White vinegar
* Water
* Spray bottle
* Spatula or scraper (plastic or silicone is best to avoid scratching)
* Microfiber cloths or sponges
* Rubber gloves (optional, but recommended)
* Small bowl
* Old towel or newspaper (to protect your floor)
Step-by-Step Cleaning Guide
Alright, let’s get this oven looking brand new!
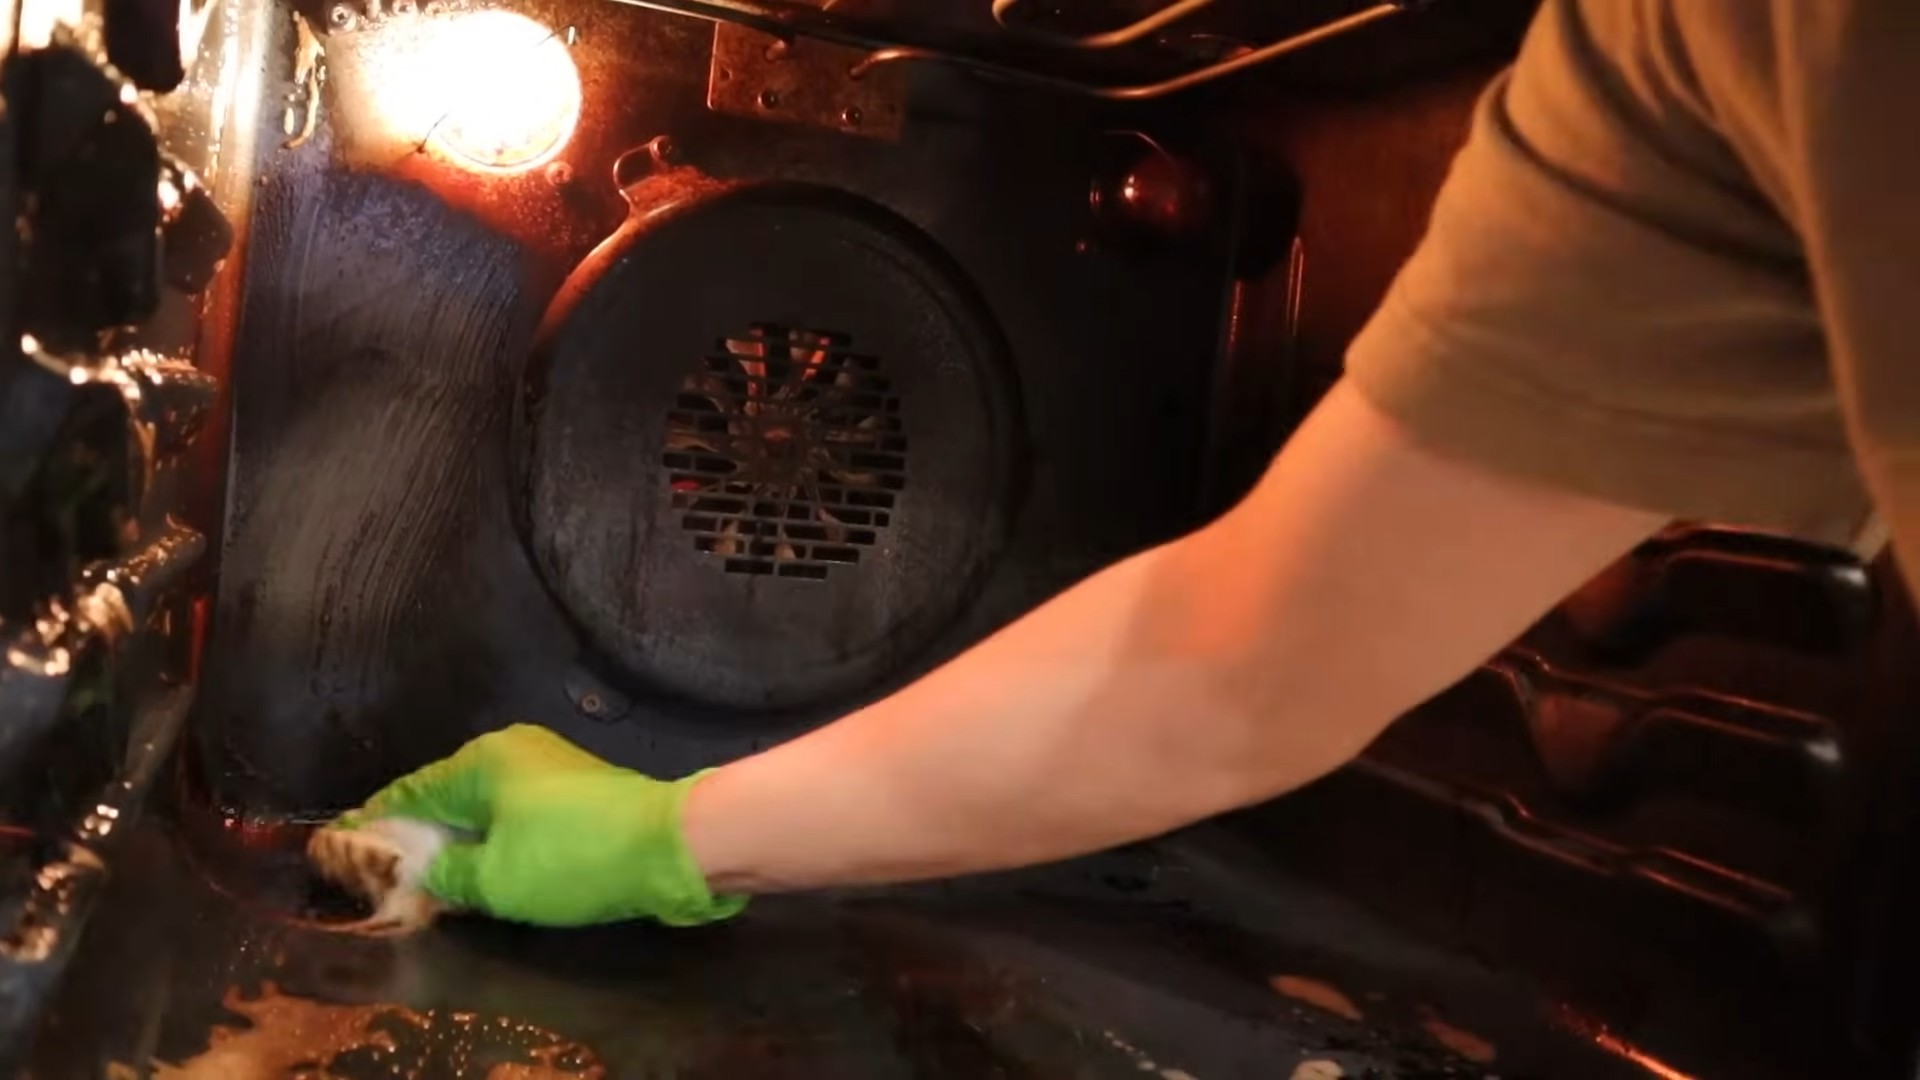
1. Prep the Oven: First things first, remove the oven racks. I usually soak mine in hot, soapy water in the sink while I’m working on the oven itself. This helps loosen the baked-on gunk. Also, remove any large debris or loose food particles from the bottom of the oven. An old towel or newspaper placed on the floor in front of the oven will protect your floor from drips and spills.
2. Make the Baking Soda Paste: In your small bowl, mix together about ½ cup of baking soda with enough water to form a thick, spreadable paste. The consistency should be similar to frosting. You might need to add a little more water or baking soda to get it just right.
3. Apply the Baking Soda Paste: Now comes the fun part (sort of!). Using your hands (with gloves on, if you prefer) or a spatula, spread the baking soda paste all over the interior surfaces of your oven. This includes the walls, the bottom, the top, and even the inside of the oven door. Avoid the heating elements! I usually apply a thicker layer to the really grimy areas.
4. Let it Sit (and Work its Magic!): This is the most important step – patience! Let the baking soda paste sit in your oven for at least 12 hours, or even better, overnight. The longer it sits, the more time it has to loosen the baked-on grease and grime. I usually do this before I go to bed so it can work its magic while I sleep.
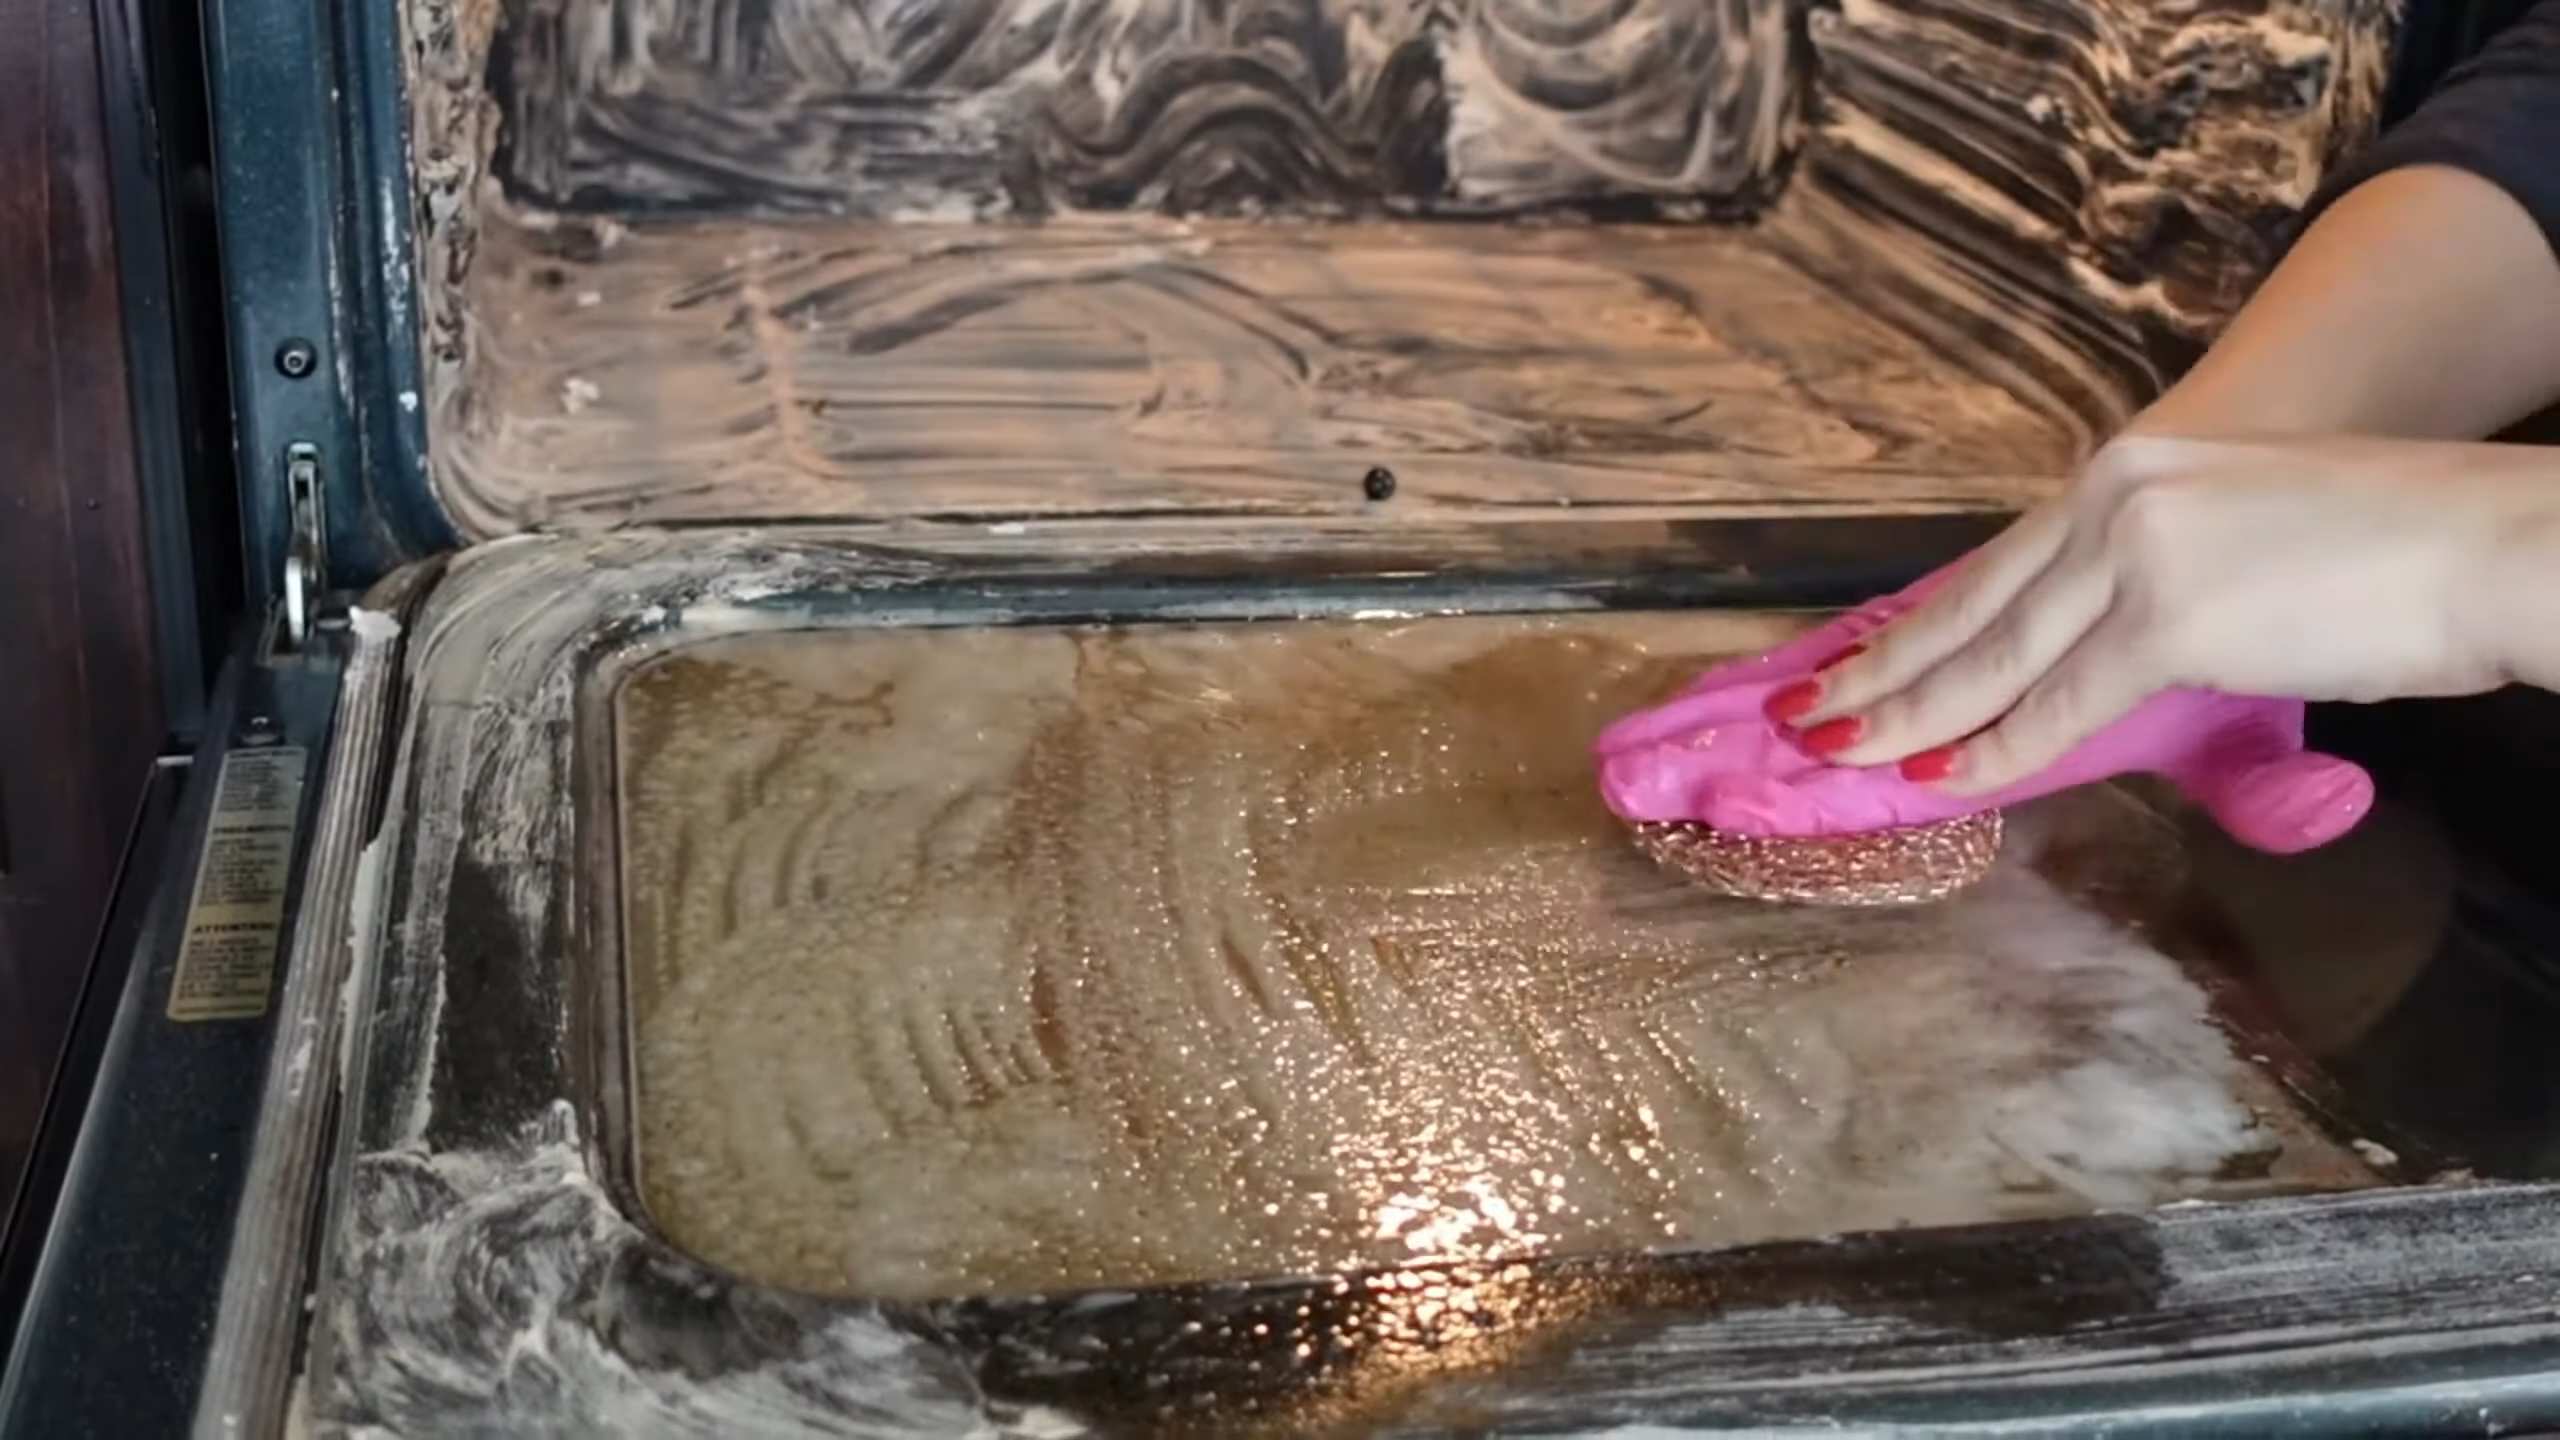
5. The Next Day: Wipe it Down: After the baking soda has had its time to work, grab your damp microfiber cloth or sponge and start wiping away the dried paste. You’ll probably need to use a little elbow grease, especially in those stubborn areas. A plastic or silicone spatula can be helpful for scraping away thicker patches of grime.
6. Vinegar Power: Once you’ve removed as much of the baking soda paste as possible, it’s time for the vinegar! Pour some white vinegar into your spray bottle. Lightly spray the interior of the oven with vinegar. The vinegar will react with any remaining baking soda, creating a foamy action that helps to further loosen any remaining residue.
7. Final Wipe Down: After spraying with vinegar, wipe down the oven one last time with a clean, damp microfiber cloth or sponge. Make sure to remove all traces of baking soda and vinegar.
8. Clean the Racks: By now, your oven racks should have been soaking for a while. Scrub them with a sponge or brush to remove any remaining grime. Rinse them thoroughly with clean water and let them dry completely.
9. Reassemble and Enjoy! Once everything is dry, replace the oven racks and you’re done! Your oven should be sparkling clean and ready to use.
Dealing with Stubborn Spots
Sometimes, even with the baking soda and vinegar combo, you might encounter some stubborn spots that just won’t budge. Here are a few tips for tackling those tough areas:
* Extra Baking Soda Paste: For particularly stubborn spots, try applying a thicker layer of baking soda paste and letting it sit for even longer – maybe even 24 hours.
* Vinegar Soak: If a spot is really resistant, try soaking a cloth in vinegar and placing it directly on the spot for a few minutes before wiping it away.
* Gentle Scrubbing: Use a non-abrasive scrubbing pad or brush to gently scrub the stubborn areas. Be careful not to scratch the oven’s surface.
Cleaning the Oven Door Glass
The oven door glass can be one of the dirtiest parts of the oven. Here’s how to clean it effectively:
1. Apply Baking Soda Paste: Just like with the interior of the oven, apply a layer of baking soda paste to the inside of the oven door glass.
2. Let it Sit: Let the paste sit for at least 30 minutes, or longer for really stubborn grime.
3. Wipe and Scrape: Use a damp cloth or sponge to wipe away the paste. A plastic scraper can be helpful for removing baked-on residue.
4. Vinegar Spray: Spray the glass with vinegar and wipe clean with a fresh cloth.
5. Outside of the Door: Don’t forget to clean the outside of the oven door with a mixture of warm water and dish soap.
Preventative Measures: Keeping Your Oven Cleaner Longer
Okay, now that your oven is sparkling, let’s talk about how to keep it that way! Here are a few tips to help prevent future messes:
* Use Oven Liners: Oven liners can catch drips and spills, preventing them from baking onto the bottom of your oven.
* Clean Up Spills Immediately: If something spills in your oven, clean it up as soon as possible before it has a chance to bake on.
* Regular Wipe-Downs: Give your oven a quick wipe-down after each use to remove any splatters or spills.
* Consider a Baking Stone or Sheet: Using a baking stone or sheet can help prevent food from dripping onto the bottom of the oven.
Why This Method Works
You might be wondering why baking soda and vinegar are so effective at cleaning ovens. Here’s the science behind it:
* Baking Soda (Sodium Bicarbonate): Baking soda is a mild alkali, which means it can help to dissolve grease and grime. It’s also a gentle abrasive, which helps to scrub away stubborn residue without scratching the oven’s surface.
* Vinegar (Acetic Acid): Vinegar is a mild acid that reacts with baking soda to create carbon dioxide gas. This fizzing action helps to loosen dirt and grime. Vinegar is also a natural disinfectant and deodorizer.
Safety First!
While this natural oven cleaning method is much safer than using harsh chemicals, it’s still important to take a few precautions:
* Wear Gloves: While baking soda and vinegar are generally safe, they can be irritating to the skin. Wearing rubber gloves can help protect your hands.
* Avoid the Heating Elements: Be careful not to get baking soda paste on the heating elements of your oven.
* Ventilation: Make sure your kitchen is well-ventilated while you’re cleaning the oven.
* Unplug the Oven: For added safety, unplug the oven before you start cleaning.
A Note on Self-Cleaning Ovens
If you have a self-cleaning oven, you might be wondering why you should bother with this method. While self-cleaning ovens can be convenient, they also use extremely high temperatures, which can release harmful fumes and damage the oven’s components. This natural cleaning method is a safer and more environmentally friendly alternative. Plus, I find that the self-cleaning function often leaves behind a white, ashy residue that still needs to be cleaned up.
Troubleshooting
* Paste is too dry: Add a little more water, a teaspoon at a time, until you reach the desired consistency.
* Paste is too runny: Add a little more baking soda, a teaspoon at a time, until you reach the desired consistency.
* Vinegar isn’t fizzing: Make sure you’ve removed as much of the baking soda paste as possible before spraying with vinegar. The fizzing action only occurs when vinegar reacts with baking soda.
* Still seeing residue: Repeat the wiping and vinegar spraying steps until all residue is gone.
Final Thoughts
So there you have it! A simple, effective, and natural way to clean your oven. I hope this guide has been helpful. Remember, a little patience and elbow grease can go a long way. Happy cleaning!
Conclusion
So, there you have it! Ditching harsh chemicals and embracing this natural oven cleaning method is more than just a trend; it’s a game-changer for your kitchen, your health, and the environment. We’ve walked you through a simple, effective process that transforms a dreaded chore into an empowering act of self-sufficiency. No more holding your breath while scrubbing with toxic fumes, no more worrying about lingering chemical residues affecting your food. This method is safe, affordable, and remarkably effective at tackling even the most stubborn baked-on grime.
But the benefits extend beyond just a sparkling clean oven. Think about the money you’ll save by using ingredients you likely already have in your pantry. Consider the peace of mind knowing you’re not exposing yourself or your loved ones to harmful chemicals. And revel in the satisfaction of creating a truly clean and healthy cooking space.
Don’t be afraid to experiment and personalize this method to suit your specific needs. For instance, if you’re dealing with particularly tough grease, you can add a tablespoon or two of dish soap to the baking soda paste for extra cleaning power. If you prefer a more fragrant cleaning experience, infuse your water with lemon peels or orange slices before heating it in the oven. The possibilities are endless!
Another variation to consider is using a pumice stone (carefully!) on particularly stubborn baked-on messes after the baking soda paste has had a chance to work its magic. Just be sure to test it in an inconspicuous area first to avoid scratching the oven surface. Remember, patience is key. Let the baking soda paste sit for at least 12 hours, or even overnight, for optimal results.
We understand that trying something new can sometimes feel daunting, but we promise you, this natural oven cleaning method is incredibly straightforward and rewarding. The results speak for themselves – a gleaming oven, a healthier home, and a lighter environmental footprint.
We wholeheartedly encourage you to give this DIY trick a try. You’ll be amazed at how easy and effective it is. And more importantly, we want to hear about your experience! Share your before-and-after photos, your tips and tricks, and any variations you’ve discovered in the comments below. Let’s build a community of eco-conscious cooks who are passionate about creating clean and healthy kitchens. Your feedback will not only inspire others but also help us refine and improve this method even further. So, go ahead, embrace the power of natural cleaning, and let us know how it goes! We can’t wait to hear from you!
Frequently Asked Questions (FAQ)
Q: Is this natural oven cleaning method safe for all types of ovens?
A: Generally, yes, this method is safe for most ovens, including electric, gas, and convection ovens. However, it’s always a good idea to consult your oven’s manufacturer’s manual for specific cleaning recommendations. Avoid using this method on self-cleaning ovens, as the high heat of the self-cleaning cycle can react negatively with the baking soda residue. Also, be cautious when using a pumice stone on delicate oven surfaces, testing it in an inconspicuous area first.
Q: How often should I use this natural oven cleaning method?
A: The frequency depends on how often you use your oven and how much it gets soiled. For most households, cleaning your oven every 3-6 months is sufficient. However, if you frequently cook messy dishes or notice a significant buildup of grease and grime, you may want to clean it more often. Regular spot cleaning of spills as they occur can also help extend the time between deep cleans.
Q: What if the baking soda paste doesn’t remove all the grime?
A: If the baking soda paste doesn’t remove all the grime on the first try, don’t despair! There are a few things you can do. First, try reapplying the paste and letting it sit for a longer period, perhaps even 24 hours. You can also try adding a tablespoon or two of dish soap to the paste for extra cleaning power. For particularly stubborn spots, a gentle scrub with a non-abrasive sponge or a pumice stone (used with caution) can help. Remember to test the pumice stone in an inconspicuous area first. In extreme cases, you might need to repeat the entire process.
Q: Can I use vinegar instead of water to make the paste?
A: While vinegar is a great natural cleaner, it’s not recommended to mix it directly with baking soda in a closed environment like an oven. The reaction between baking soda and vinegar produces carbon dioxide gas, which could potentially cause pressure buildup. It’s best to use water to make the baking soda paste and then use vinegar as a rinse after the paste has been removed.
Q: How do I clean the oven racks using this method?
A: You can clean the oven racks using the same baking soda paste. Simply soak the racks in a bathtub or large sink filled with hot water and baking soda. Let them soak for several hours or overnight, then scrub them clean with a brush or sponge. Rinse thoroughly and dry before placing them back in the oven. For heavily soiled racks, you can also try wrapping them in old towels soaked in hot water and baking soda.
Q: Is this method effective for cleaning the oven door glass?
A: Yes, this method is very effective for cleaning the oven door glass. Apply the baking soda paste to the glass, let it sit for several hours, and then wipe it clean with a damp cloth. For stubborn spots, you can use a plastic scraper to gently remove the grime. A final wipe with a vinegar and water solution will leave the glass sparkling clean.
Q: What if I have a self-cleaning oven? Can I still use this method?
A: It’s generally not recommended to use this method on self-cleaning ovens. The high heat of the self-cleaning cycle can react negatively with the baking soda residue, potentially damaging the oven. If you have a self-cleaning oven, it’s best to follow the manufacturer’s instructions for cleaning. However, you can still use this method to clean the oven door glass, as it doesn’t involve high heat.
Q: Will this method remove burnt-on sugar or other sugary spills?
A: Yes, this method can be effective for removing burnt-on sugar or other sugary spills. The baking soda helps to loosen the sugar, making it easier to scrub away. However, you may need to let the paste sit for a longer period and use a bit more elbow grease to remove particularly stubborn sugary messes.
Q: Can I use this method to clean my microwave?
A: While this specific method is designed for ovens, a similar principle can be applied to cleaning your microwave. You can place a microwave-safe bowl filled with water and a few tablespoons of baking soda in the microwave and heat it on high for a few minutes. The steam will help to loosen the grime, making it easier to wipe clean.
Q: What are the environmental benefits of using this natural oven cleaning method?
A: The environmental benefits are significant. By using baking soda and water, you’re avoiding the use of harsh chemicals that can pollute waterways and contribute to air pollution. You’re also reducing your reliance on plastic bottles and containers, which can end up in landfills. This method is a more sustainable and eco-friendly way to keep your oven clean.


Leave a Comment