

Quick kitchen deep cleaning hacks – who doesn’t crave them? Let’s face it, the kitchen, the heart of our homes, often bears the brunt of daily life. From splattered sauces to lingering odors, it can quickly transform from a culinary haven into a cleaning battlefield. But fear not, fellow home enthusiasts! This isn’t just another chore list; it’s your secret weapon to reclaim your kitchen’s sparkle without sacrificing your precious time.
Throughout history, a clean and organized kitchen has been a symbol of prosperity and well-being. Think of the meticulously maintained kitchens of ancient Rome or the spotless hearths depicted in classic paintings. While our methods have evolved, the desire for a hygienic and inviting cooking space remains timeless.
In today’s fast-paced world, who has hours to dedicate to deep cleaning? That’s where these quick kitchen deep cleaning hacks come in. I’m going to share some of my favorite time-saving tips and tricks that will help you tackle those stubborn stains, eliminate lingering odors, and create a kitchen you’ll be proud to show off. These DIY solutions are not only effective but also budget-friendly, using ingredients you likely already have in your pantry. Get ready to transform your kitchen from chaotic to clean in a snap!
DIY Kitchen Deep Cleaning Hacks: Sparkling Clean in No Time!
Okay, let’s face it, the kitchen is the heart of the home, but it’s also a magnet for grime, spills, and general chaos. I know, I’ve been there! But don’t worry, I’m going to share my favorite DIY kitchen deep cleaning hacks that will have your kitchen sparkling in no time. We’re talking about those often-overlooked areas that accumulate gunk and deserve some serious TLC. Get ready to roll up your sleeves and transform your kitchen!
Tackling the Oven: Goodbye Baked-On Mess!
The oven is a notorious culprit for baked-on food and grease. Commercial oven cleaners can be harsh and smelly, so I prefer a natural and effective DIY approach.
What You’ll Need:
* Baking soda
* White vinegar
* Water
* Spray bottle
* Sponge or scrub brush
* Rubber gloves
* Old towel or newspaper
Step-by-Step Instructions:
1. Empty the Oven: Remove oven racks, baking stones, and anything else inside. I usually soak the racks in hot, soapy water while I’m working on the oven interior.
2. Baking Soda Paste: In a bowl, mix ½ cup of baking soda with enough water to form a spreadable paste. The consistency should be similar to pancake batter.
3. Coat the Oven: Wearing your gloves, spread the baking soda paste all over the interior surfaces of the oven, avoiding the heating elements. I like to use my hands for this to ensure even coverage, but a spatula works too. Be generous with the paste, especially on stubborn stains.
4. Let it Sit: This is the key! Let the baking soda paste sit for at least 12 hours, or even overnight. The longer it sits, the better it will loosen the baked-on grime. I usually do this before bed and tackle the rest in the morning.
5. Vinegar Power: The next day, fill a spray bottle with white vinegar. Spray the vinegar all over the baking soda paste. The vinegar will react with the baking soda, causing it to fizz. This helps to further loosen the grime.
6. Scrub-a-Dub-Dub: Using a sponge or scrub brush, scrub the oven interior. You’ll be amazed at how easily the grime comes off! For really stubborn spots, I sometimes use a plastic scraper.
7. Wipe Clean: Wipe away the loosened grime and baking soda paste with a damp sponge or cloth. You may need to rinse the sponge frequently.
8. Final Rinse: Give the oven a final rinse with clean water to remove any remaining residue.
9. Dry and Replace: Dry the oven interior with a clean towel. Replace the oven racks and other items.
Cleaning the Microwave: Steam Power to the Rescue!
Microwaves are notorious for splatters and spills. This simple steam cleaning method makes it a breeze to clean.
What You’ll Need:
* Microwave-safe bowl
* Water
* White vinegar or lemon juice
* Sponge or cloth
Step-by-Step Instructions:
1. Prepare the Solution: Fill the microwave-safe bowl with 1 cup of water. Add 2 tablespoons of white vinegar or lemon juice. I find lemon juice leaves a fresher scent.
2. Microwave Magic: Place the bowl in the microwave and heat on high for 5-7 minutes, or until the water boils and the microwave is filled with steam.
3. Let it Sit: Leave the microwave door closed for another 2-3 minutes to allow the steam to loosen the grime. Don’t open it immediately!
4. Wipe Away: Carefully remove the bowl (it will be hot!). Use a sponge or cloth to wipe down the interior of the microwave. The steam will have loosened the grime, making it easy to wipe away.
5. Clean the Turntable: Remove the turntable and wash it with warm, soapy water. Rinse and dry thoroughly before replacing it.
Degreasing the Range Hood: Banishing Sticky Residue
The range hood is a grease magnet! It’s important to clean it regularly to prevent grease buildup, which can be a fire hazard.
What You’ll Need:
* Dish soap
* Hot water
* Baking soda (optional, for stubborn grease)
* Sponge or scrub brush
* Spray bottle
* Rubber gloves
Step-by-Step Instructions:
1. Remove the Filters: Most range hoods have removable filters. Take them out and soak them in hot, soapy water.
2. Prepare the Cleaning Solution: In a spray bottle, mix hot water with a squirt of dish soap.
3. Spray and Wipe: Spray the cleaning solution onto the exterior and interior surfaces of the range hood. Let it sit for a few minutes to loosen the grease.
4. Scrub Away: Use a sponge or scrub brush to scrub away the grease. For stubborn grease, make a paste of baking soda and water and apply it to the affected areas. Let it sit for a few minutes before scrubbing.
5. Rinse and Dry: Rinse the range hood with clean water and dry it with a clean towel.
6. Clean the Filters: Scrub the filters with a sponge or scrub brush to remove any remaining grease. Rinse them thoroughly and let them dry completely before replacing them.
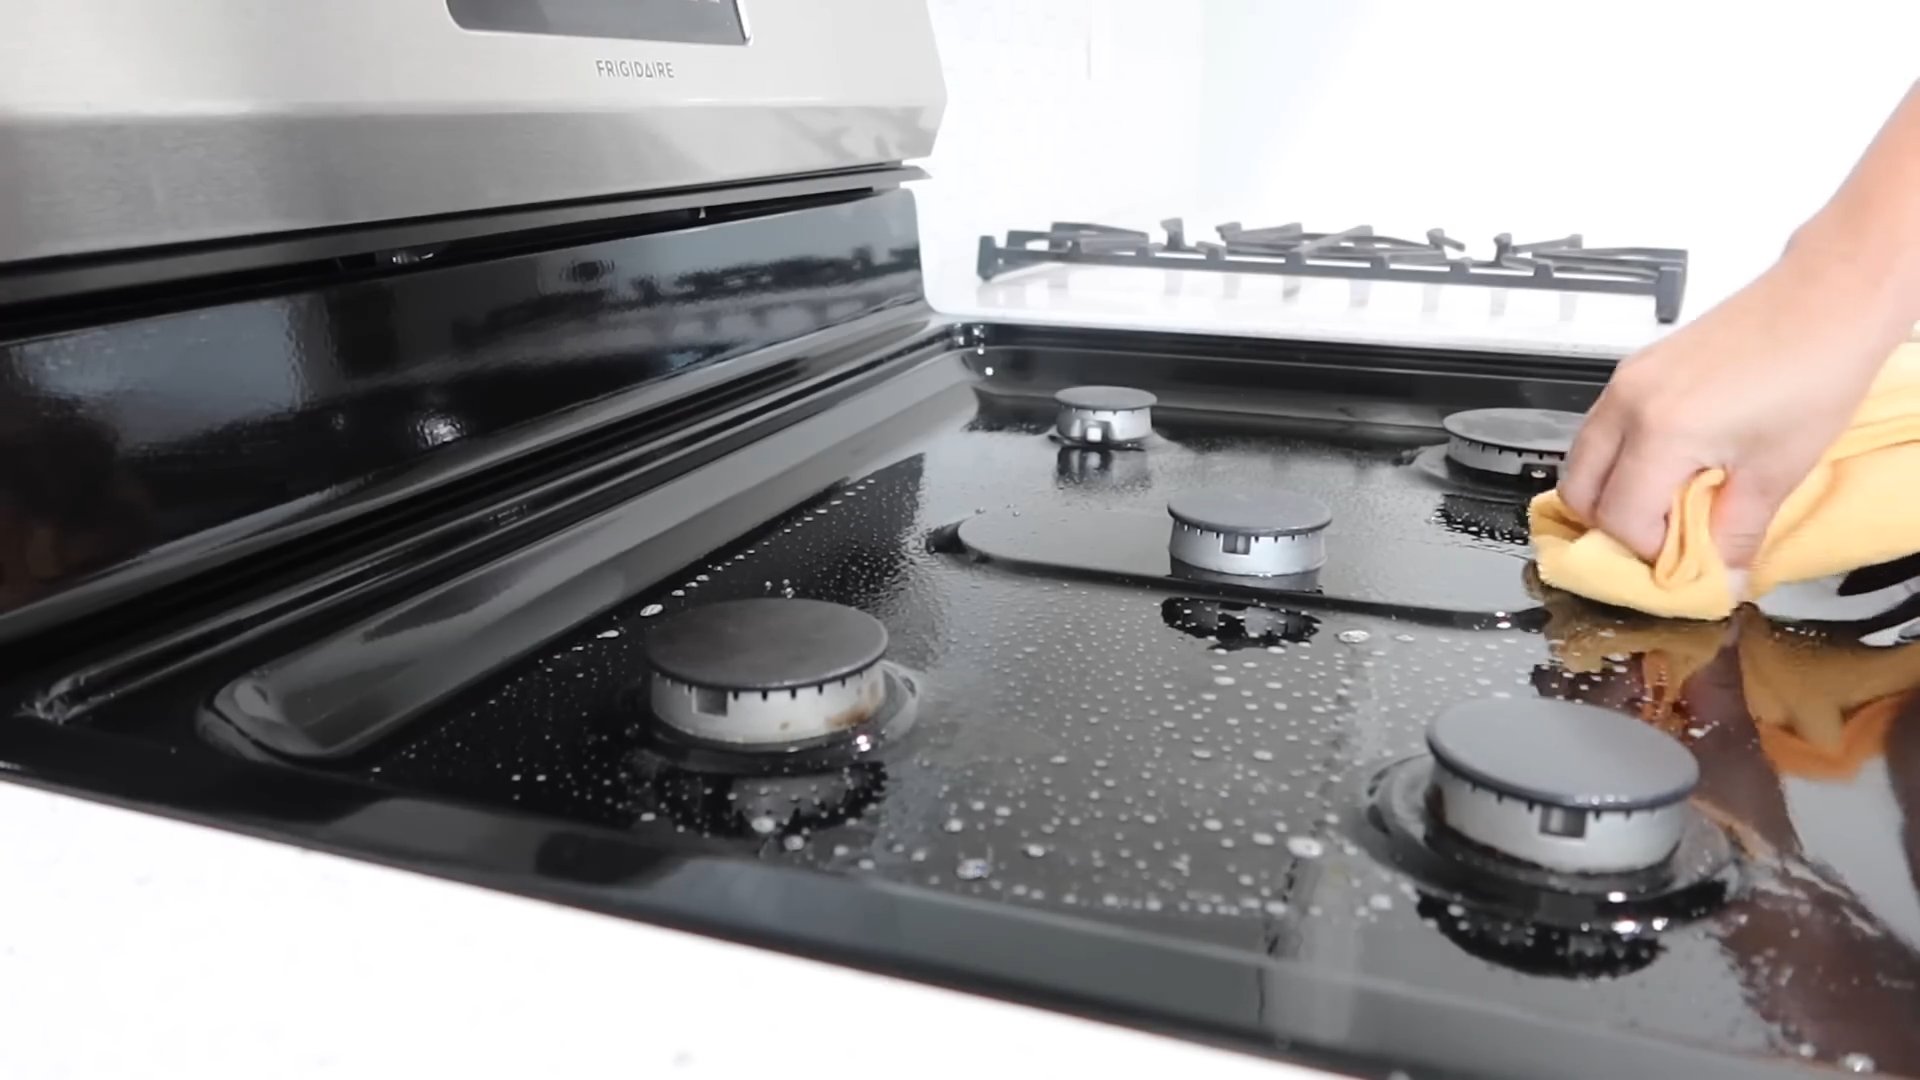
Deep Cleaning the Sink: Sparkling and Sanitary
Your kitchen sink sees a lot of action, so it’s important to keep it clean and sanitary.
What You’ll Need:
* Baking soda
* White vinegar
* Lemon halves (optional)
* Salt (optional)
* Sponge or scrub brush
* Hot water
Step-by-Step Instructions:
1. Rinse the Sink: Rinse the sink with hot water to remove any loose debris.
2. Baking Soda Scrub: Sprinkle baking soda all over the sink.
3. Vinegar Fizz: Pour white vinegar over the baking soda. The mixture will fizz, which helps to loosen grime and disinfect the sink.
4. Scrub-a-Dub: Use a sponge or scrub brush to scrub the sink thoroughly. Pay attention to the corners and around the drain.
5. Lemon Power (Optional): For extra cleaning power and a fresh scent, rub lemon halves over the sink surface. The citric acid in lemons helps to break down grease and stains.
6. Salt Scrub (Optional): For stubborn stains, sprinkle salt on the lemon halves and use them to scrub the sink. The salt acts as a gentle abrasive.
7. Rinse and Shine: Rinse the sink thoroughly with hot water. Dry it with a clean towel to prevent water spots.
Cleaning the Dishwasher: Freshening and Sanitizing
A clean dishwasher means cleaner dishes! This simple cleaning routine will keep your dishwasher running smoothly.
What You’ll Need:
* White vinegar
* Baking soda
* Dish soap
* Toothpick or wire
* Sponge or cloth
Step-by-Step Instructions:
1. Empty the Dishwasher: Make sure the dishwasher is completely empty.
2. Clean the Filter: Locate the dishwasher filter (usually at the bottom of the dishwasher). Remove it and rinse it under hot water. Use a toothpick or wire to remove any debris that may be clogging the filter.
3. Vinegar Rinse: Place a dishwasher-safe cup filled with white vinegar on the top rack of the dishwasher.
4. Run a Hot Cycle: Run the dishwasher on a hot cycle without any detergent. The vinegar will help to dissolve grease and mineral buildup.
5. Baking Soda Freshener: After the cycle is complete, sprinkle a cup of baking soda on the bottom of the dishwasher.
6. Short Hot Cycle: Run a short, hot cycle. The baking soda will help to absorb odors and freshen the dishwasher.
7. Clean the Door and Seals: Use a sponge or cloth to wipe down the dishwasher door and seals with a mixture of dish soap and water.
Organizing the Refrigerator: Fresh Food, Happy Life!
A clean and organized refrigerator not only looks better but also helps to keep your food fresh and prevent food waste.
What You’ll Need:
* Dish soap
* Hot water
* Baking soda
* Sponge or cloth
* Trash bags
* Cooler (to store perishable items)
Step-by-Step Instructions:
1. Empty the Refrigerator: Remove all food items from the refrigerator. Check expiration dates and discard any expired or spoiled food. Place perishable items in a cooler to keep them cold.
2. Remove Shelves and Drawers: Remove all removable shelves and drawers. Wash them with hot
Conclusion
So, there you have it! These quick kitchen deep cleaning hacks aren’t just about making your kitchen sparkle; they’re about reclaiming your time, saving money, and creating a healthier, more enjoyable cooking environment. We’ve explored simple, effective solutions using ingredients you likely already have in your pantry. From banishing stubborn grease to revitalizing your appliances, these DIY methods offer a powerful alternative to harsh chemicals and expensive cleaning products.
The beauty of these hacks lies in their adaptability. Feel free to experiment with variations to suit your specific needs and preferences. For instance, if you’re sensitive to vinegar, try using lemon juice as a substitute. For extra cleaning power on tough stains, create a paste of baking soda and water and let it sit for a bit before scrubbing. Consider adding a few drops of your favorite essential oil, like lemon or lavender, to your cleaning solutions for a fresh, natural scent.
Why is this a must-try? Because a clean kitchen is more than just aesthetically pleasing; it’s essential for food safety and overall well-being. These hacks are easy to implement, cost-effective, and environmentally friendly. They empower you to take control of your cleaning routine and create a space you truly love to be in.
Don’t let the thought of deep cleaning overwhelm you. Start with one or two of these hacks and gradually incorporate them into your regular cleaning schedule. You’ll be amazed at the difference they can make.
We wholeheartedly encourage you to try these quick kitchen deep cleaning hacks and experience the satisfaction of a sparkling clean kitchen. We’re confident that you’ll find them to be valuable additions to your cleaning arsenal.
But the real magic happens when you share your experiences! We’d love to hear about your results, any variations you tried, and any other kitchen cleaning tips you’ve discovered. Share your stories in the comments below, and let’s create a community of clean kitchen enthusiasts! Your insights could inspire others to transform their kitchens and enjoy the benefits of a clean and healthy cooking space. So go ahead, give these hacks a try, and let us know what you think!
Frequently Asked Questions (FAQ)
Q: Are these quick kitchen deep cleaning hacks safe for all kitchen surfaces?
A: Generally, yes, but it’s always a good idea to test any cleaning solution on a small, inconspicuous area first, especially on delicate surfaces like natural stone countertops or antique wood cabinets. Vinegar, while effective, can be acidic and may etch certain surfaces. Baking soda is mildly abrasive, so avoid using it on highly polished or easily scratched materials. When in doubt, consult the manufacturer’s recommendations for your specific surfaces.
Q: How often should I perform these deep cleaning hacks?
A: The frequency depends on your cooking habits and the level of use your kitchen gets. For heavily used kitchens, deep cleaning every month or two is recommended. For less frequently used kitchens, quarterly deep cleaning may suffice. Regular maintenance, such as wiping down surfaces after each use and addressing spills promptly, will help prevent buildup and reduce the need for frequent deep cleaning.
Q: Can I use these hacks on stainless steel appliances?
A: Yes, many of these hacks are excellent for cleaning stainless steel. Vinegar diluted with water can effectively remove fingerprints and water spots. Baking soda paste can help tackle stubborn stains. Always wipe in the direction of the grain to avoid scratching. For a final polish, use a microfiber cloth.
Q: What’s the best way to clean a greasy oven using these hacks?
A: A combination of baking soda and vinegar is your best bet. First, remove any loose debris from the oven. Then, make a paste of baking soda and water and spread it generously over the interior surfaces, avoiding the heating elements. Let it sit overnight. The next day, spray the baking soda paste with vinegar. It will fizz and loosen the grime. Wipe away the residue with a damp cloth. For particularly stubborn grease, you may need to repeat the process or use a scrub brush.
Q: Are these cleaning solutions safe for families with children and pets?
A: While these DIY cleaning solutions are generally safer than harsh chemicals, it’s still important to exercise caution, especially around children and pets. Keep cleaning solutions out of reach and supervise children during cleaning activities. Ensure surfaces are thoroughly rinsed and dried after cleaning to remove any residue. If you’re concerned about potential allergies or sensitivities, consider using milder alternatives like lemon juice or castile soap.
Q: Can I use these hacks to clean my dishwasher?
A: Yes, you can use vinegar to clean your dishwasher. Pour a cup of white vinegar into a dishwasher-safe bowl and place it on the top rack. Run the dishwasher on a hot cycle. The vinegar will help dissolve mineral deposits and remove odors. You can also sprinkle baking soda on the bottom of the dishwasher before running the cycle for extra cleaning power.
Q: What about cleaning my microwave?
A: Cleaning your microwave is easy with these hacks. Combine equal parts water and vinegar in a microwave-safe bowl. Microwave on high for 5-10 minutes. The steam will loosen any splatters and food residue. Carefully remove the bowl and wipe down the interior of the microwave with a damp cloth.
Q: How can I get rid of stubborn odors in my kitchen?
A: Several of these hacks can help eliminate odors. Simmering a pot of water with lemon slices or cinnamon sticks can freshen the air. Placing a bowl of baking soda in the refrigerator or pantry can absorb odors. Cleaning your garbage disposal regularly with vinegar and baking soda can also prevent unpleasant smells.
Q: Can I use these hacks to clean my kitchen sink?
A: Absolutely! Baking soda is excellent for scrubbing away stains and grime in your kitchen sink. You can also pour vinegar down the drain to help unclog it and eliminate odors. For stainless steel sinks, use a mixture of olive oil and lemon juice to polish and protect the surface.
Q: What are some other variations I can try with these quick kitchen deep cleaning hacks?
A: The possibilities are endless! Try adding a few drops of tea tree oil to your cleaning solutions for its antibacterial properties. Use orange peels to infuse your vinegar cleaner with a citrus scent. Experiment with different ratios of vinegar and water to find what works best for your specific cleaning needs. Don’t be afraid to get creative and customize these hacks to suit your preferences. Remember, the goal is to create a clean and healthy kitchen environment that you enjoy.


Leave a Comment