

Shiny Stainless Steel Pans – who doesn’t love the gleam of a perfectly polished pan hanging in their kitchen? But let’s be honest, achieving that showroom shine can feel like a Herculean task after a delicious, albeit messy, cooking session. I know I’ve been there, staring at stubborn stains and burnt-on food, wondering if my beloved stainless steel cookware is destined for a dull, lackluster existence.
For generations, cooks have battled the challenges of keeping their cookware looking its best. From using ash and elbow grease in simpler times to the array of modern cleaning products available today, the quest for sparkling pans has been a constant. In many cultures, the condition of one’s cookware was even seen as a reflection of their household’s pride and care.
But fear not, fellow home chefs! You don’t need harsh chemicals or hours of scrubbing to restore your shiny stainless steel pans to their former glory. This DIY guide is packed with simple, effective tricks and hacks that use ingredients you probably already have in your pantry. I’m going to share my favorite methods for tackling everything from water spots to burnt-on residue, so you can spend less time cleaning and more time creating culinary masterpieces. Let’s get those pans sparkling!
DIY: Restore Your Stainless Steel Pans to Their Former Glory
Okay, let’s face it. We all love the sleek look of shiny, new stainless steel pans. But life happens, cooking happens, and suddenly those beauties are covered in burnt-on food, water spots, and a dull haze. Don’t despair! You don’t need to toss them and buy new ones. I’m going to show you a few simple, effective DIY methods to bring back that showroom shine using ingredients you probably already have in your kitchen.
Understanding the Enemy: What Causes Stains on Stainless Steel?
Before we dive into the cleaning process, it’s helpful to understand what we’re up against. Stainless steel is durable, but it’s not invincible. Here’s a breakdown of common culprits:
* Burnt-on Food: This is the most obvious offender. Food particles bake onto the surface, creating a stubborn, blackened layer.
* Hard Water Spots: Minerals in hard water leave unsightly spots and streaks, especially after washing.
* Heat Tint: Overheating can cause a bluish or brownish discoloration, known as heat tint.
* Grease and Oil: Even after washing, a thin film of grease can remain, attracting dust and dulling the shine.
Method 1: Baking Soda Power! (For General Cleaning and Light Stains)
Baking soda is my go-to for everyday cleaning. It’s a mild abrasive that’s safe for stainless steel and incredibly effective at removing grime and light stains.
What You’ll Need:
* Baking soda
* Water
* Soft sponge or cloth
* Optional: White vinegar
Step-by-Step Instructions:
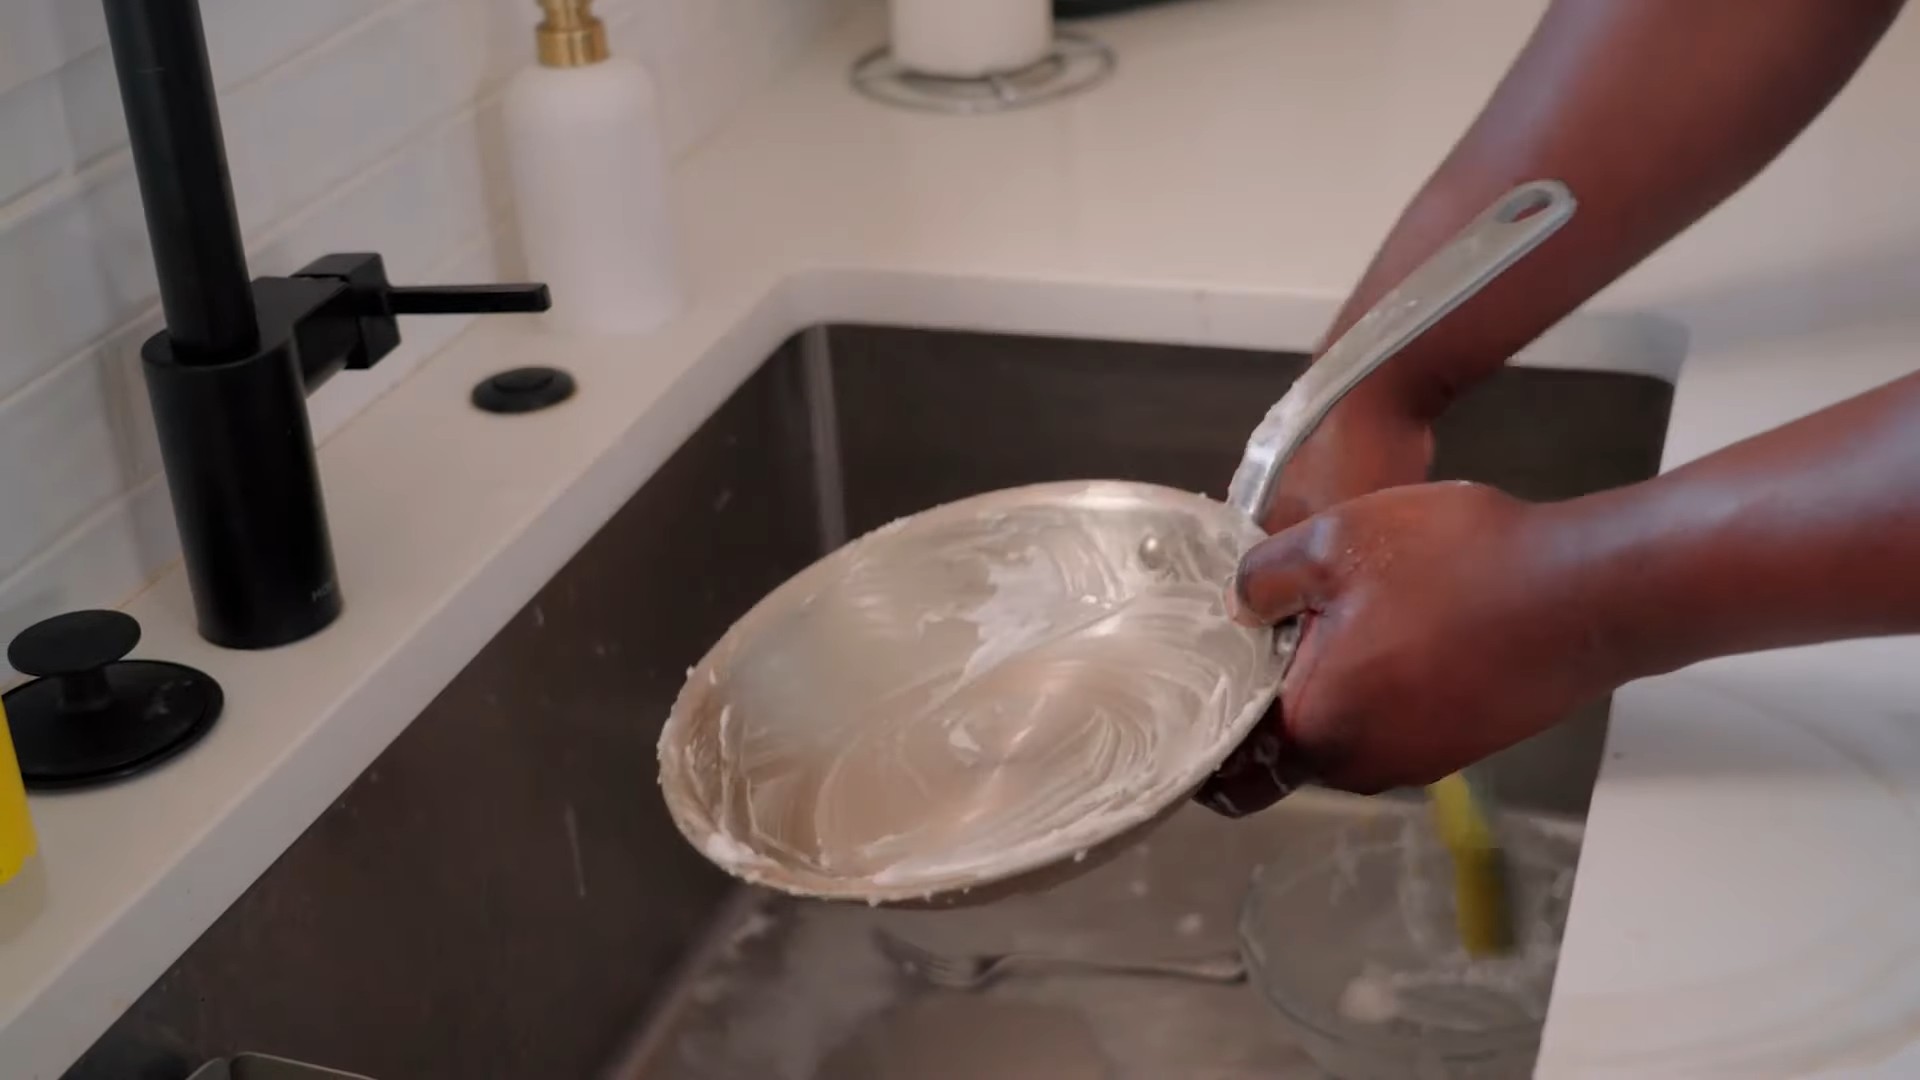
1. Create a Paste: In a bowl, mix baking soda with a small amount of water to form a thick paste. The consistency should be similar to toothpaste.
2. Apply the Paste: Using your sponge or cloth, generously apply the baking soda paste to the affected areas of the pan. Don’t be shy!
3. Scrub Gently: Gently scrub the pan in a circular motion. Avoid using steel wool or abrasive scrubbers, as they can scratch the surface. Focus on areas with stubborn stains.
4. Let it Sit (Optional): For tougher stains, let the baking soda paste sit for 15-20 minutes. This allows the baking soda to penetrate and loosen the grime.
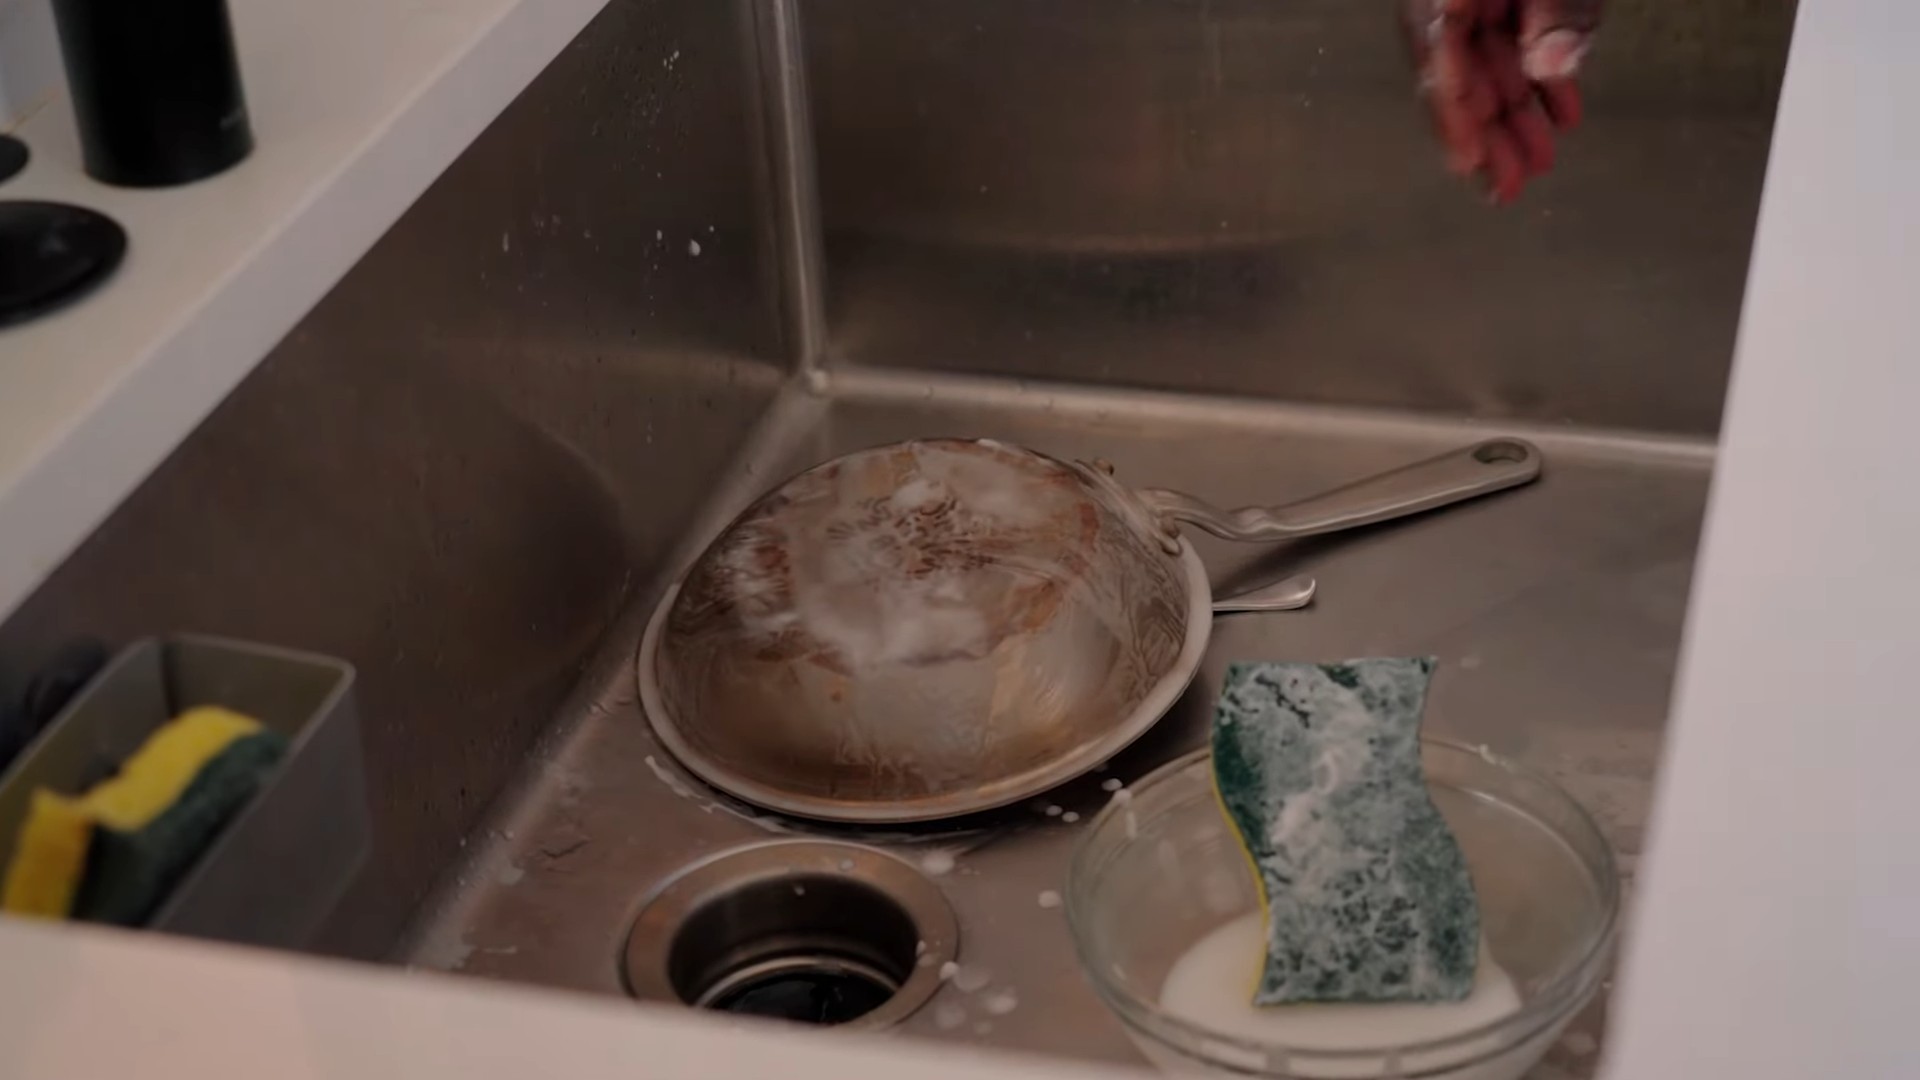
5. Rinse Thoroughly: Rinse the pan thoroughly with warm water, making sure to remove all traces of baking soda.
6. Dry Completely: Use a clean, dry cloth to dry the pan completely. This will prevent water spots from forming.
7. Vinegar Boost (Optional): For extra shine and to combat water spots, you can lightly spray the pan with white vinegar after rinsing. Wipe it dry immediately. The vinegar’s acidity helps to dissolve mineral deposits.
Method 2: Vinegar and Boiling Water (For Burnt-On Food)
When baking soda isn’t enough, it’s time to bring out the big guns: vinegar and boiling water. This method is fantastic for loosening stubborn burnt-on food.
What You’ll Need:
* White vinegar
* Water
* Stovetop
* Soft sponge or cloth
* Optional: Baking soda
Step-by-Step Instructions:
1. Fill the Pan: Pour a mixture of equal parts white vinegar and water into the pan, enough to cover the burnt-on food.
2. Boil the Mixture: Place the pan on the stovetop and bring the mixture to a boil.
3. Simmer for 10-15 Minutes: Let the mixture simmer for 10-15 minutes. You should see the burnt-on food start to loosen and lift from the bottom of the pan.
4. Remove from Heat: Carefully remove the pan from the heat and let it cool slightly.
5. Scrub Gently: Once the pan is cool enough to handle, use a soft sponge or cloth to scrub away the loosened food particles.
6. Baking Soda Assist (If Needed): If some stubborn spots remain, sprinkle baking soda onto the affected areas and scrub gently.
7. Rinse Thoroughly: Rinse the pan thoroughly with warm water.
8. Dry Completely: Dry the pan completely with a clean, dry cloth.
Method 3: Cream of Tartar Magic (For Stubborn Stains and Discoloration)
Cream of tartar is a mild abrasive that’s excellent for removing stubborn stains and discoloration from stainless steel. It’s a bit of a secret weapon!
What You’ll Need:
* Cream of tartar
* Water
* Soft sponge or cloth
Step-by-Step Instructions:
1. Create a Paste: In a bowl, mix cream of tartar with a small amount of water to form a paste. The consistency should be similar to toothpaste.
2. Apply the Paste: Apply the cream of tartar paste to the stained or discolored areas of the pan.
3. Scrub Gently: Gently scrub the pan in a circular motion.
4. Let it Sit: Let the paste sit for 30 minutes to an hour for tougher stains.
5. Rinse Thoroughly: Rinse the pan thoroughly with warm water.
6. Dry Completely: Dry the pan completely with a clean, dry cloth.
Method 4: The Power of Lemon (For Light Stains and Odor Removal)
Lemons aren’t just for lemonade! Their acidity makes them a great natural cleaner and deodorizer for stainless steel.
What You’ll Need:
* Lemon (half or slices)
* Water
* Soft sponge or cloth
Step-by-Step Instructions:
1. Boil Lemon Water (Optional): For tougher stains, fill the pan with water and add lemon slices or the juice of half a lemon. Bring the mixture to a boil and let it simmer for 10-15 minutes.
2. Scrub with Lemon: Cut a lemon in half and use it to scrub the inside of the pan. The lemon’s acidity will help to loosen stains and remove odors.
3. Let it Sit (Optional): For extra cleaning power, let the lemon juice sit on the surface for 10-15 minutes.
4. Rinse Thoroughly: Rinse the pan thoroughly with warm water.
5. Dry Completely: Dry the pan completely with a clean, dry cloth.
Method 5: Olive Oil Polish (For a Final Shine)
This isn’t about cleaning, but about giving your freshly cleaned pan that final, showroom-worthy shine.
What You’ll Need:
* Olive oil
* Clean, soft cloth
Step-by-Step Instructions:
1. Apply a Small Amount: Put a very small amount of olive oil on a clean, soft cloth. A little goes a long way!
2. Buff the Pan: Gently buff the exterior of the pan with the oiled cloth. Use circular motions to distribute the oil evenly.
3. Wipe Away Excess: Use a clean part of the cloth to wipe away any excess oil. You want a subtle shine, not a greasy residue.
Important Tips for Maintaining Your Stainless Steel Pans
* Wash After Each Use: Don’t let food sit in your pans for extended periods. Wash them as soon as possible after cooking to prevent stains from setting.
* Avoid Abrasive Cleaners: Steel wool, scouring pads, and harsh chemicals can scratch the surface of stainless steel. Stick to gentle cleaning methods.
* Dry Immediately: Water spots are the enemy! Always dry your pans thoroughly after washing.
* Don’t Overheat: Overheating can cause discoloration. Use medium heat whenever possible.
* Salt Smartly: Add salt to water *after* it has come to a boil. Salt can pit stainless steel if it sits on the bottom of the pan for too long.
* Proper Storage: Store your pans carefully to prevent scratches. Consider using pan protectors or hanging them on a rack.
Troubleshooting Common Stainless Steel Pan Problems
* Rainbow Discoloration (Heat Tint): This is caused by overheating. Try using a stainless steel cleaner specifically designed for removing heat tint. You can also try the cream of tartar method.
* Rust Spots: While stainless steel is rust-resistant, it’s not completely rust-proof. Small rust spots can sometimes appear. Use a stainless steel cleaner or a paste of baking soda and water to remove them.
* Cloudy Film: This is often caused by hard water deposits. Try using vinegar to remove the film. You can also invest in a water softener to prevent future buildup.
By following these simple DIY methods and maintenance tips, you can keep your stainless steel pans looking their best for years
Conclusion
So, there you have it! Achieving that coveted, mirror-like shine on your stainless steel pans doesn’t require expensive cleaners or hours of scrubbing. This simple, DIY trick using readily available household ingredients is a game-changer for anyone who wants to keep their cookware looking its best. We’ve shown you how to banish those stubborn stains and bring back the brilliance of your stainless steel, all without harsh chemicals or back-breaking effort.
Why is this DIY method a must-try? Because it’s effective, affordable, and environmentally friendly. You’re likely to already have the necessary ingredients in your pantry, saving you a trip to the store and money in your pocket. Plus, you’re avoiding the potentially harmful chemicals found in many commercial cleaners. The satisfaction of seeing your pans transform from dull and stained to sparkling and new is incredibly rewarding.
But don’t stop there! Feel free to experiment with variations to find what works best for your specific needs. For instance, if you’re dealing with particularly stubborn burnt-on food, try letting the baking soda paste sit for a longer period, even overnight. You could also add a squeeze of lemon juice to the paste for an extra boost of cleaning power, thanks to its natural acidity. For a gentler approach on delicate stainless steel, consider using a soft sponge or microfiber cloth instead of a more abrasive scrubber. Remember to always test any new cleaning method on a small, inconspicuous area first to ensure it doesn’t damage the finish.
This DIY method is especially effective for maintaining the shine of your shiny stainless steel pans. Regular cleaning with this technique will prevent the buildup of stains and discoloration, keeping your cookware looking its best for years to come.
We’re confident that this DIY trick will become a staple in your cleaning routine. It’s a simple, effective, and satisfying way to keep your stainless steel pans looking their absolute best.
Now, it’s your turn! Give this DIY method a try and see the amazing results for yourself. We’re eager to hear about your experiences. Share your before-and-after photos and any variations you tried in the comments below. Let’s build a community of sparkling stainless steel enthusiasts! We believe in the power of shared knowledge and collective experience, so don’t hesitate to ask questions or offer tips to fellow readers. Together, we can conquer even the most stubborn stains and keep our kitchens gleaming. Happy cleaning!
Frequently Asked Questions (FAQ)
Q: What kind of stainless steel is this DIY method suitable for?
A: This DIY cleaning method is generally safe and effective for most types of stainless steel cookware, including pots, pans, and baking sheets. However, it’s always a good idea to test the method on a small, inconspicuous area first, especially if you have vintage or particularly delicate stainless steel items. This will help ensure that the cleaning process doesn’t damage the finish or cause any discoloration. If you’re unsure about the type of stainless steel you have, consult the manufacturer’s instructions or website for specific cleaning recommendations.
Q: Can I use this method on non-stainless steel cookware?
A: While the ingredients used in this DIY method are generally mild, they are specifically formulated for stainless steel. Using them on other types of cookware, such as non-stick, cast iron, or copper, could potentially damage the surface or affect its performance. For example, baking soda can be abrasive and may scratch non-stick coatings. Always refer to the manufacturer’s instructions for cleaning recommendations for your specific type of cookware.
Q: How often should I clean my stainless steel pans using this method?
A: The frequency of cleaning depends on how often you use your pans and how prone they are to staining. For pans that are used frequently, a weekly cleaning with this DIY method can help prevent the buildup of stains and discoloration. For pans that are used less often, a monthly cleaning may be sufficient. If you notice stubborn stains or discoloration, you can clean your pans more frequently as needed. Regular cleaning will not only keep your pans looking their best but also prevent the buildup of food residue that can be difficult to remove later.
Q: What if the stains are really stubborn and don’t come off easily?
A: For particularly stubborn stains, there are a few things you can try. First, make sure you’re using enough baking soda and water to create a thick paste. Apply the paste generously to the stained area and let it sit for a longer period, even overnight. You can also try adding a squeeze of lemon juice to the paste for an extra boost of cleaning power. The acidity of the lemon juice can help break down stubborn stains. When scrubbing, use a bit more pressure, but be careful not to scratch the surface of the stainless steel. If the stains persist, you can try using a commercial stainless steel cleaner specifically designed for removing burnt-on food. Always follow the manufacturer’s instructions when using commercial cleaners.
Q: Can I use steel wool to scrub the pans?
A: While steel wool can be effective for removing stubborn stains, it’s generally not recommended for cleaning stainless steel pans. Steel wool is abrasive and can scratch the surface of the stainless steel, leaving it looking dull and damaged. Instead, opt for a non-abrasive scrubber, such as a nylon scrubbing pad or a soft sponge. You can also use a microfiber cloth for a gentler approach. If you must use a more abrasive scrubber, test it on a small, inconspicuous area first to ensure it doesn’t damage the finish.
Q: How do I prevent my stainless steel pans from staining in the first place?
A: Prevention is key to keeping your stainless steel pans looking their best. Avoid overheating your pans, as this can cause food to burn and stick. Use medium heat for most cooking tasks and avoid letting your pans sit empty on a hot burner. When cooking acidic foods, such as tomatoes or vinegar, clean your pans immediately after use to prevent staining. Avoid using harsh chemicals or abrasive cleaners, as these can damage the surface of the stainless steel. Finally, dry your pans thoroughly after washing to prevent water spots and discoloration.
Q: Is this method safe for cleaning the outside of my stainless steel pans as well?
A: Yes, this DIY method is generally safe for cleaning the outside of your stainless steel pans as well. The same principles apply: test on a small area first, use a non-abrasive scrubber, and avoid harsh chemicals. The outside of your pans can also accumulate grease and grime over time, so regular cleaning with this method can help keep them looking their best.
Q: What about cleaning the handles of my stainless steel pans?
A: The handles of your stainless steel pans can also benefit from this DIY cleaning method. Pay special attention to areas where grease and grime tend to accumulate, such as around the rivets or where the handle attaches to the pan. Use a small brush or cotton swab to reach tight spaces. If the handles are made of a different material, such as plastic or wood, be sure to avoid getting the baking soda paste on those areas, as it could potentially damage them.
Q: Can I use this method to clean my shiny stainless steel sink as well?
A: Absolutely! This DIY cleaning method is not just for pans; it works wonders on stainless steel sinks too. The same principles apply: the baking soda paste helps to lift stains and grime, leaving your sink sparkling clean. Just be sure to rinse thoroughly after cleaning to remove any baking soda residue.

Leave a Comment