

Vertical garden DIY projects are taking the gardening world by storm, and for good reason! Imagine transforming a drab, unused wall into a vibrant, living masterpiece bursting with color and fresh herbs. Forget sprawling gardens that demand acres of land; we’re talking about maximizing space and adding a touch of green elegance to even the smallest apartments or balconies.
The concept of vertical gardening isn’t exactly new. Think of the Hanging Gardens of Babylon, one of the Seven Wonders of the Ancient World! While we might not be building anything quite so grand, the spirit of bringing nature upwards remains the same. Historically, cultures around the globe have utilized walls and structures to cultivate plants, optimizing sunlight and space. Today, with urban living becoming increasingly common, the need for innovative gardening solutions is more pressing than ever.
Why should you dive into a vertical garden DIY project? Well, beyond the sheer aesthetic appeal, these gardens offer a multitude of benefits. They’re perfect for anyone with limited space, allowing you to grow herbs, vegetables, and flowers without sacrificing precious square footage. Plus, they can improve air quality, reduce noise pollution, and even insulate your home! I’m excited to share some simple, yet effective, DIY tricks and hacks that will help you create your own stunning vertical garden, regardless of your experience level. Let’s get started and bring some green magic into your life!
DIY Vertical Garden: Bringing Greenery to Small Spaces
Okay, so you’re itching for some green in your life but short on space? I totally get it! A vertical garden is the perfect solution. It’s a fantastic way to add a touch of nature to your balcony, patio, or even an indoor wall. Plus, it’s a fun DIY project! I’m going to walk you through creating your own stunning vertical garden, step-by-step. Let’s get our hands dirty!
Choosing Your Vertical Garden Style
Before we dive into the construction, let’s decide what kind of vertical garden you want. There are tons of options, but here are a few popular ones:
* Pallet Garden: Repurpose a wooden pallet for a rustic and charming look. This is a budget-friendly option and great for beginners.
* Pocket Garden: Use fabric pockets attached to a backing board. This is lightweight and versatile, perfect for herbs and smaller plants.
* Stacked Planter Garden: Arrange planters vertically on shelves or a tiered stand. This is easy to customize and move around.
* Hanging Gutter Garden: Repurpose rain gutters to create a unique and modern vertical garden. This is great for succulents and trailing plants.
For this guide, I’m going to focus on the **Pallet Garden** because it’s relatively easy to build, cost-effective, and looks amazing!
Materials You’ll Need
Alright, let’s gather our supplies. Here’s what you’ll need for your pallet vertical garden:
* Wooden Pallet: Find a clean and sturdy pallet. Look for one that hasn’t been chemically treated (HT stamp is good, MB stamp is bad). You can often find these for free at local businesses or online marketplaces.
* Heavy-Duty Landscape Fabric: This will line the back and bottom of the pallet to create pockets for your plants.
* Staple Gun and Staples: To secure the landscape fabric to the pallet.
* Scissors or Utility Knife: For cutting the landscape fabric.
* Gloves: To protect your hands.
* Measuring Tape: For accurate fabric placement.
* Potting Soil: Choose a good quality potting mix that drains well.
* Plants: Select plants that are suitable for vertical gardening and the amount of sunlight your garden will receive. Herbs, succulents, strawberries, and leafy greens are great choices.
* Sandpaper (Optional): If your pallet is rough, you might want to sand it down a bit.
* Wood Stain or Paint (Optional): To customize the look of your pallet.
* Protective Wood Sealer (Optional): To protect the pallet from the elements.
Step-by-Step Instructions: Building Your Pallet Vertical Garden
Okay, let’s get building! Here’s how to transform that old pallet into a beautiful vertical garden:
1. Prepare the Pallet:
* First, give your pallet a good cleaning. Use a brush and soapy water to remove any dirt, debris, or loose splinters.
* Inspect the pallet for any loose nails or staples and remove them.
* If the wood is rough, sand it down with sandpaper. This will make it smoother and safer to handle.
* (Optional) If you want to customize the look of your pallet, now’s the time to stain or paint it. Let it dry completely before moving on. I personally love the rustic look of a natural pallet, but a pop of color can be fun too!
* (Optional) Apply a protective wood sealer to help protect the pallet from the elements, especially if it will be outdoors.
2. Measure and Cut the Landscape Fabric:
* Measure the width and depth of the pallet openings where you want to create planting pockets.
* Cut the landscape fabric into pieces that are large enough to line the back and bottom of each opening, with enough overlap to staple it securely. I usually add a few extra inches to be safe.
* For example, if your pallet opening is 12 inches wide and 8 inches deep, you might cut the fabric to be 16 inches wide and 12 inches long.
3. Create the Planting Pockets:
* Starting with the bottom row of openings, line the back and bottom of each opening with the landscape fabric.
* Fold the fabric over the edges of the pallet and staple it securely in place using the staple gun. Make sure the staples are close together to create a strong and watertight seal.
* Repeat this process for each opening, creating individual pockets for your plants.
* Important Tip: Make sure the fabric is taut but not too tight. You want to create a sturdy pocket that can hold the soil and plants without tearing.
4. Reinforce the Bottom (Important!):
* The bottom row of pockets will bear the most weight, so it’s crucial to reinforce them.
* You can do this by adding an extra layer of landscape fabric to the bottom of each pocket.
* Alternatively, you can use small pieces of wood or plastic to provide additional support.
5. Add Drainage Holes (Essential!):
* This is super important! Plants need drainage to prevent root rot.
* Use scissors or a utility knife to poke a few small drainage holes in the bottom of each pocket.
* Don’t make the holes too big, or the soil will leak out.
6. Fill the Pockets with Potting Soil:
* Now it’s time to fill your newly created pockets with potting soil.
* Use a good quality potting mix that drains well.
* Fill each pocket about two-thirds full, leaving some space for the plants.
* Gently pat down the soil to remove any air pockets.
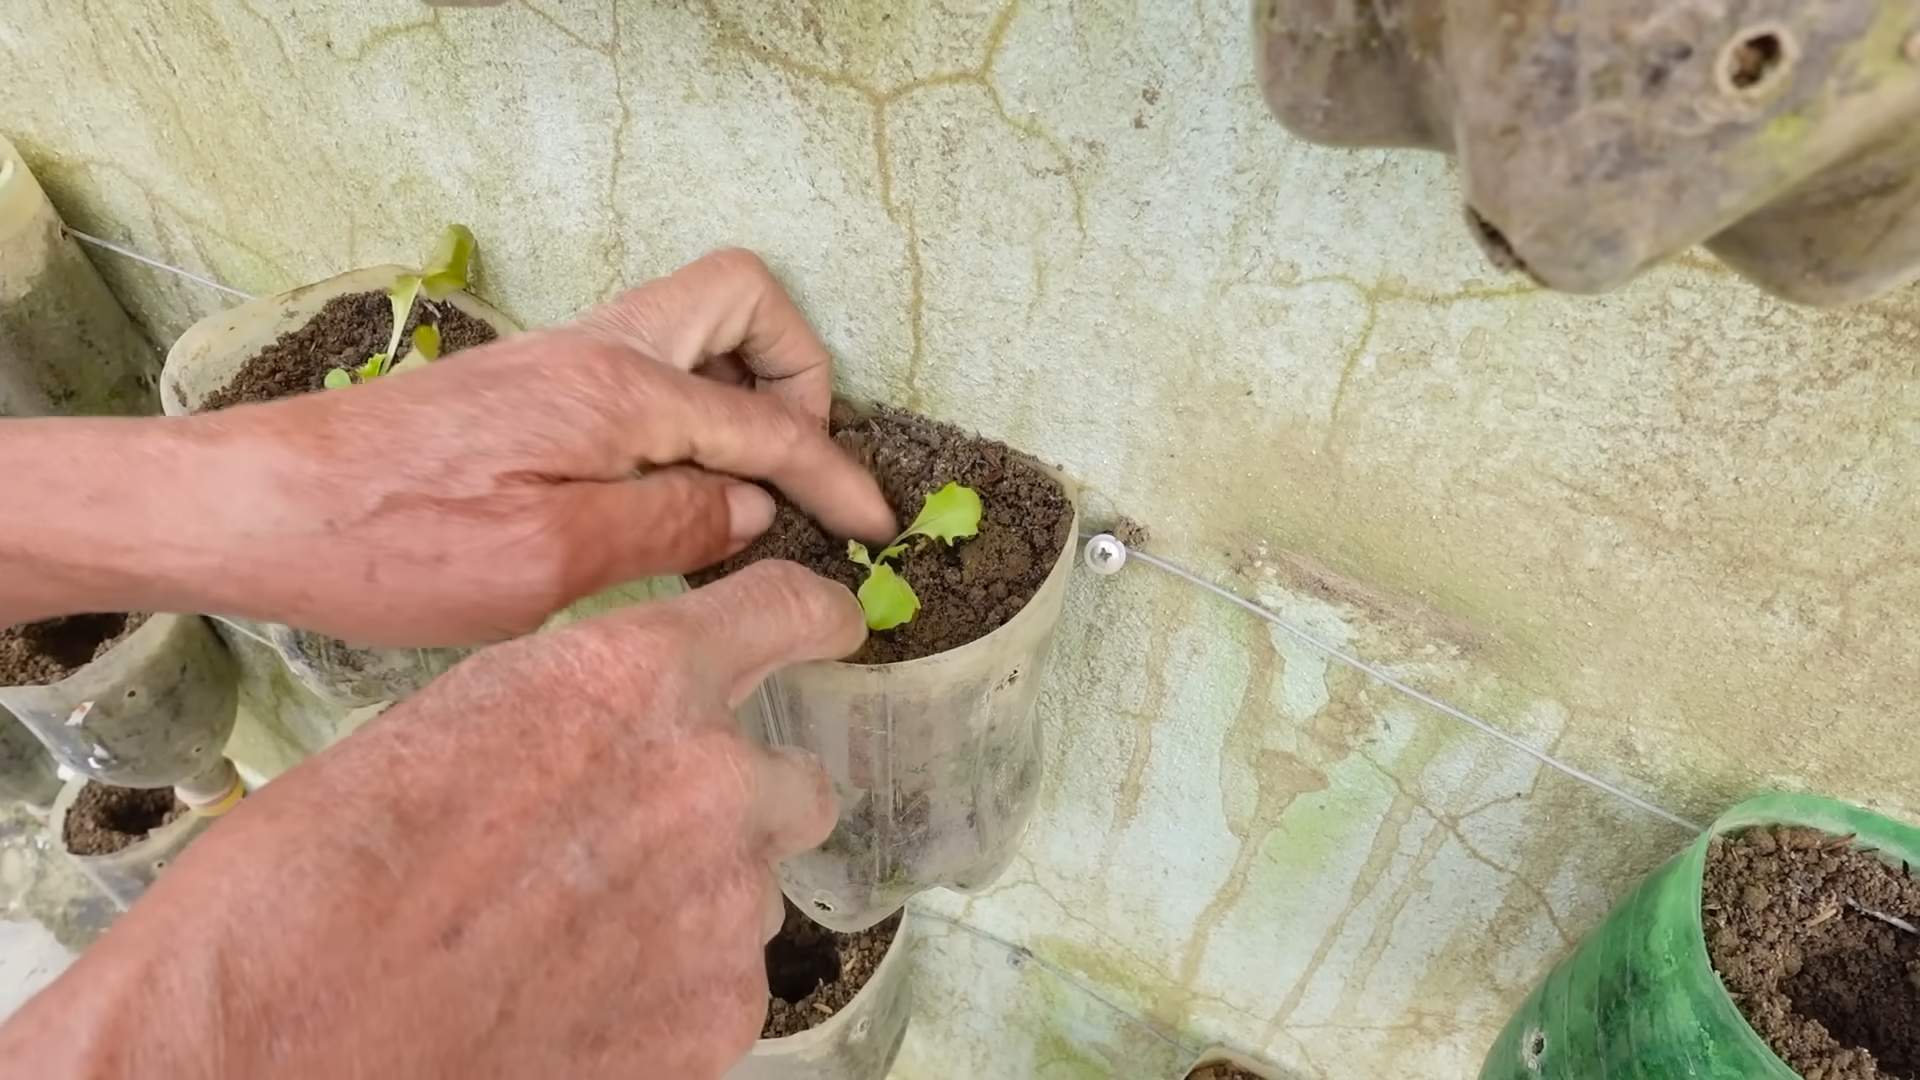
7. Plant Your Plants:
* Carefully remove your plants from their containers.
* Gently loosen the roots before planting.
* Place each plant in its designated pocket and add more potting soil around the roots.
* Make sure the plants are securely planted and that the soil is level with the top of the pocket.
* Water the plants thoroughly after planting.
8. Position Your Vertical Garden:
* Choose a location that receives the appropriate amount of sunlight for your chosen plants.
* Lean the pallet against a wall or fence, or mount it securely using brackets.
* Make sure the pallet is stable and won’t tip over.
* If you’re hanging the pallet, use heavy-duty hooks and chains to support the weight.
Choosing the Right Plants
Selecting the right plants is key to a thriving vertical garden. Consider these factors:
* Sunlight: How much sunlight does your garden receive? Choose plants that are suited to the amount of light available.
* Watering: How often will you be able to water your garden? Choose plants that can tolerate your watering schedule.
* Size: How much space do you have in each pocket? Choose plants that won’t outgrow their space too quickly.
* Maintenance: How much time are you willing to spend maintaining your garden? Choose plants that are relatively low-maintenance.
Here are some great plant options for a pallet vertical garden:
* Herbs: Basil, mint, oregano, thyme, rosemary, parsley
* Succulents: Echeveria, sedum, sempervivum
* Strawberries: Alpine strawberries are a good choice for smaller spaces.
* Leafy Greens: Lettuce, spinach, kale
* Flowers: Petunias, impatiens, pansies
Maintaining Your Vertical Garden
Once your vertical garden is up and running, it’s important to maintain it properly to keep your plants healthy and happy. Here are some tips:
* Water Regularly: Water your plants regularly, especially during hot and dry weather. Check the soil moisture before watering to avoid overwatering.
* Fertilize: Fertilize your plants every few weeks with a balanced liquid fertilizer.
* Prune: Prune your plants regularly to encourage growth and prevent them from becoming too leggy.
* Pest Control: Keep an eye out for pests and diseases. Treat any problems promptly to prevent them from spreading.
* Replace Plants: As plants grow and mature, you may need to replace them with smaller ones.
Troubleshooting Tips
Even with the best planning, you might encounter a few challenges. Here are some common issues and how to fix them:
* Plants are Wilting: This could be due to underwatering, overwatering, or too much sunlight. Adjust your watering schedule and move the garden to a shadier location if necessary.
* Leaves are Turning Yellow: This could be due to nutrient deficiency. Fertilize your plants with a balanced liquid fertilizer.
* Pests
Conclusion
So, there you have it! Creating your own vertical garden DIY is not just a trendy project; it’s a transformative experience that brings nature closer, enhances your living space, and offers a rewarding sense of accomplishment. We’ve explored a simple yet effective method to build a stunning vertical garden, and hopefully, you’re feeling inspired to embark on your own green adventure.
Why is this DIY trick a must-try? Because it’s more than just aesthetics. It’s about reclaiming space, especially in urban environments where horizontal gardening is limited. It’s about improving air quality, creating a calming atmosphere, and even growing your own herbs and vegetables right outside your kitchen door. It’s about adding a unique, personal touch to your home that reflects your creativity and love for nature.
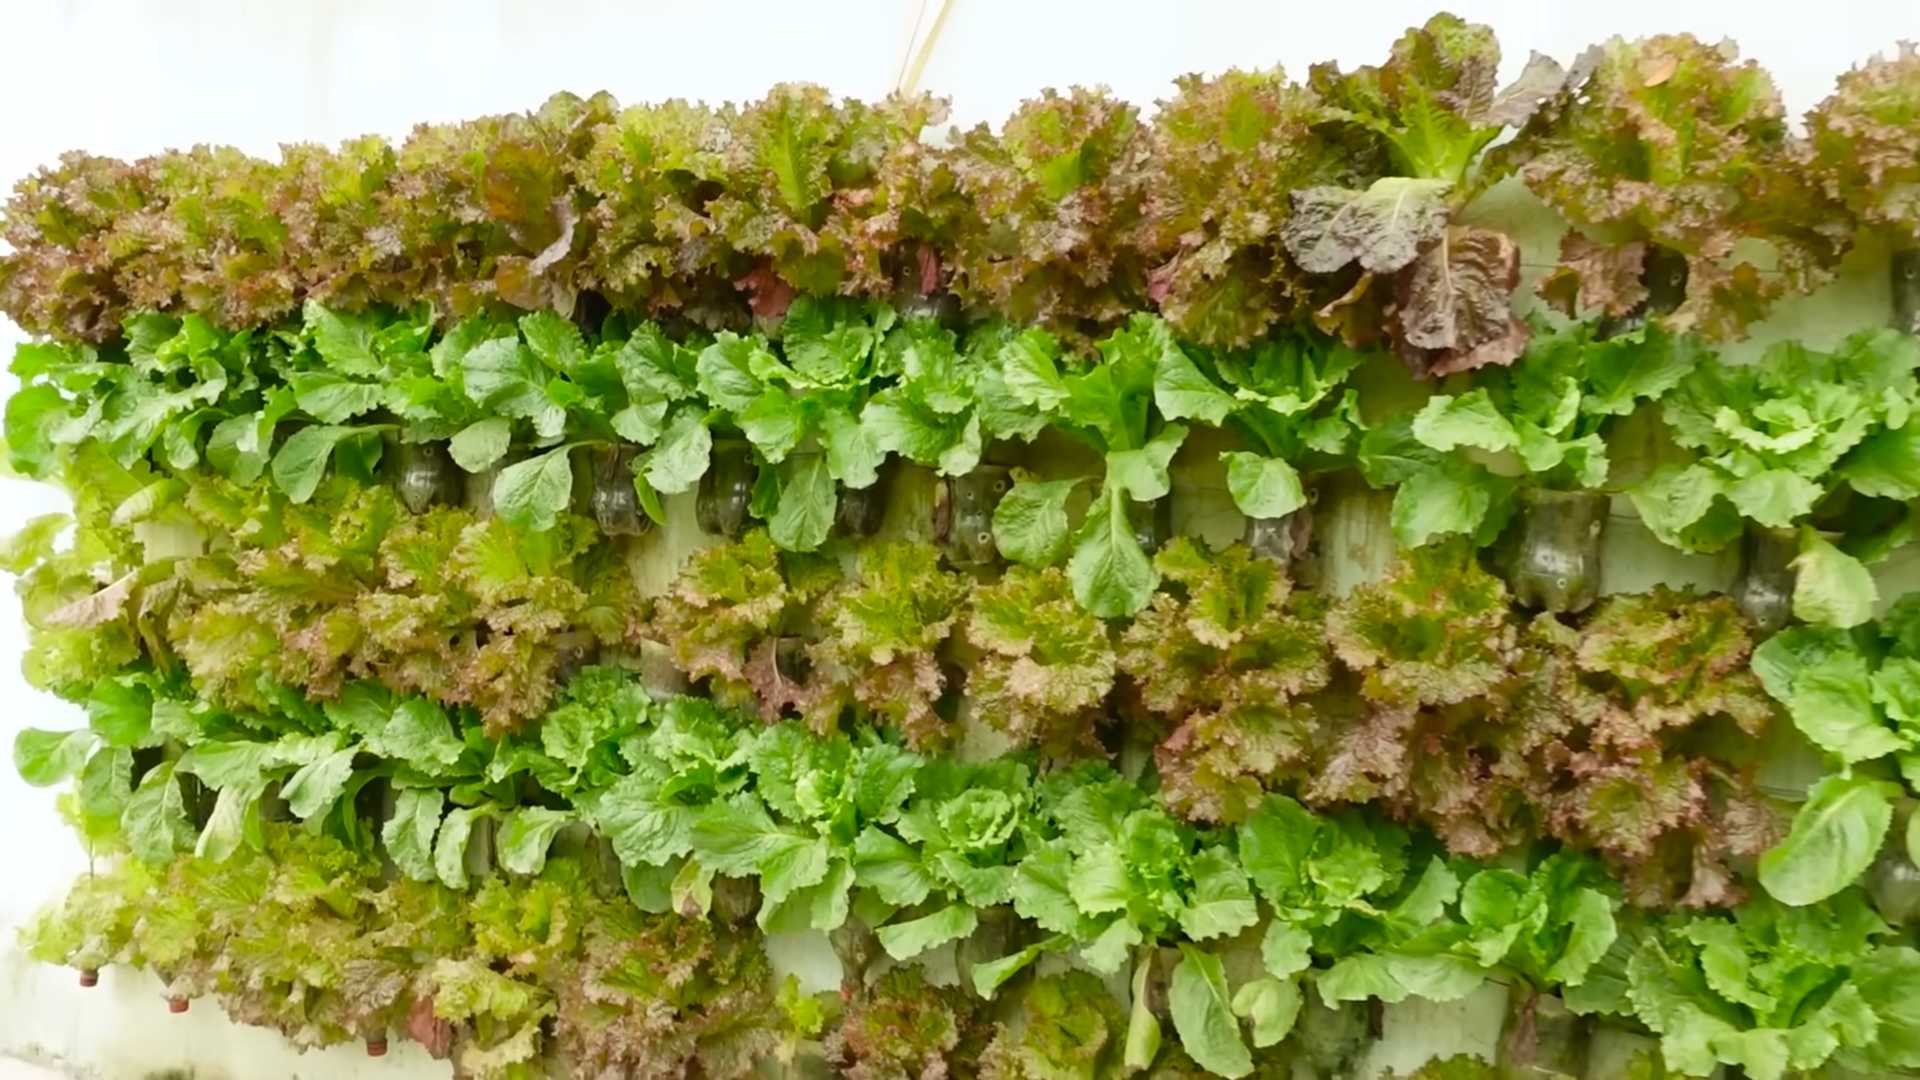
But the beauty of this project lies in its adaptability. Feel free to experiment with different materials. Instead of pallet wood, consider using reclaimed plastic bottles, stacked terracotta pots, or even repurposed shoe organizers. The possibilities are endless!
Think about the plants you want to grow. Succulents are fantastic for low-maintenance, drought-tolerant gardens. Herbs like basil, mint, and rosemary thrive in vertical setups and provide fresh ingredients for your culinary creations. For a splash of color, consider flowering plants like petunias, impatiens, or trailing begonias. Remember to choose plants that are well-suited to your local climate and the amount of sunlight your vertical garden will receive.
Consider adding a self-watering system to simplify maintenance. Drip irrigation kits are readily available and can be easily integrated into your vertical garden design. This is especially helpful if you travel frequently or simply want to reduce the amount of time you spend watering.
Don’t be afraid to get creative with the layout and design. Arrange your plants in patterns, create a living wall with varying textures and colors, or even incorporate decorative elements like pebbles, shells, or small figurines. Let your imagination run wild and create a vertical garden that truly reflects your personal style.
We strongly encourage you to give this vertical garden DIY project a try. It’s a fun, rewarding, and sustainable way to enhance your living space and connect with nature. And most importantly, we want to hear about your experience! Share your photos, tips, and challenges in the comments below. Let’s build a community of vertical gardeners and inspire each other to create beautiful, green spaces, one wall at a time. We are excited to see your unique creations and learn from your experiences. Happy gardening!
Frequently Asked Questions (FAQ)
What are the best plants to use in a vertical garden?
The best plants for your vertical garden depend on several factors, including your climate, the amount of sunlight your garden receives, and your personal preferences. However, some popular and reliable choices include:
* **Succulents:** These are drought-tolerant and require minimal maintenance, making them ideal for beginners. Varieties like sedum, echeveria, and sempervivum are excellent choices.
* **Herbs:** Many herbs, such as basil, mint, rosemary, thyme, and oregano, thrive in vertical gardens. They are easy to grow and provide fresh ingredients for cooking.
* **Lettuce and Salad Greens:** These can be grown in vertical gardens, providing a fresh supply of salad ingredients.
* **Strawberries:** These can be grown in vertical gardens, providing a fresh supply of fruits.
* **Flowering Plants:** Petunias, impatiens, begonias, and trailing geraniums add a splash of color and are well-suited to vertical setups.
* **Ferns:** These add a lush, green texture to your vertical garden and thrive in shady locations.
* **Air Plants (Tillandsia):** These require no soil and can be easily attached to vertical structures, adding a unique and low-maintenance element.
Remember to research the specific needs of each plant before incorporating it into your vertical garden.
How often should I water my vertical garden?
The watering frequency depends on several factors, including the type of plants, the climate, and the material used for your vertical garden. Generally, you should water your vertical garden when the top inch of soil feels dry to the touch. Succulents require less frequent watering than leafy greens or flowering plants. During hot, dry weather, you may need to water more frequently. Consider using a moisture meter to accurately assess the soil moisture levels. A self-watering system can also help to regulate watering and prevent over or under-watering.
What type of soil should I use for my vertical garden?
Use a well-draining potting mix specifically formulated for container gardening. Avoid using garden soil, as it can become compacted and impede drainage. A good potting mix will retain moisture while allowing excess water to drain away, preventing root rot. You can also amend your potting mix with perlite or vermiculite to improve drainage and aeration.
How much sunlight does my vertical garden need?
The amount of sunlight your vertical garden needs depends on the type of plants you are growing. Most flowering plants and herbs require at least six hours of direct sunlight per day. Leafy greens and ferns can tolerate partial shade. Research the specific sunlight requirements of each plant before placing it in your vertical garden. If your vertical garden is located indoors, you may need to supplement natural light with grow lights.
How do I fertilize my vertical garden?
Regular fertilization is essential for maintaining healthy plant growth in your vertical garden. Use a balanced liquid fertilizer diluted to half strength and apply it every two to four weeks during the growing season. Follow the instructions on the fertilizer label. You can also use slow-release fertilizer granules mixed into the potting mix at planting time. Avoid over-fertilizing, as this can damage your plants.
How do I prevent pests and diseases in my vertical garden?
Regularly inspect your plants for signs of pests or diseases. Common pests that may affect vertical gardens include aphids, spider mites, and whiteflies. Treat infestations promptly with insecticidal soap or neem oil. Ensure good air circulation to prevent fungal diseases. Remove any dead or diseased leaves to prevent the spread of infection.
Can I move my vertical garden?
The ability to move your vertical garden depends on its size and construction. Smaller, lightweight vertical gardens can be easily moved. Larger, heavier vertical gardens may be more difficult to move. Consider the weight and stability of your vertical garden before attempting to move it. If necessary, enlist the help of others to safely move your vertical garden.
How do I winterize my vertical garden?
If you live in a climate with cold winters, you will need to take steps to protect your vertical garden from frost and freezing temperatures. Move your vertical garden indoors if possible. If you cannot move it indoors, wrap it in burlap or horticultural fleece to provide insulation. Water less frequently during the winter months. Prune back any dead or damaged growth.
What if I don’t have a green thumb? Can I still do this?
Absolutely! This vertical garden DIY is designed to be beginner-friendly. Start with easy-to-grow plants like succulents or herbs. Don’t be afraid to experiment and learn as you go. There are plenty of resources available online and in your local library to help you succeed. The most important thing is to have fun and enjoy the process. Even if you make mistakes, you’ll learn from them and become a better gardener. Remember, even experienced gardeners face challenges, so don’t be discouraged if things don’t go perfectly at first.


Leave a Comment